
Real Deal Steel NMCA ’69 Camaro RS/SS Quick Build
Oct 15th 2025
Real Deal Steel began U.S. assembly of the GM-licensed 1967-1969 Camaro coupes in 2013 after introducing them at the SEMA show in Las Vegas that same year. More than 40 coupe bodies were assembled and shipped prior to the start of the RDS/NMCA project.
Construction of the RDS/NMCA ’69 began in mid-August 2015. This car will be awarded to a lucky racer participating in the Chevrolet Performance Challenge Series for 2016 www.nmcadigital.com
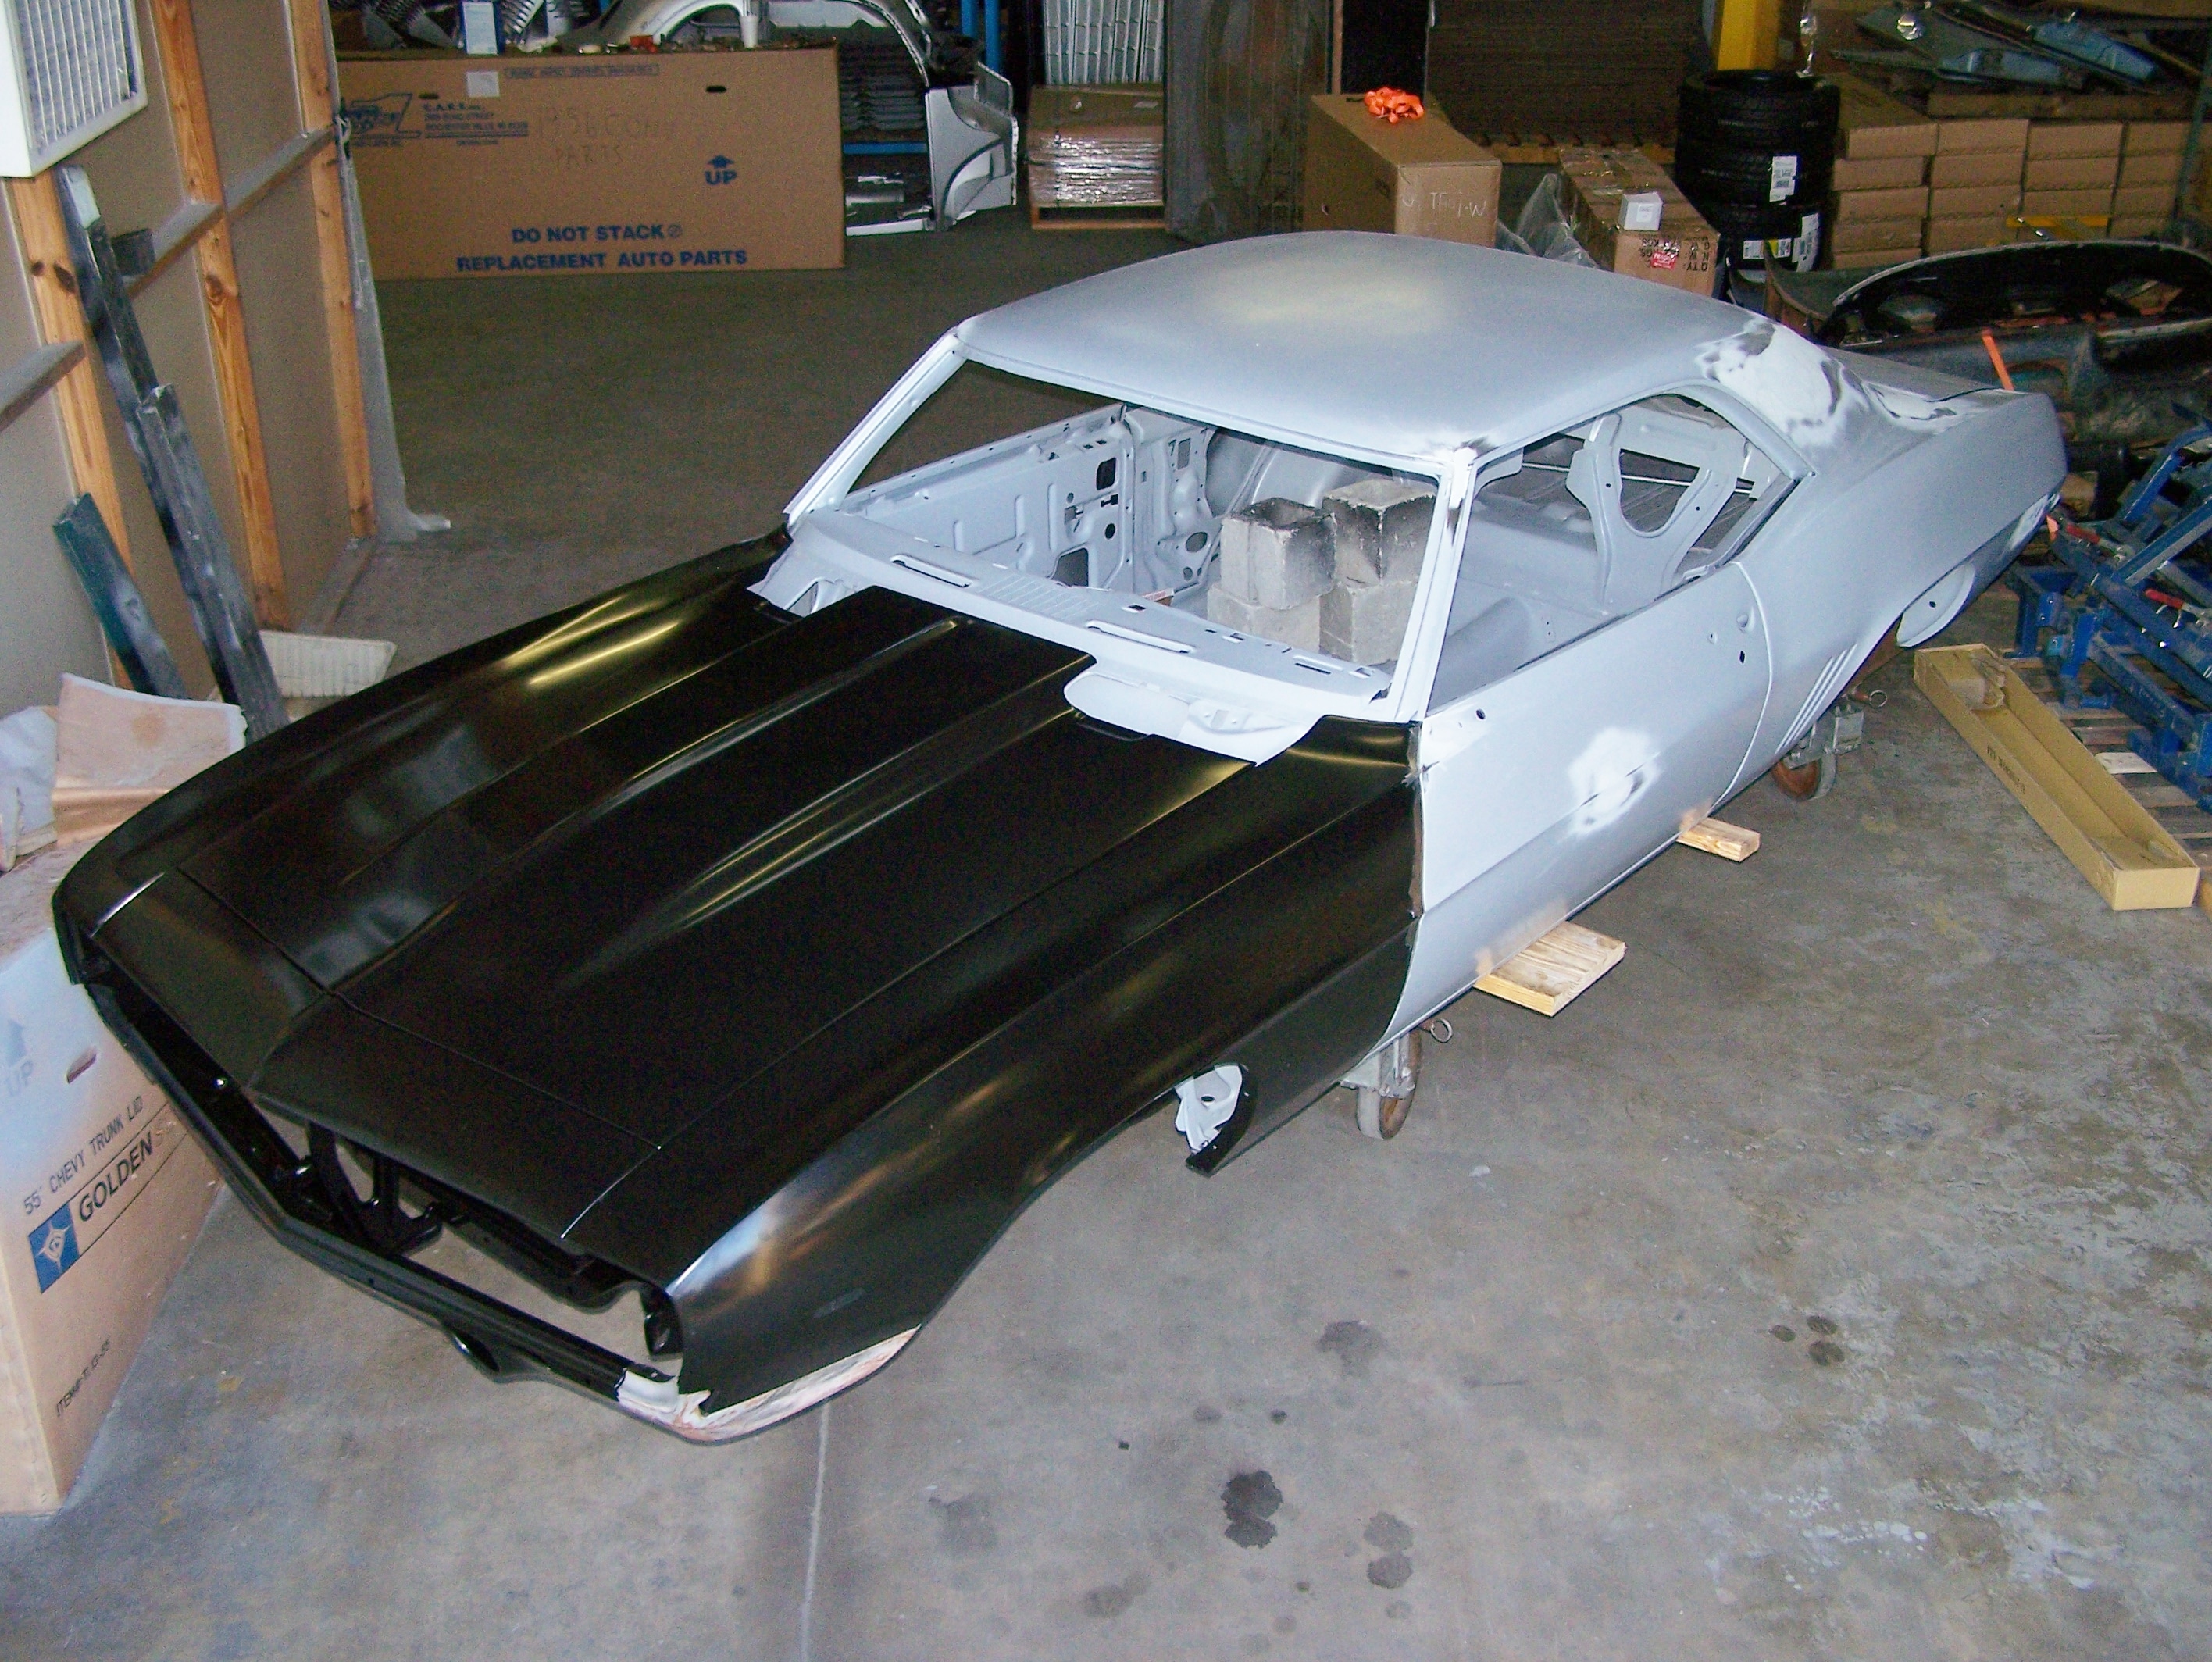
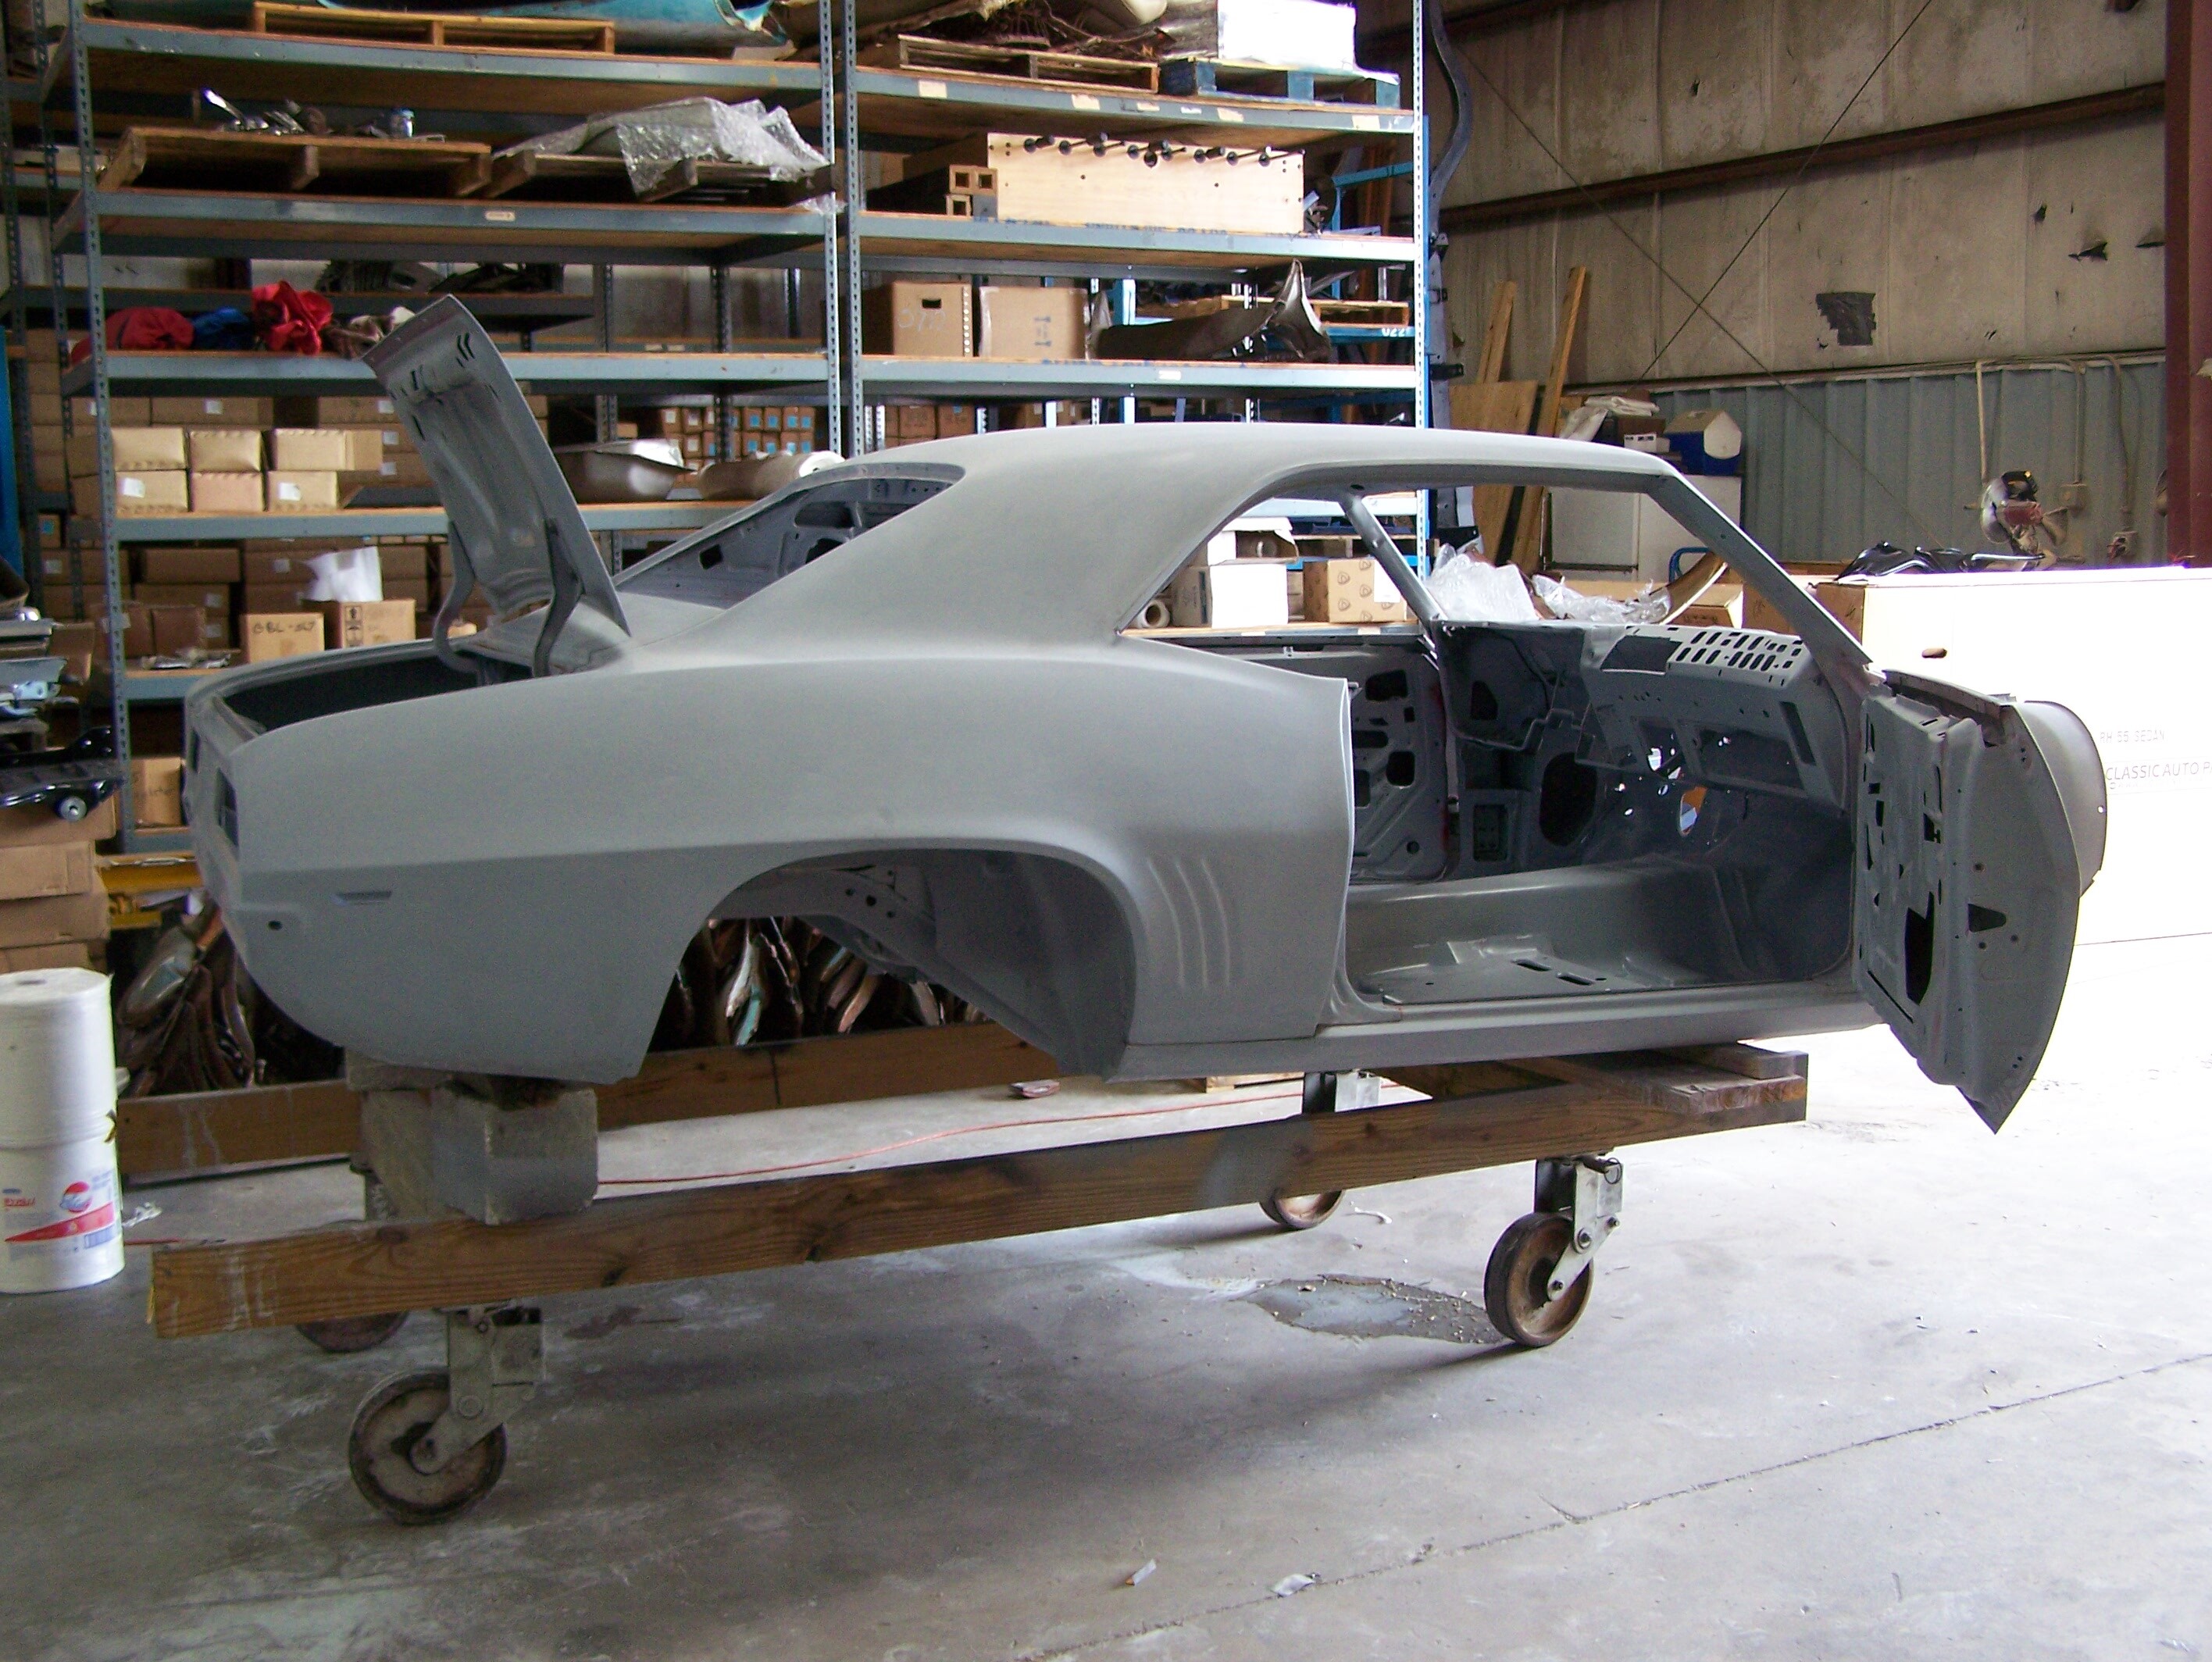
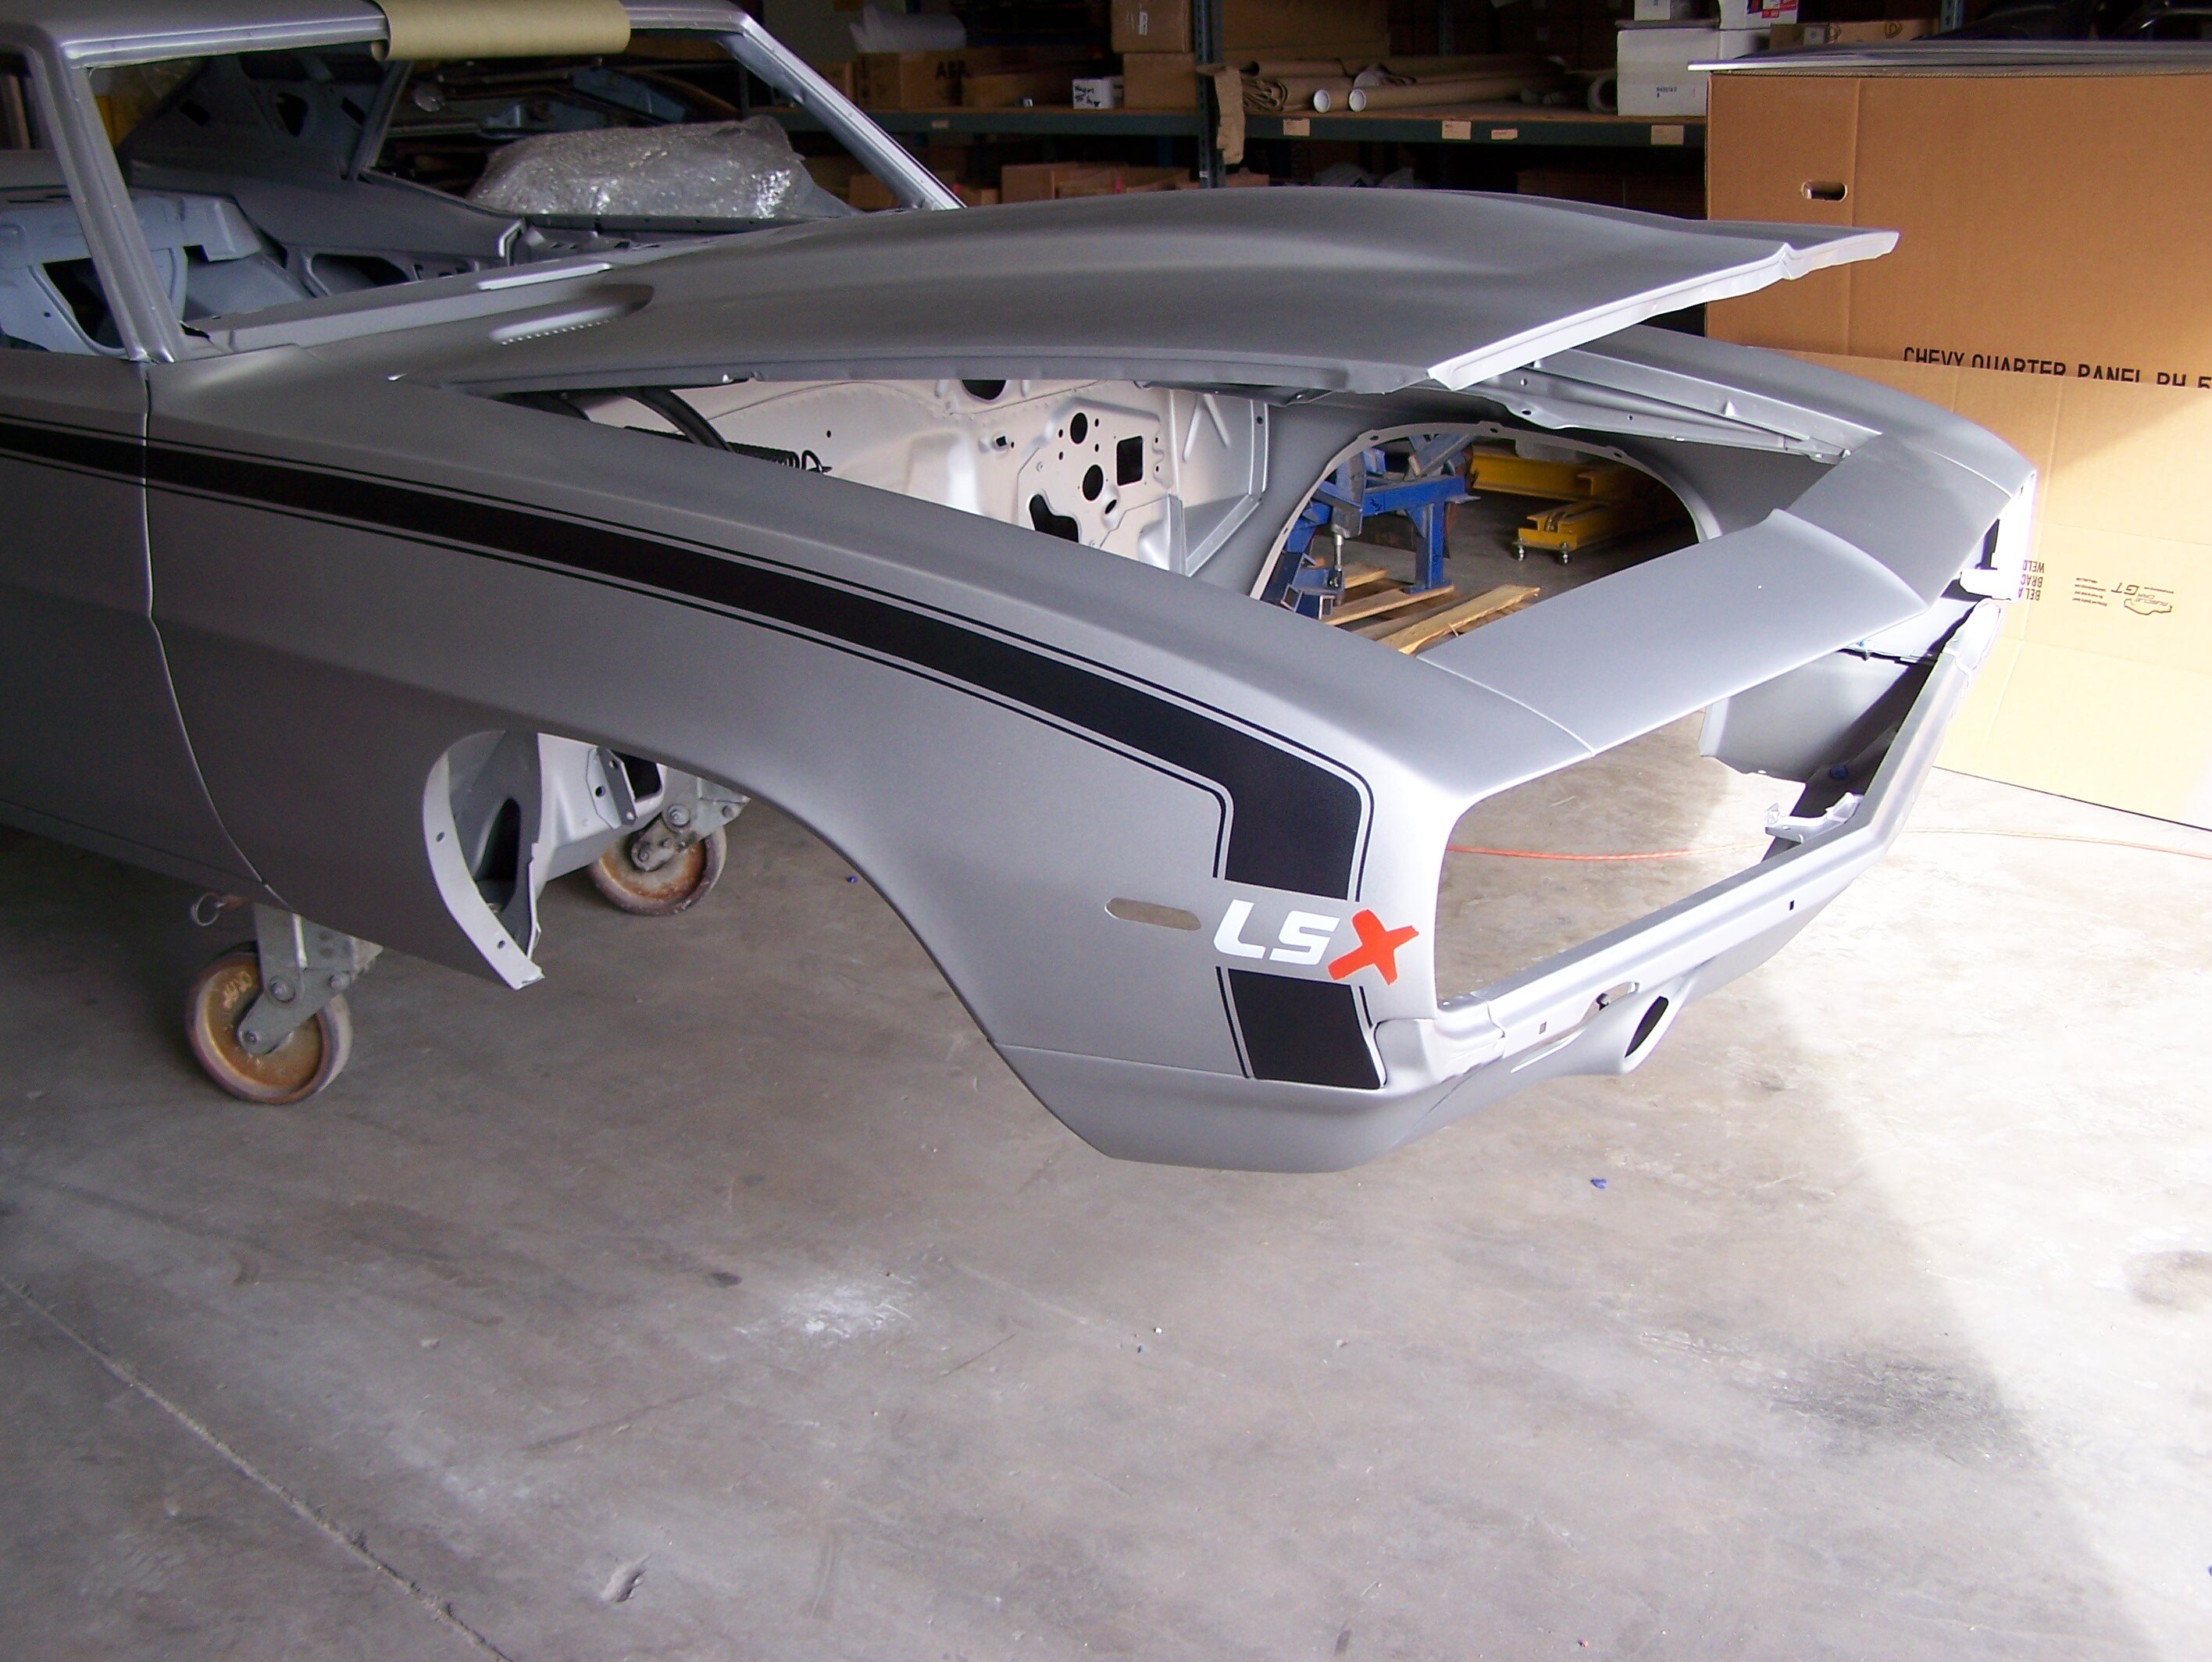
The full floor and trunk pan were assembled first -- upside down -- on the special floor fixture. Once spot welding of the floor assembly was completed, it was placed on the RDS platform/rotisserie and all internal fixtures were bolted in place. These fixtures ensure that all of the remaining structural components are assembled in the correct locations for each and every build. This particular body was built with the smooth heater delete firewall, wider wheel tub (allows up to 335mm of rear rubber) and RS options. All of the exterior panels on all RDS 67-69 Camaro coupes come from Auto Metal Direct (AMD). www.autometaldirect.com
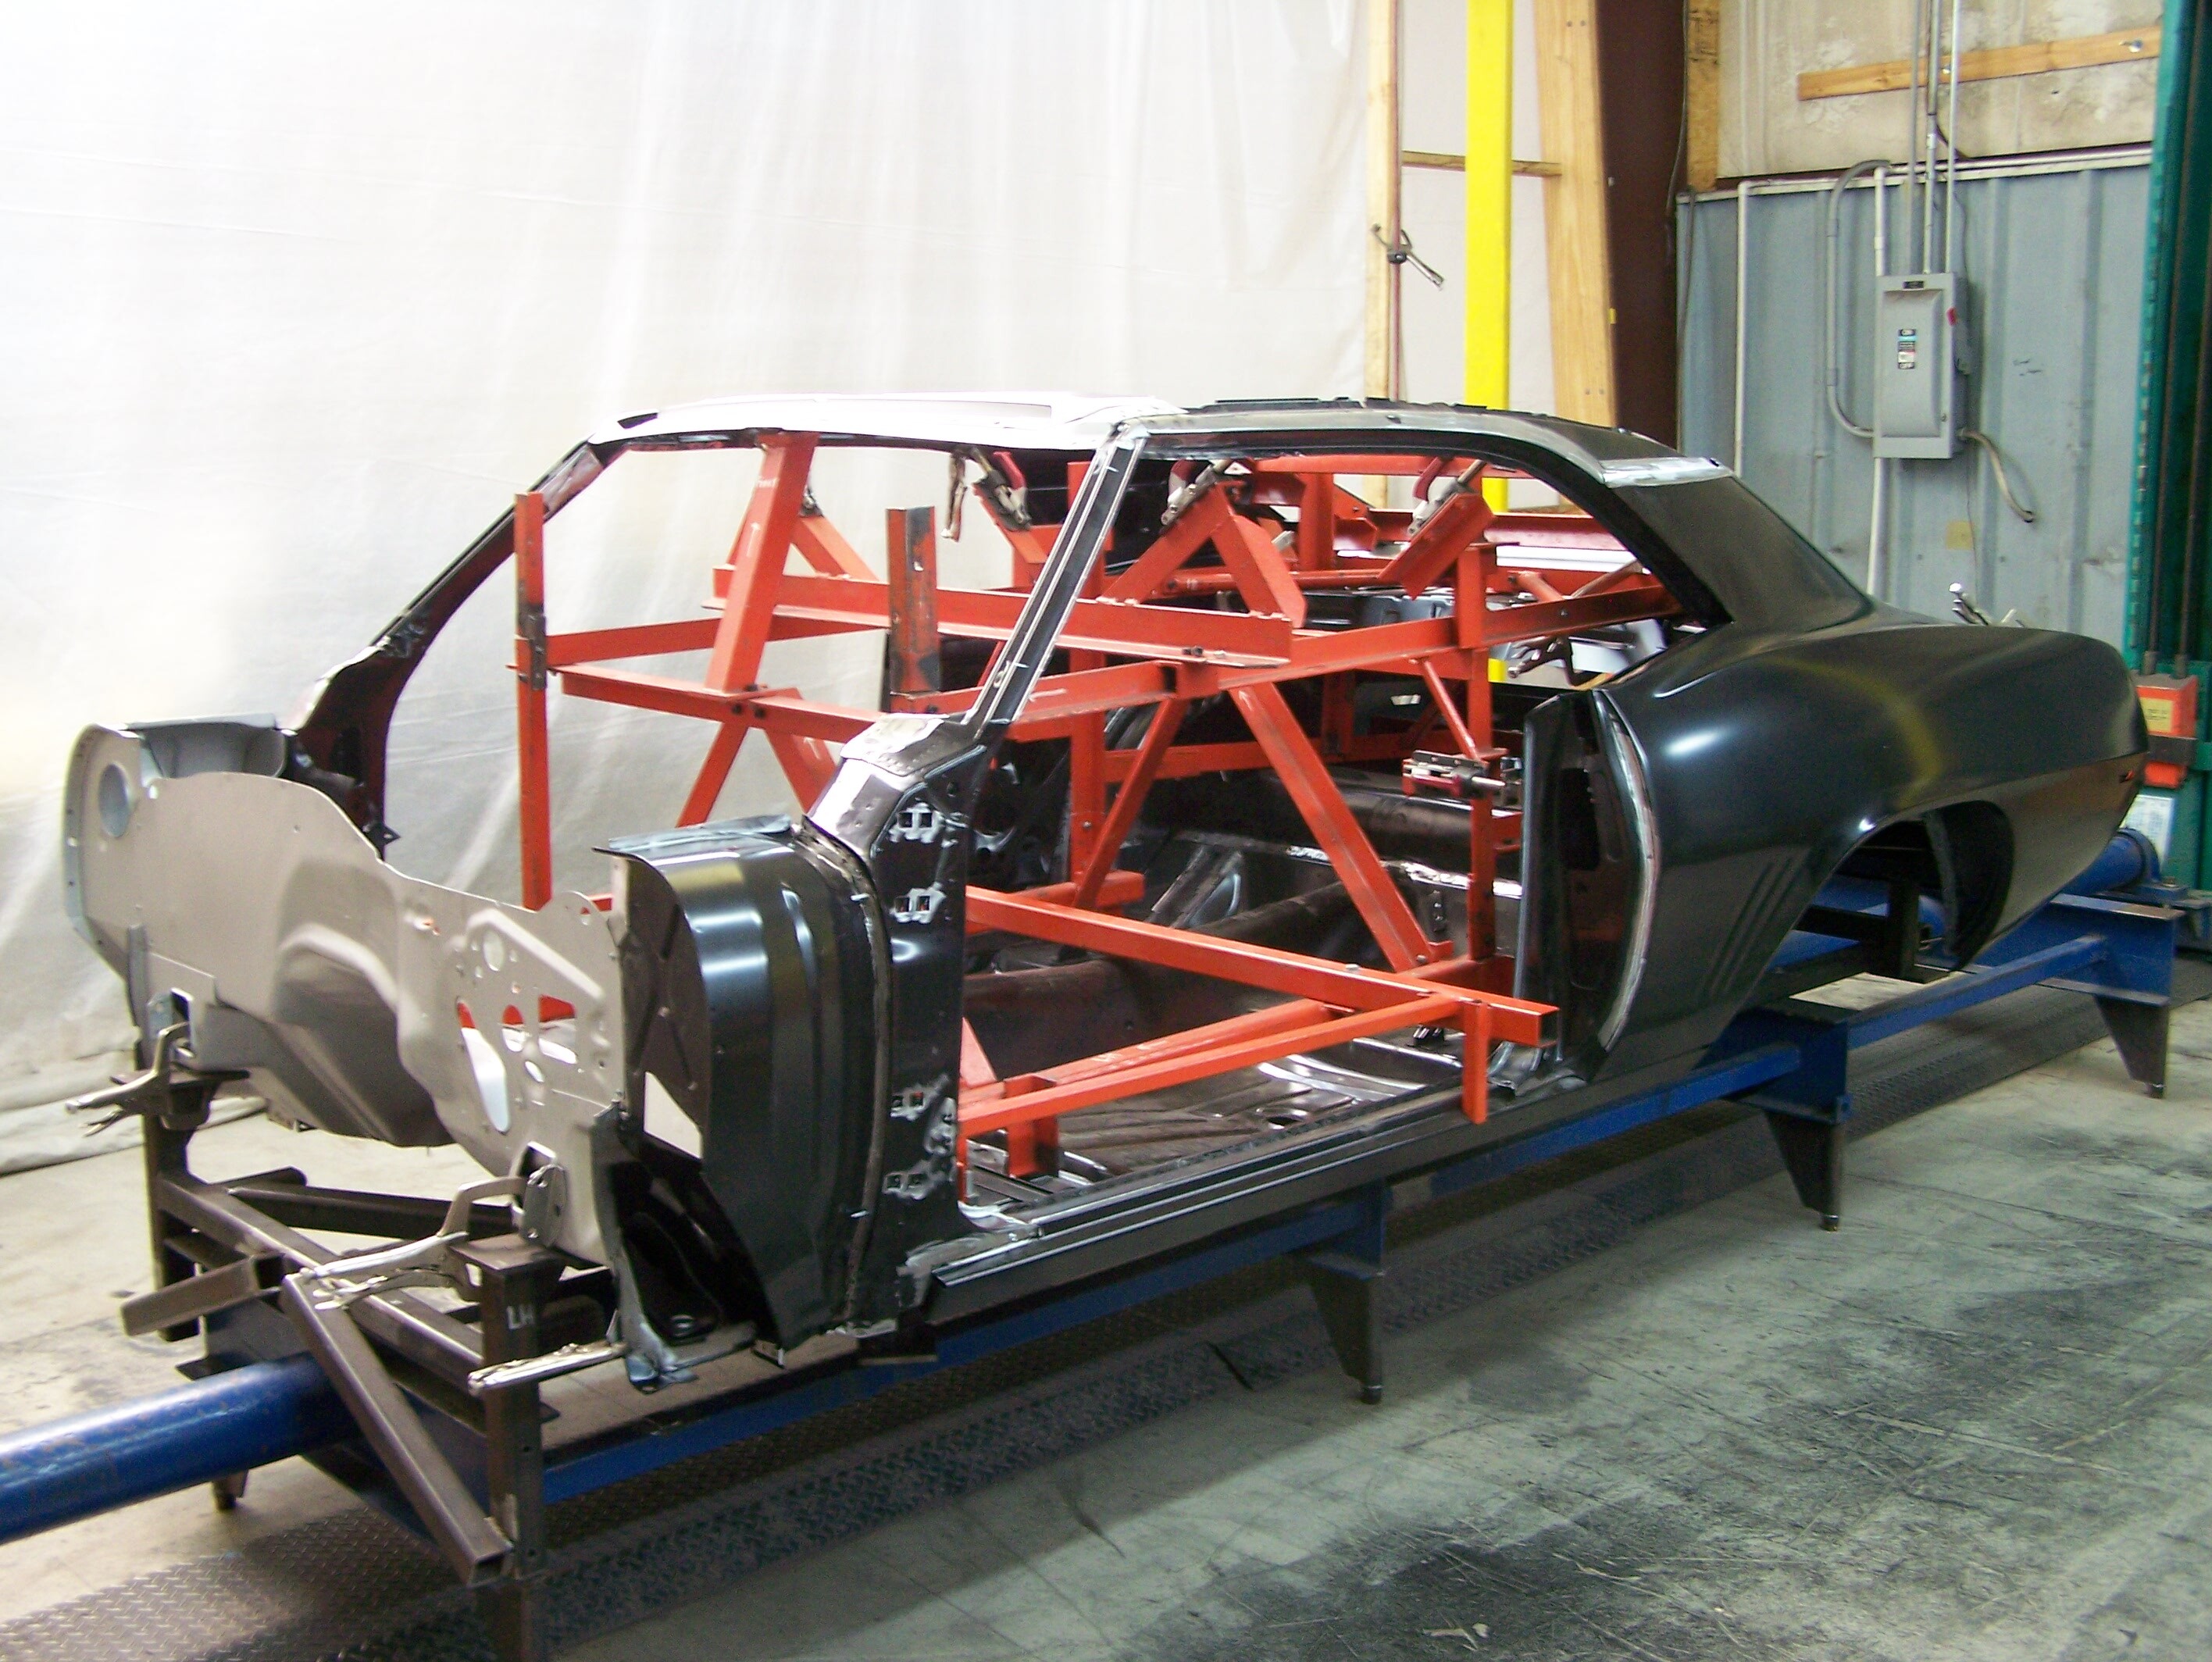

Once the body assembly was completed, it was sent to All-Bare Media Blasting in central Florida for crushed-glass bottle blasting to bare metal and a 2K Urethane etch epoxy primer. RDS offers this as an option for all of its new steel bodies. The crushed-bottle blast process removes all factory coatings to bare steel and gives the new steel just the right amount of “tooth” for best adhesion of the epoxy primer. The primer etches the steel when applied and provides the best possible surface over which to apply body filler and primers. www.allbare.com
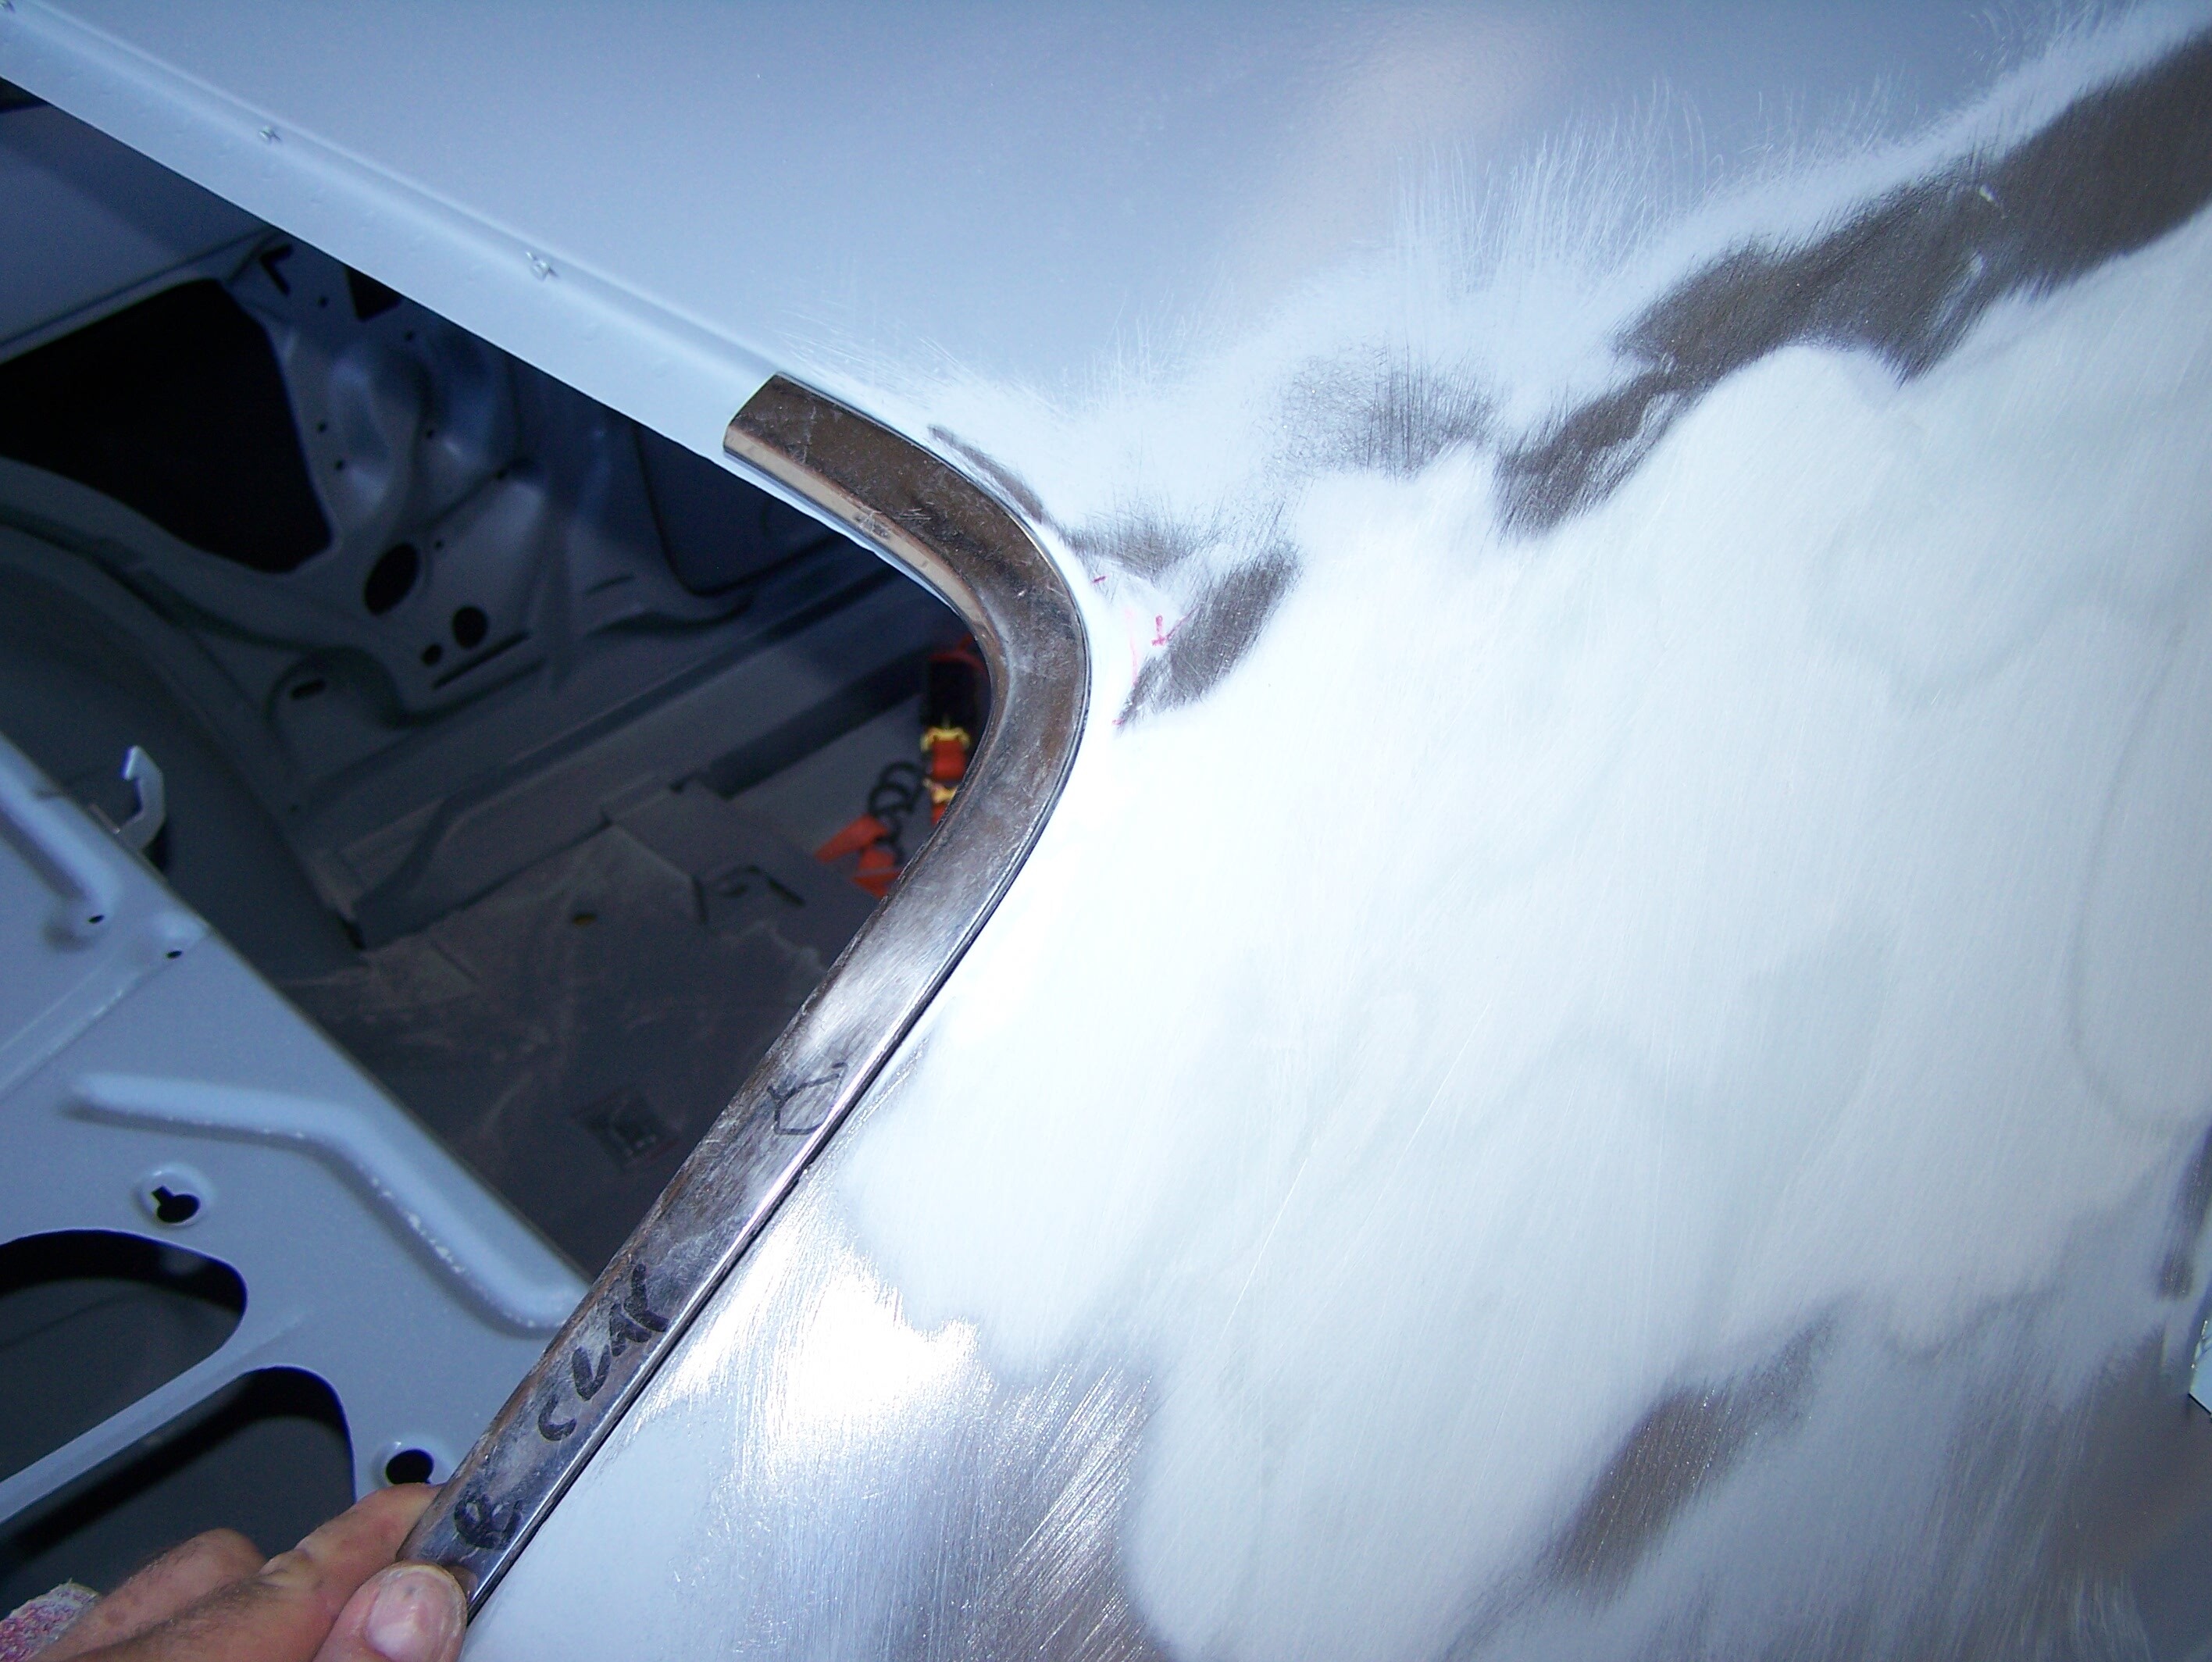
RDS does not apply any fillers or coatings to new bodies. Factory seams that were originally leaded when the bodies were originally produced new by GM must be filled and smoothed by the end user. Modern fillers are so superior to lead that RDS recommends using a heavy-bodied waterproof filler like SEM Carbo Fill or USC Duraglas when filling original lap welds or deep cavities. Before applying filler, the epoxy primer should be scuffed with 40-grit dry sandpaper in the area to be filled. Apply the waterproof filler, block sand with 40-grit until smooth and feathered. Then apply high-quality lightweight body filler and block sand. The lightweight filler sands and feathers far better than the heavy-bodied filler – so always use lightweight filler on top of the heavy-bodied filler. Repeat until all imperfections are gone and final block sand with 80 grit and 120 grit dry sandpaper.
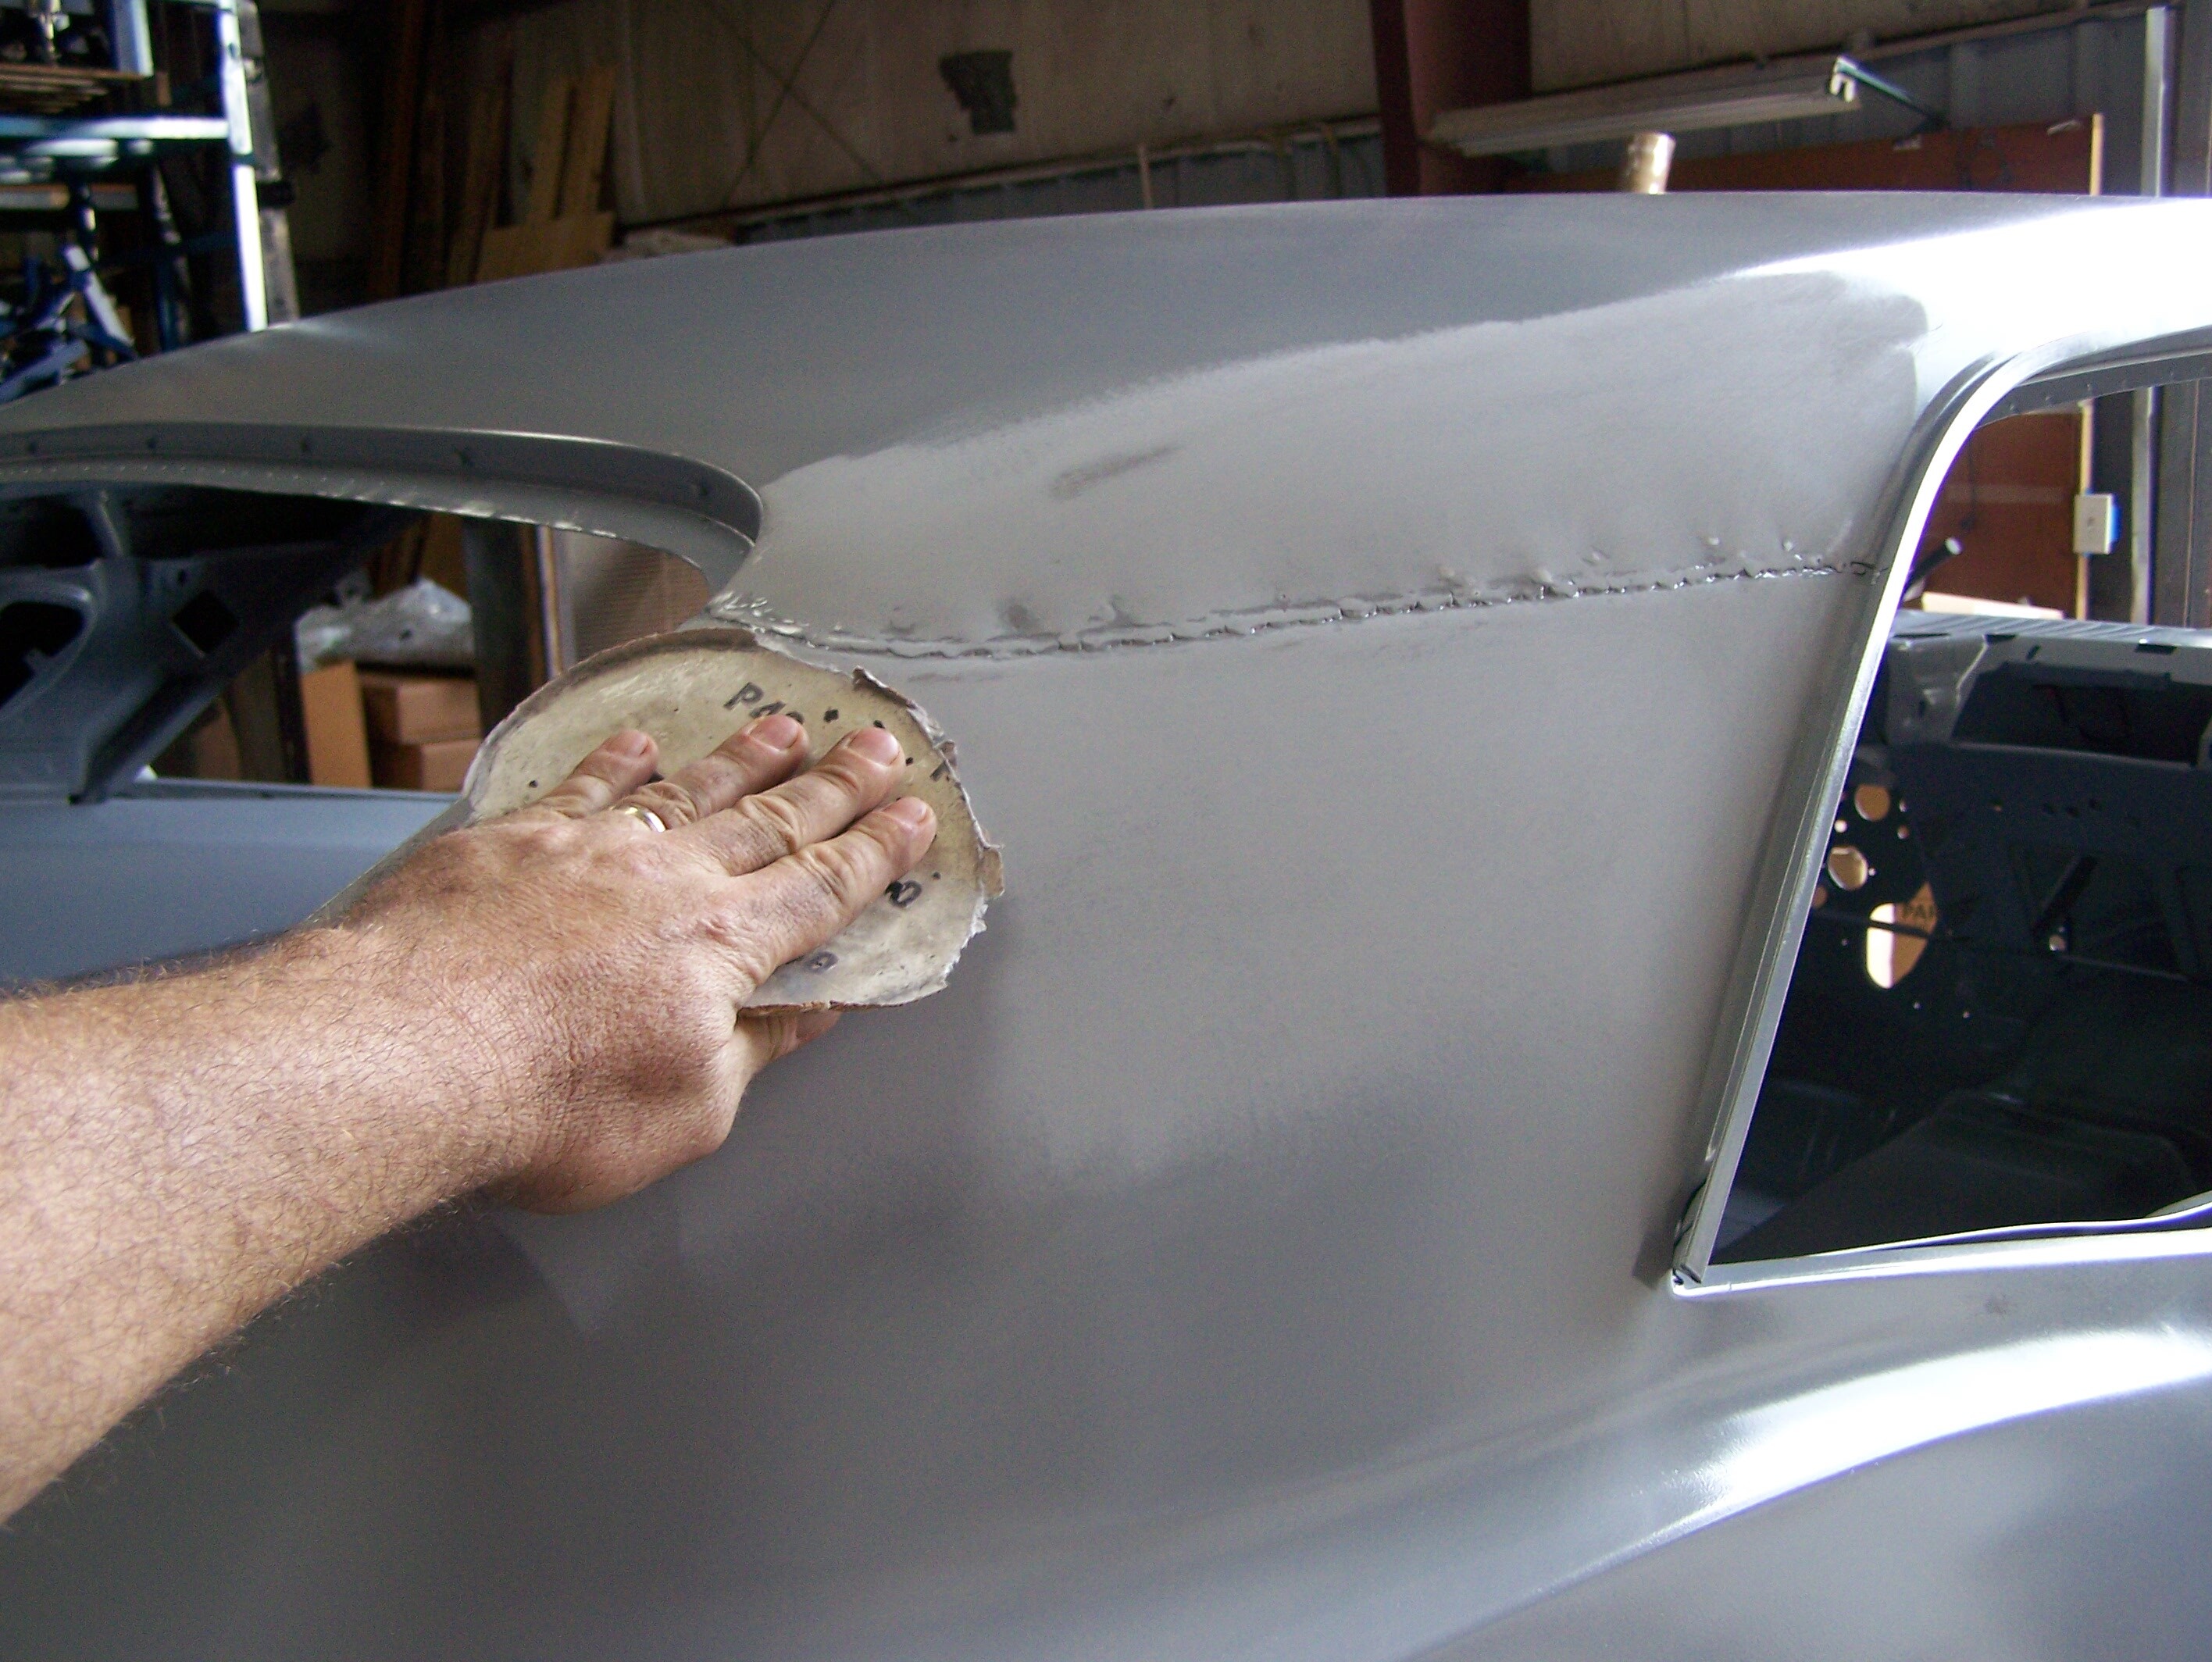
Other factory weld joints like the A-pillar to top skin should receive the same treatment.
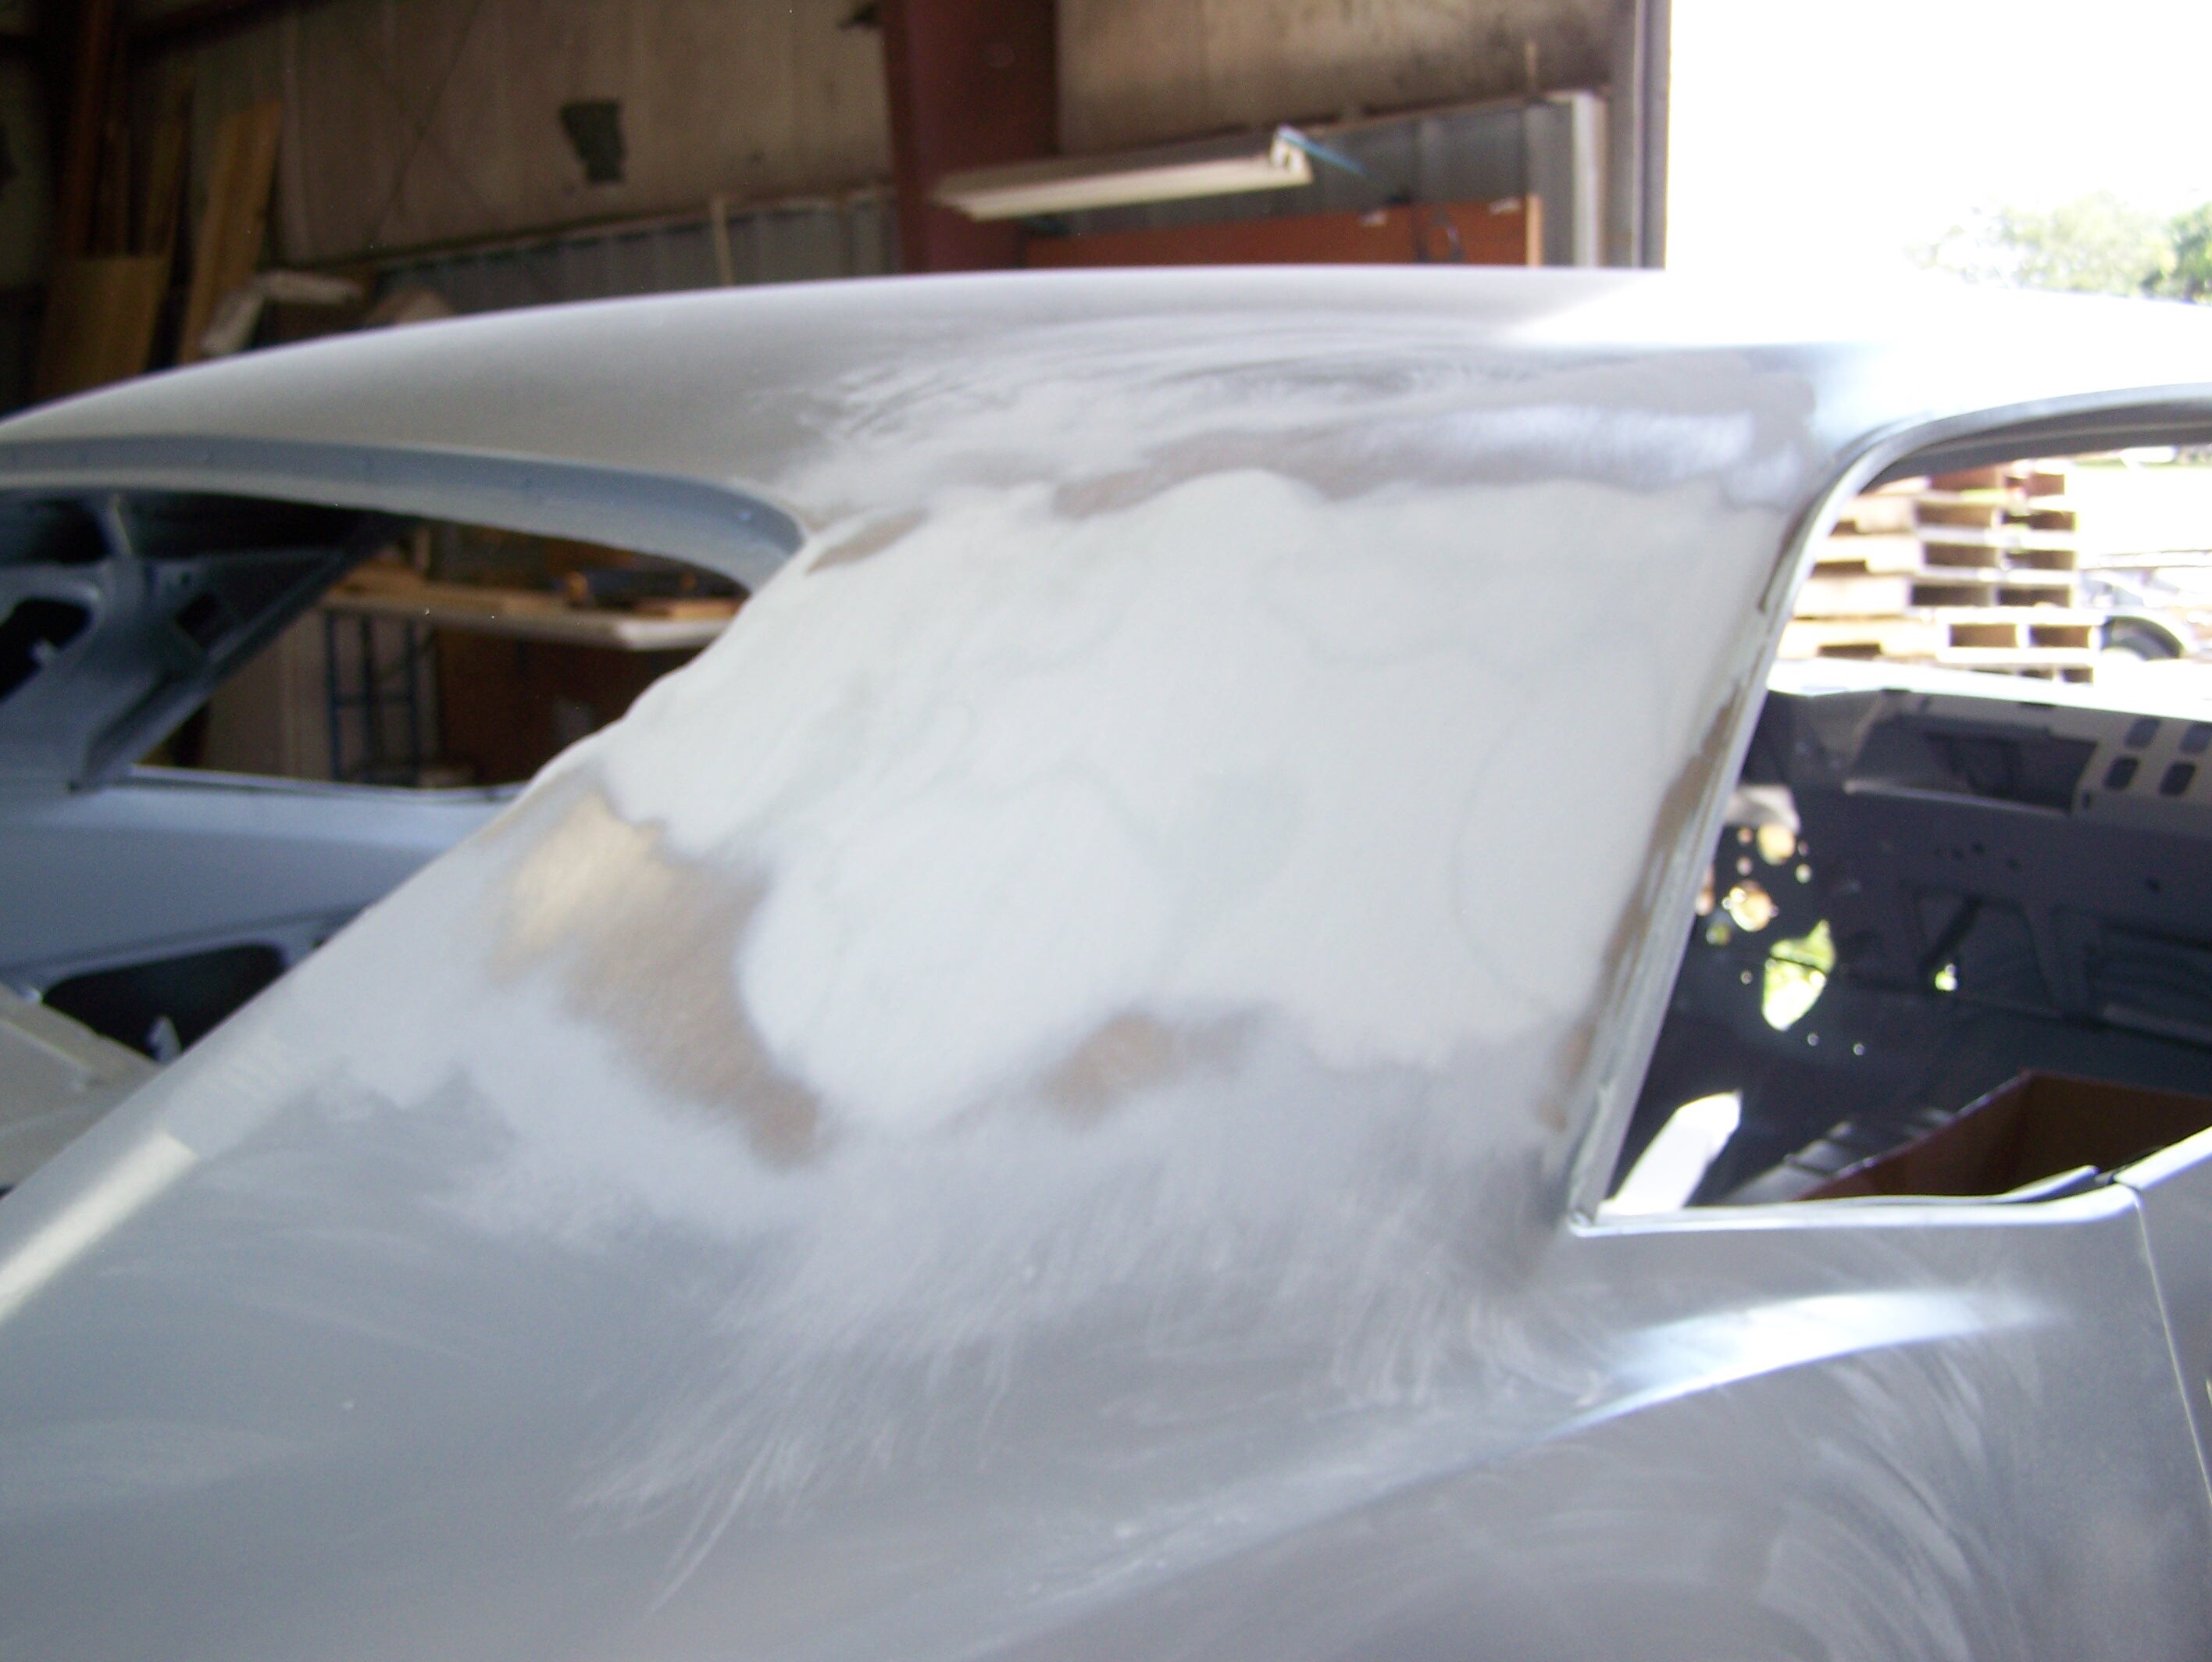
RDS delivers new bodies with door and trunk gaps fitted so the end user should have to do a minimum amount of “moving metal around”. To achieve these gaps, RDS often must cut/hammer and mig-weld the new panels into shape. RDS metal finishes these areas so a thin skim of filler can be applied to make the areas perfect. One area often metal-worked are the tops of the new quarters near the deck lid opening. We applied lightweight body filler, block sanded and feathered to areas previously metal-worked to achieve the final trunk gaps.
Our new body had picked up a ding or two from sitting around the shop so these areas were metal-worked and filled where needed.
Before finish primer coats are applied, items like glass opening trim, bolt-on spoilers, etc., should all be test fitted so corrections can be made before paint. The new bodies are good, but all major body parts should still be test-fitted before final bodywork and paint so any corrections can be made.
The front end sheet metal (whether reproduction or original) should always be fully fitted before any painting is done. This will help save much heartache later when you find out that the fenders and hood do not fit the body properly!
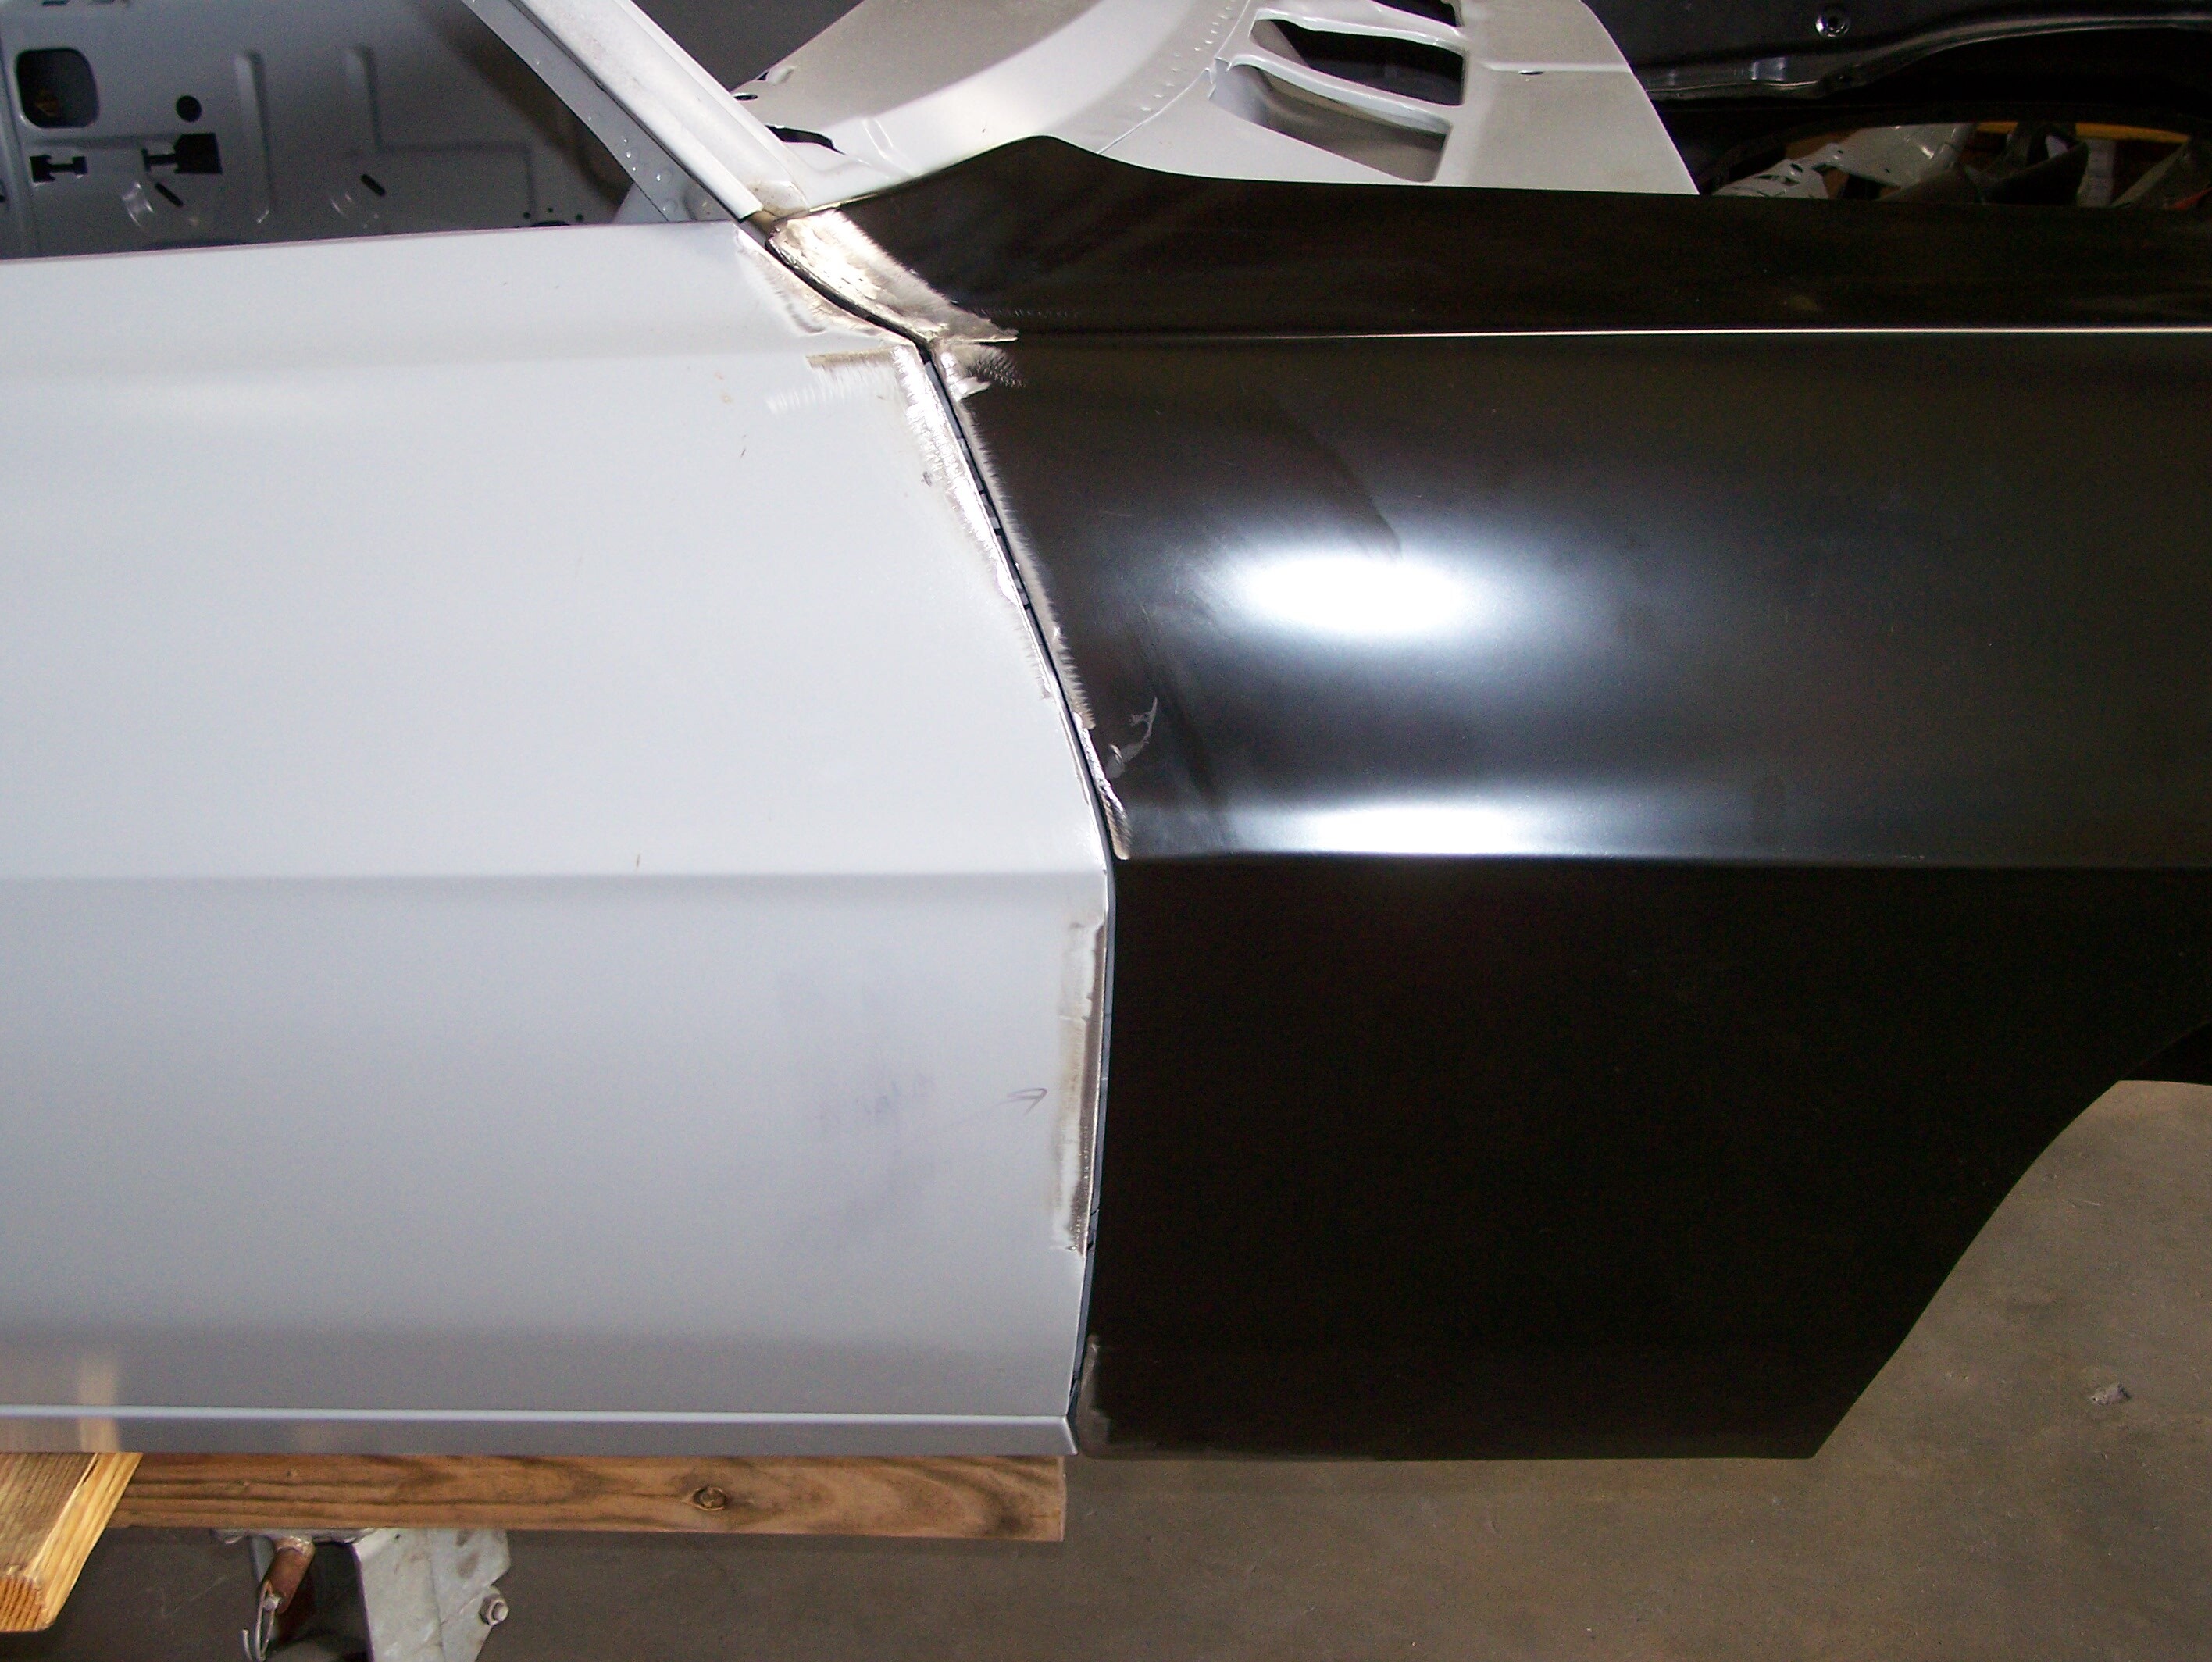
The first-generation Camaros are notorious for poor fender, hood and door fitment. The front frame clip and core support were installed to allow front sheet metal fitment. We discovered extensive fitment issues between the rear edges of both new front fenders and the front edges of the doors and rockers on the new body. On the left front fender, we discovered the fender bulged “out” at the door line. We reduced this bulge by re-shaping the edge with our rubber mallet. The top edge of the fender also “laid down” relative to the cowl top and the upper door edge so we tapped and pried on this area of the fender until we were happy with the fit.
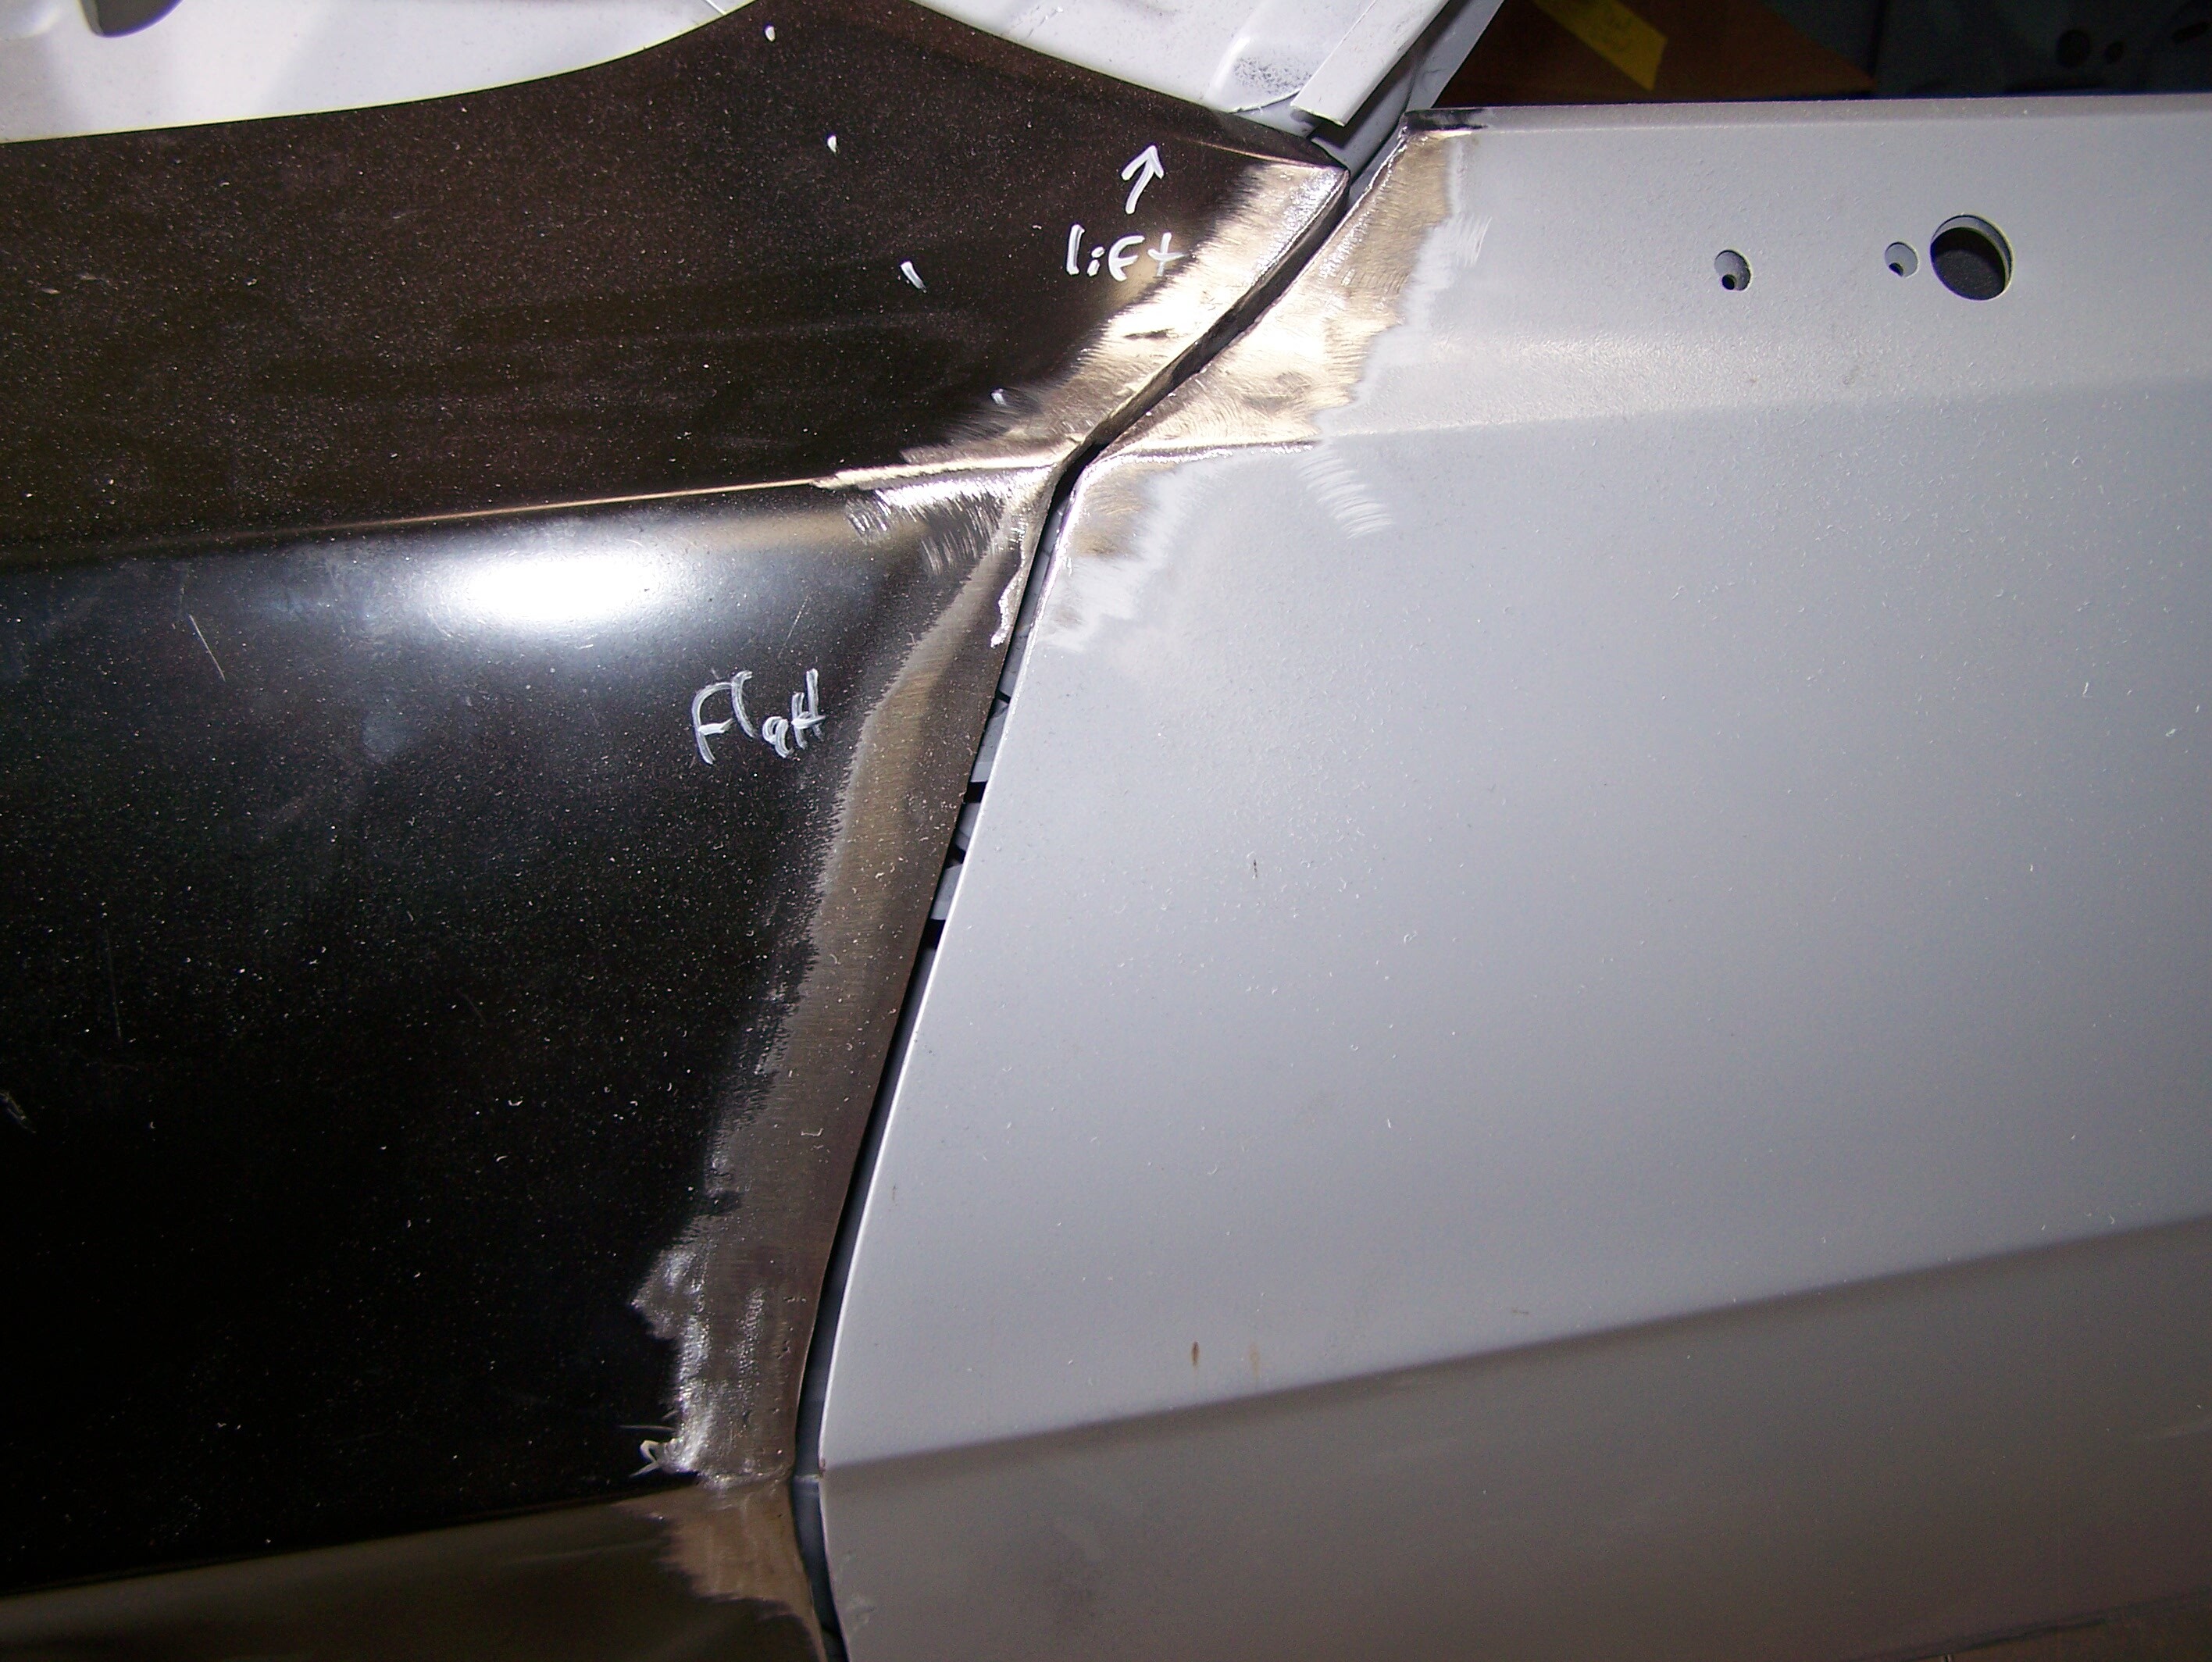
The gap between the top of the door and the fender on the left side was still poor, so both the door and fender were cut, reshaped and welded to achieve a better fit.
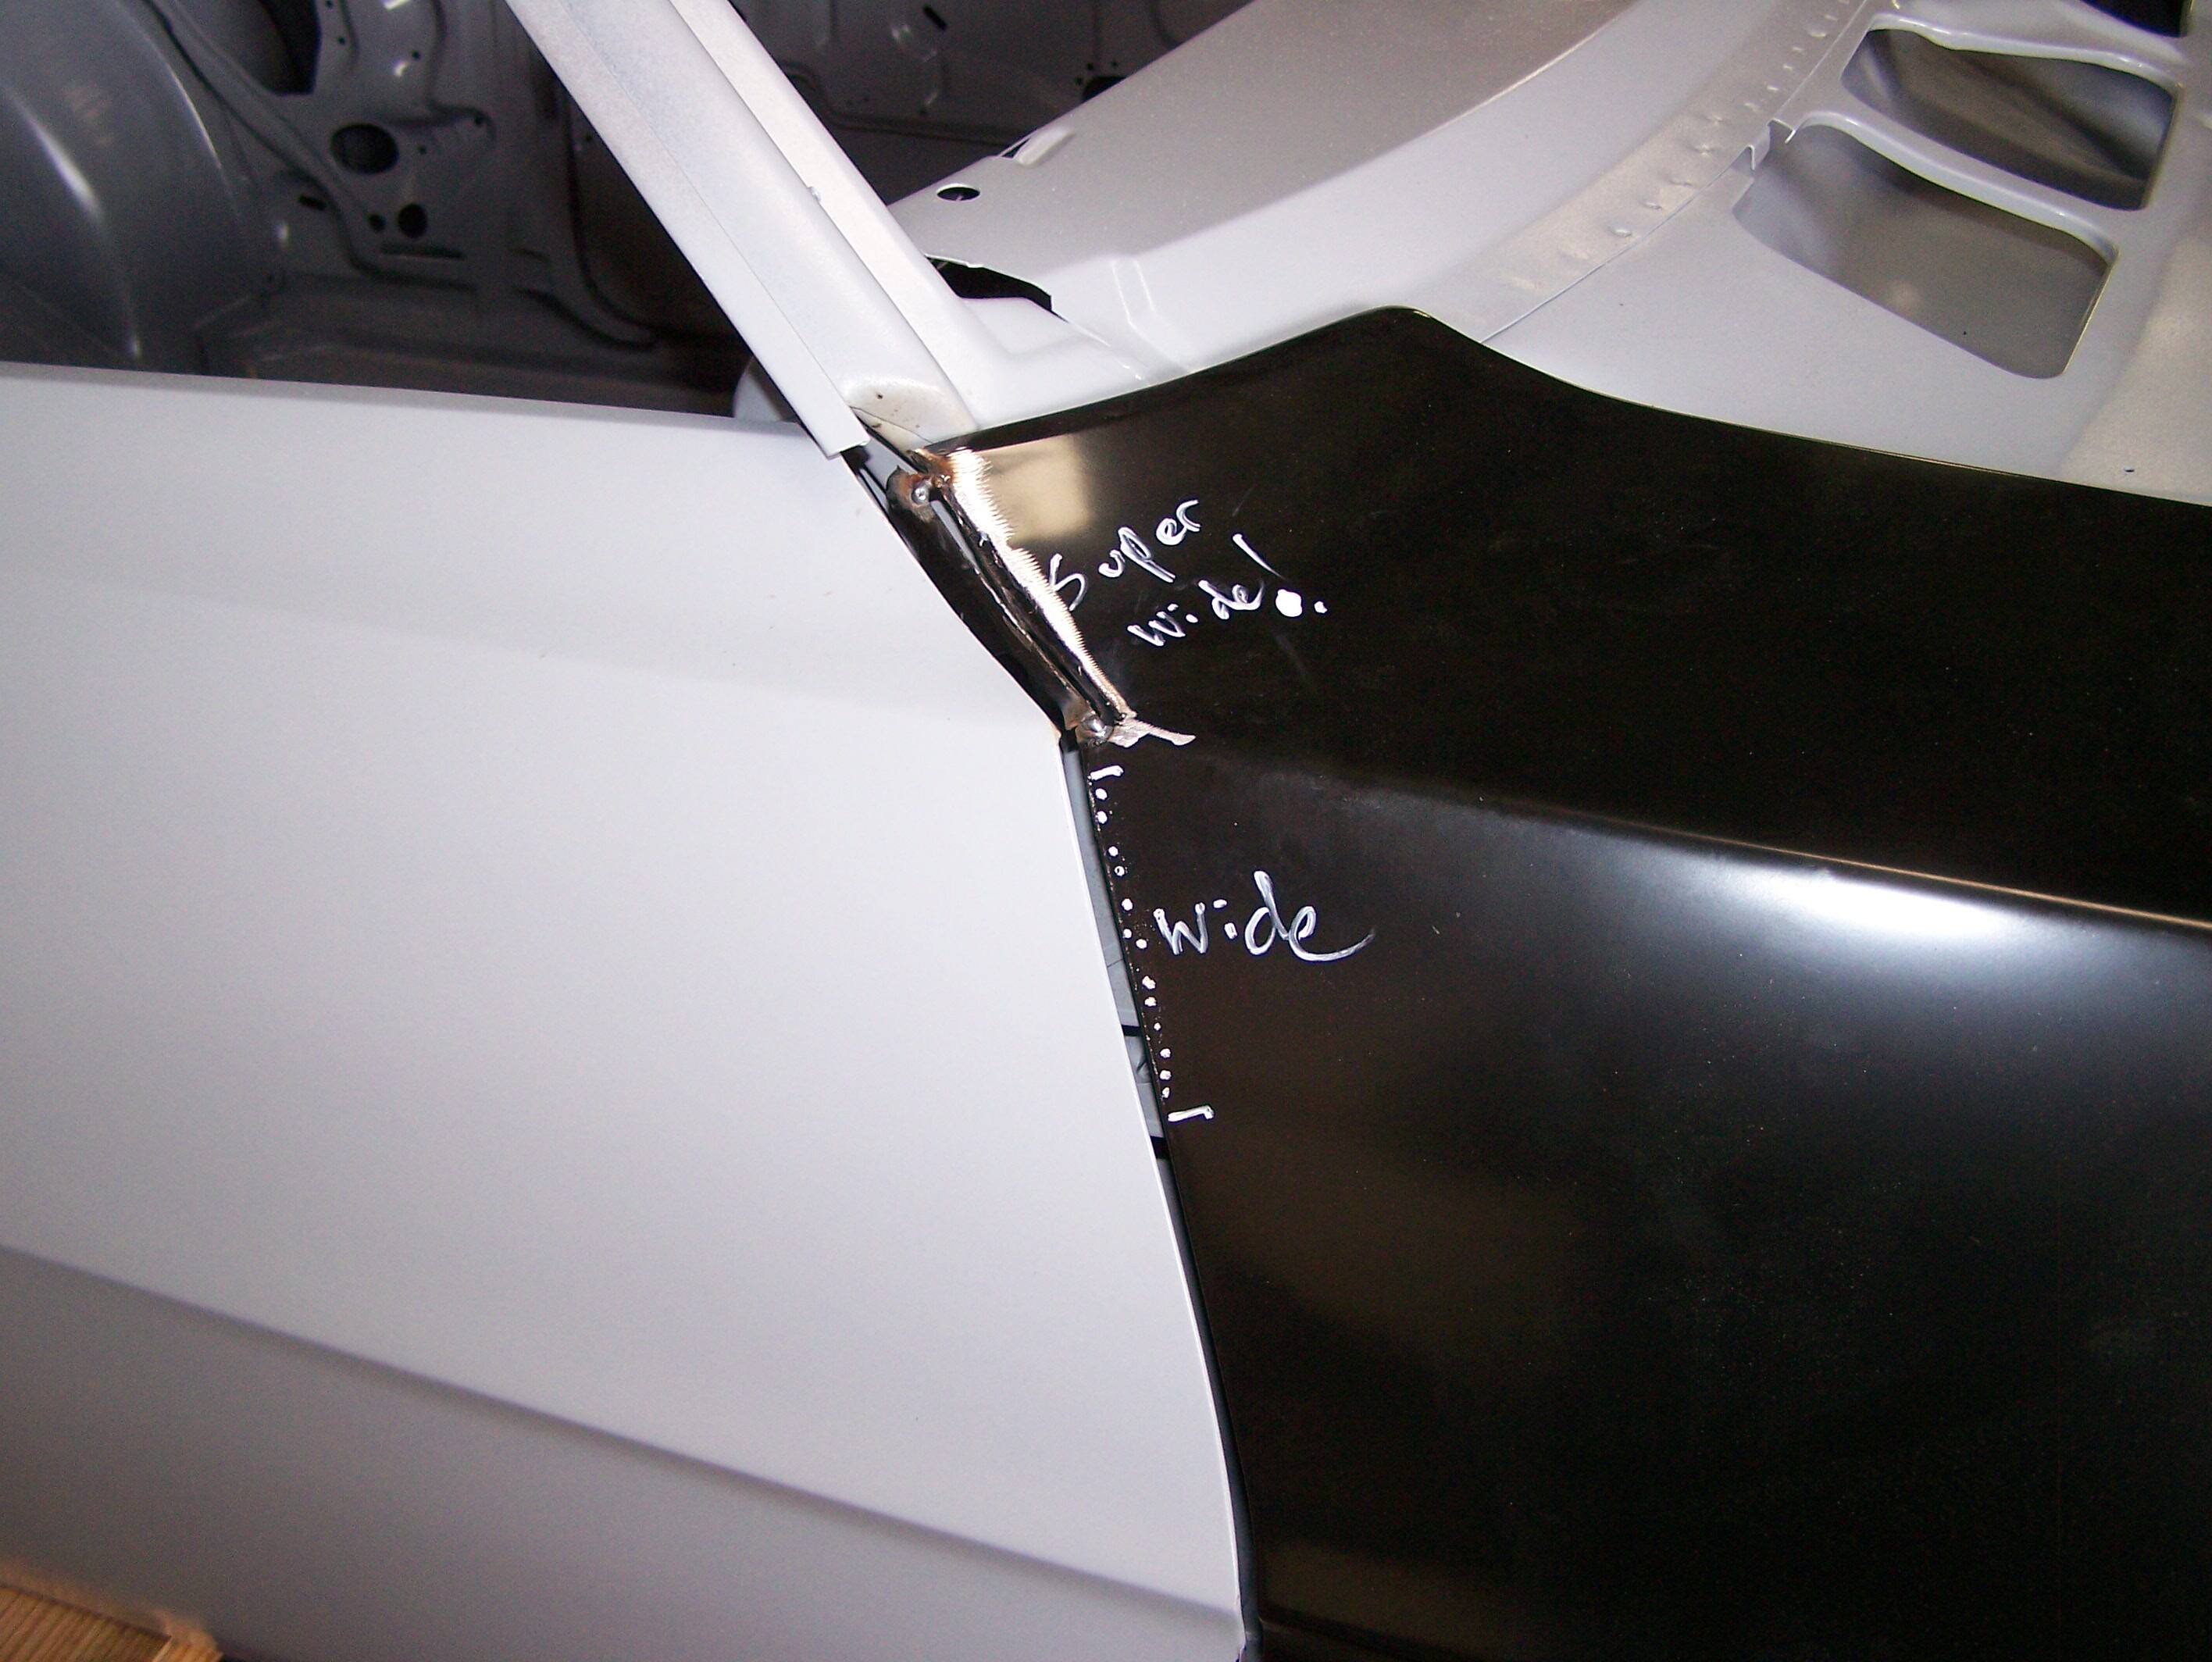
The right front fender to door gap had even more severe fitment issues so metal was added to the center-up area of the door edge (an old steel coat hanger or piece of 1/16” piano wire works well) and the fender was cut and lengthened almost ¼” at the upper body line. (images 4014-4025) Patience and determination come in handy here! Some extra time spent here will make a huge difference in the quality of the finished product. Our goal was just to achieve “nice” door gaps without spending too many hours to achieve “perfect” gaps. From the point where the body was blasted and in epoxy primer to the point where all filler work and gapping was completed was about 40 hours labor.
Once the fenders were fit, we installed the header panel, lower valance and hood. All panels were adjusted to achieve proper gaps. No modifications were need to the hood or front panels.
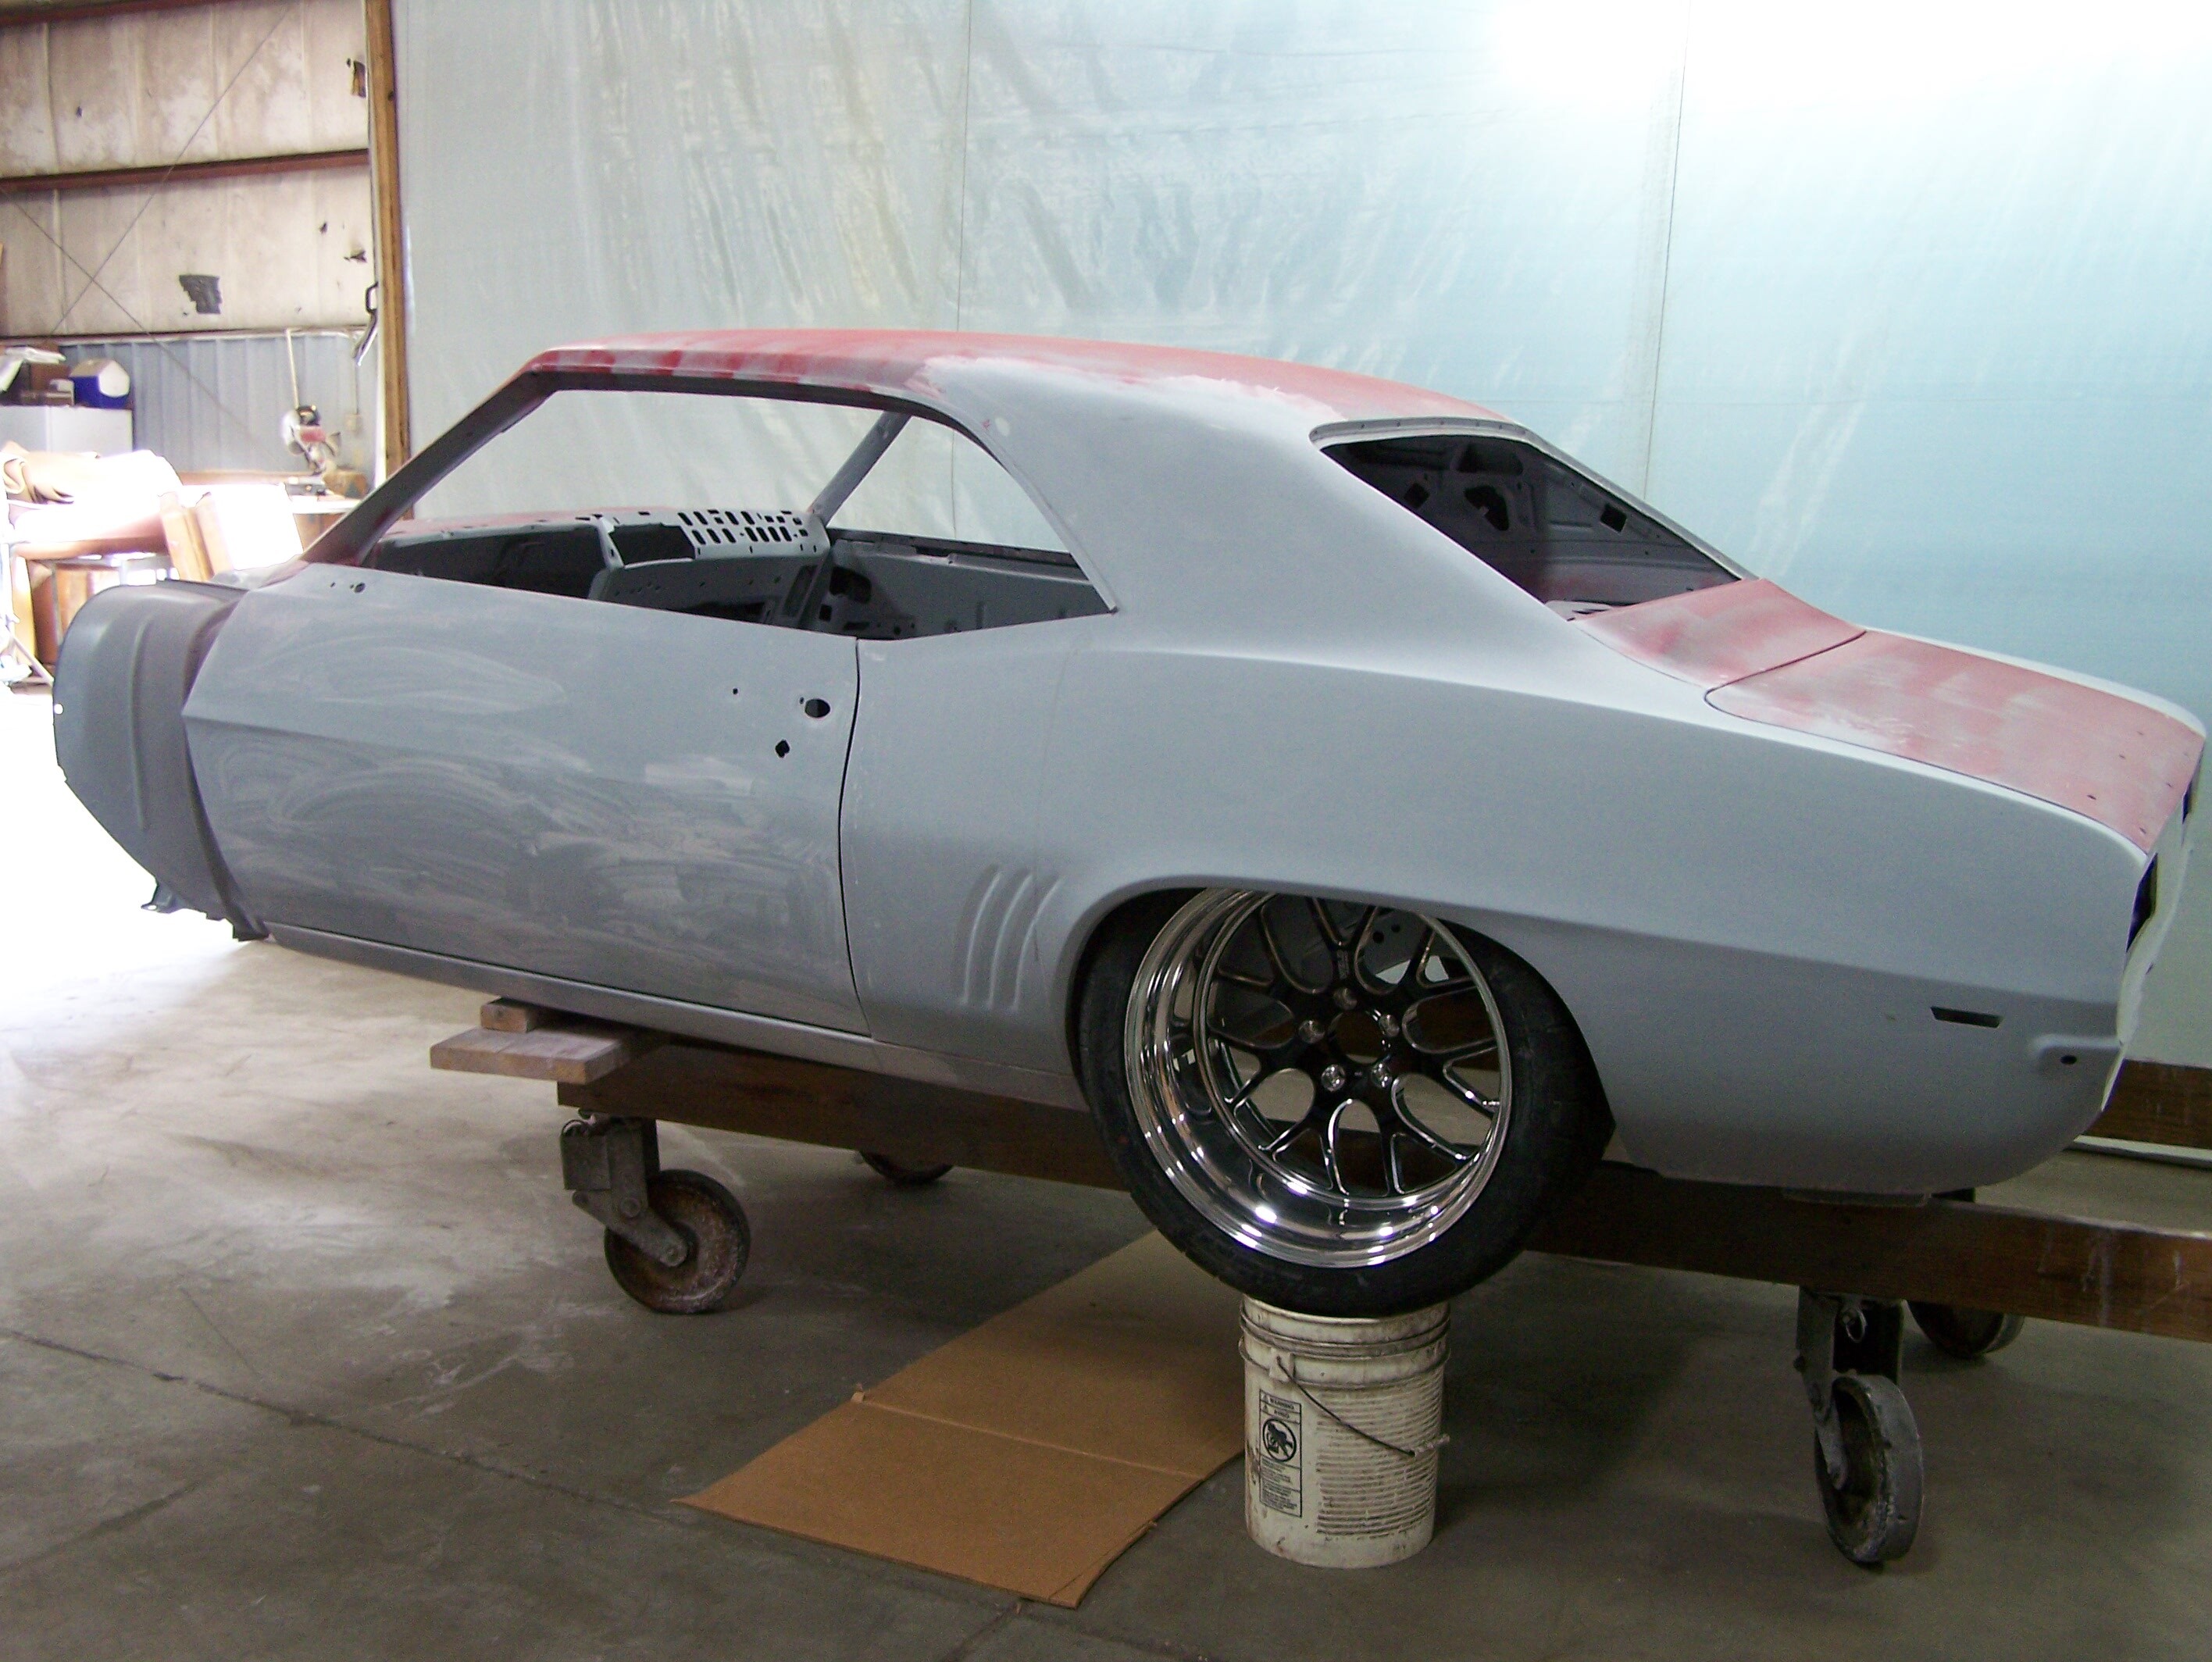
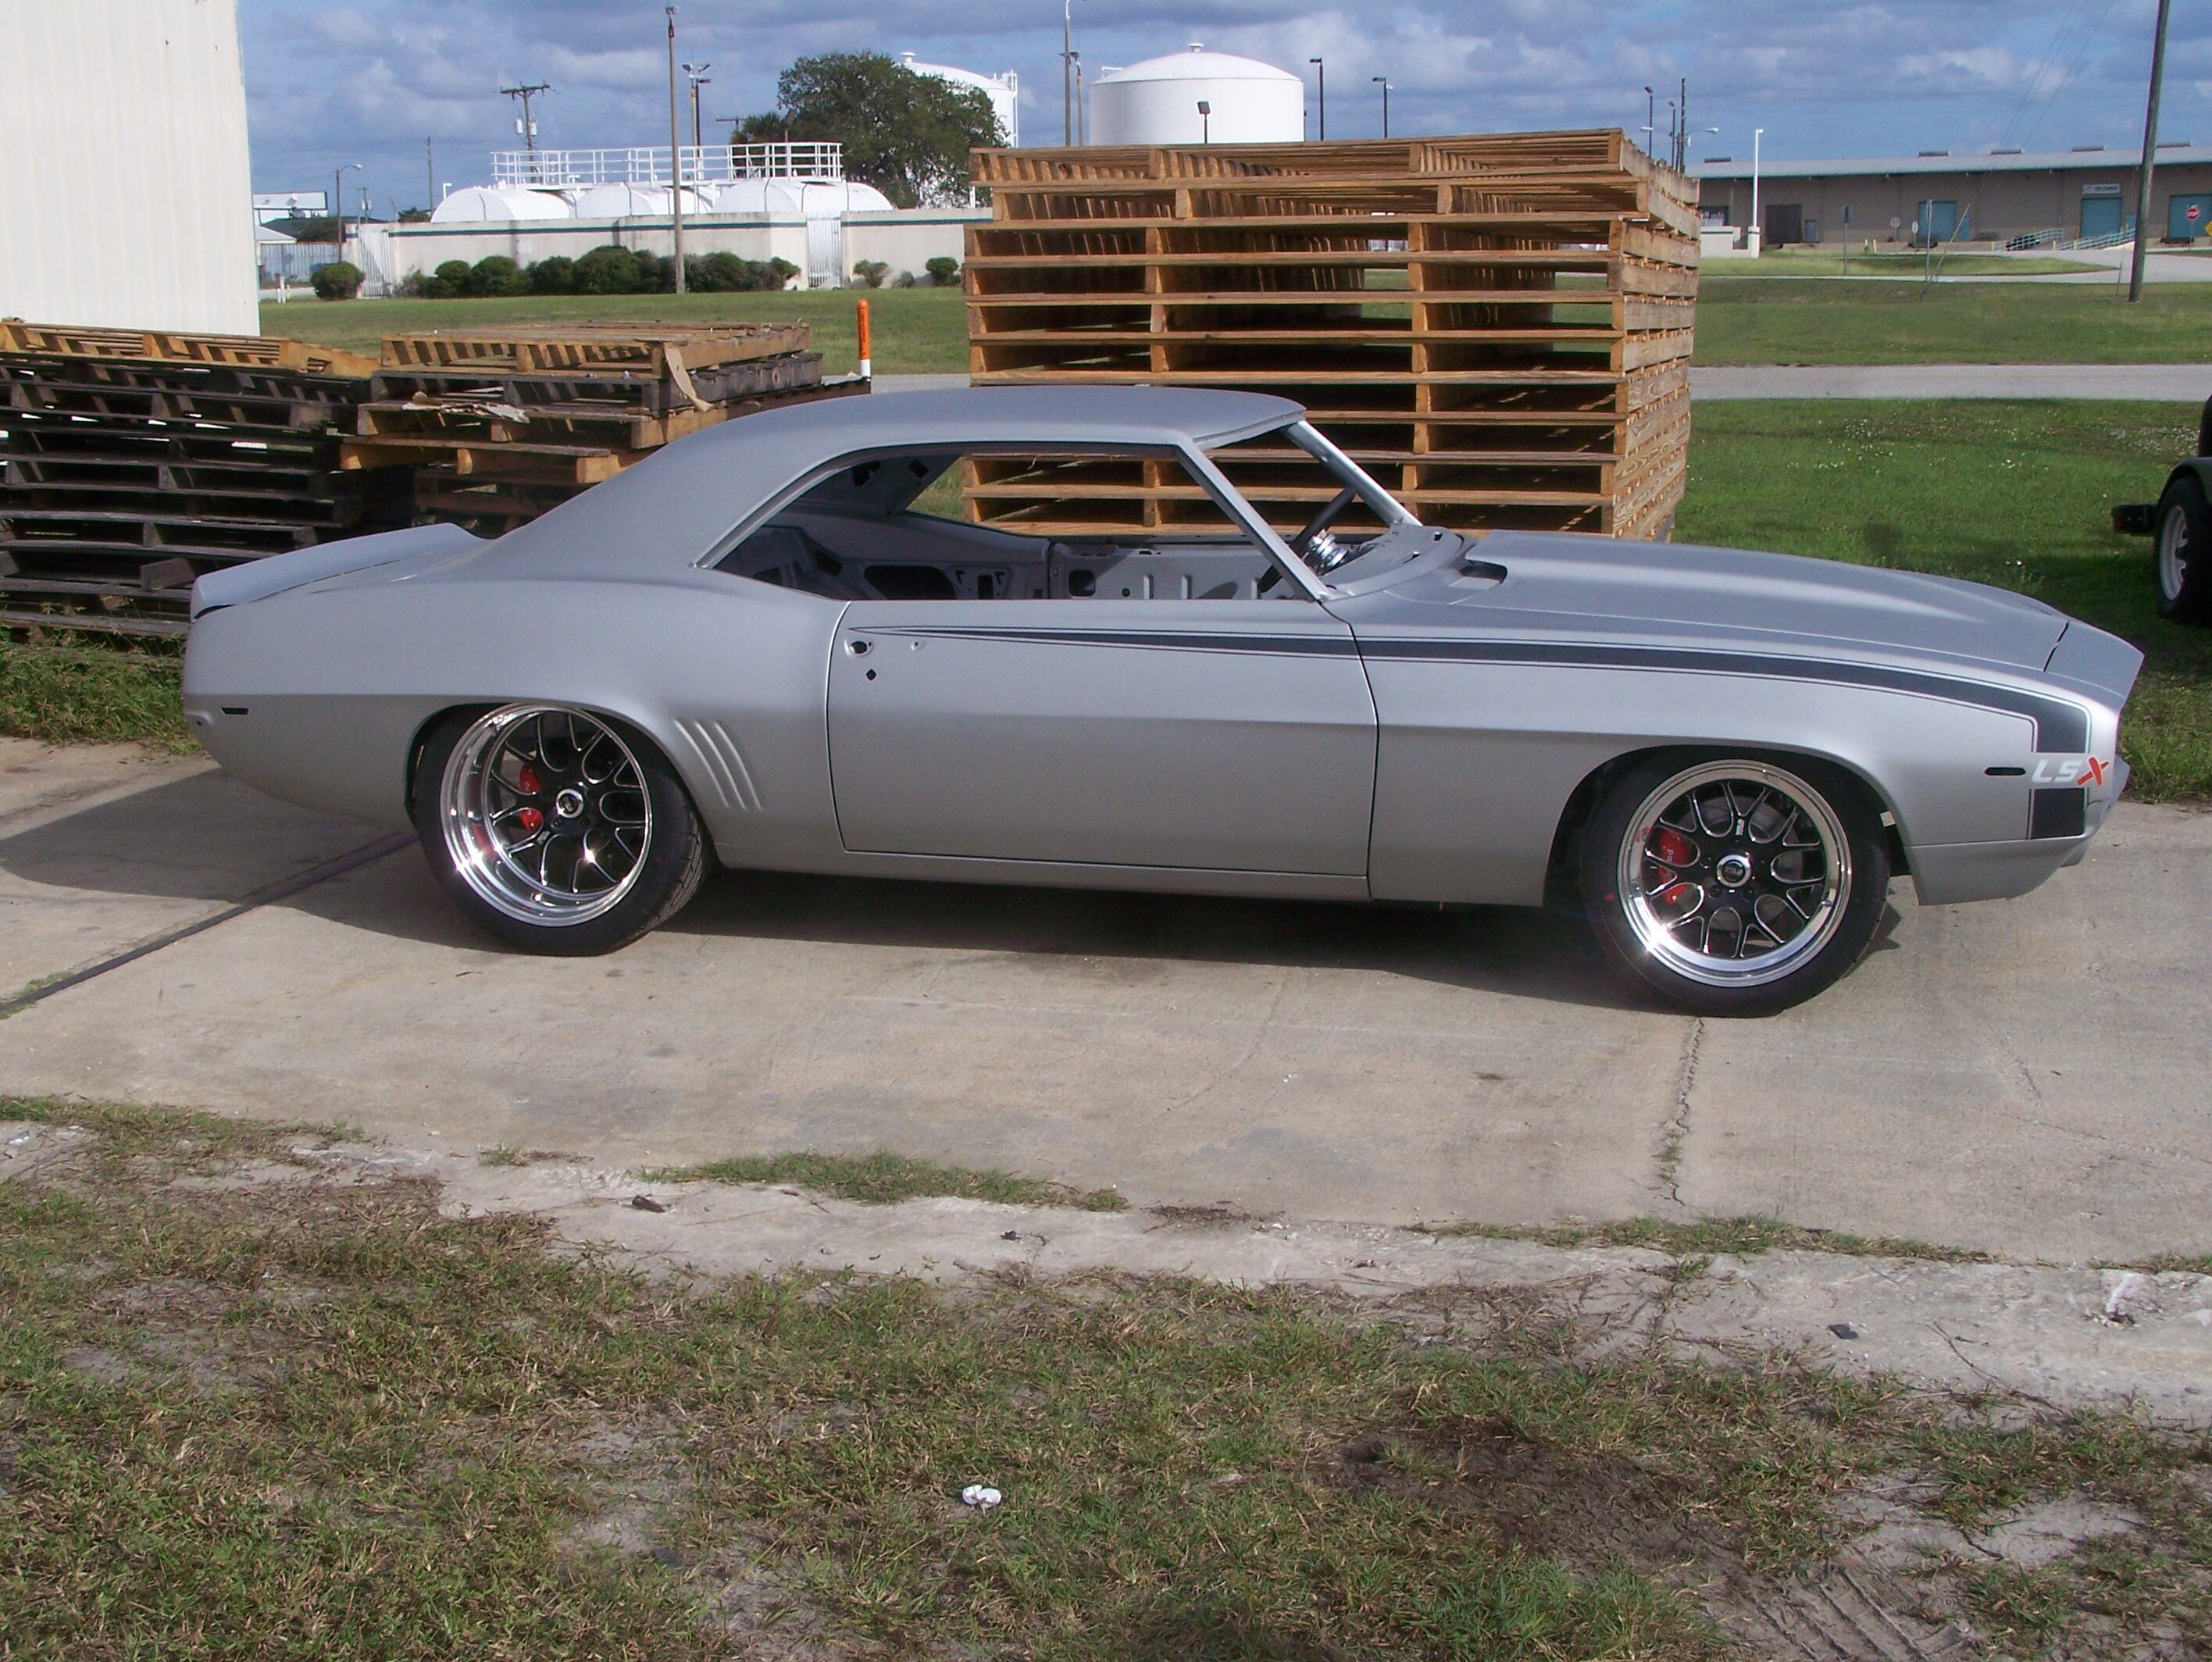
Now is also a good time to fit your wheels/tires, particularly if you are installing a non-original wheel/tire combo along with a non-stock rear axle. This body is mini-tubbed so we performed a quick-fit of our Mickey Thompson tires www.mickeythompsontires.com and Weld Racing wheels www.weldracing.com to make certain we did not have any obvious clearance issues. With all four tires mounted on our wheels, we mocked up the rears in the rear wheel wells and measured for our rear axle width. Be sure to allow for brake rotor or drum thickness when doing your final calculations. Our axle flange-to-flange width as submitted to Moser Engineering www.moserengineering.com was 53”.
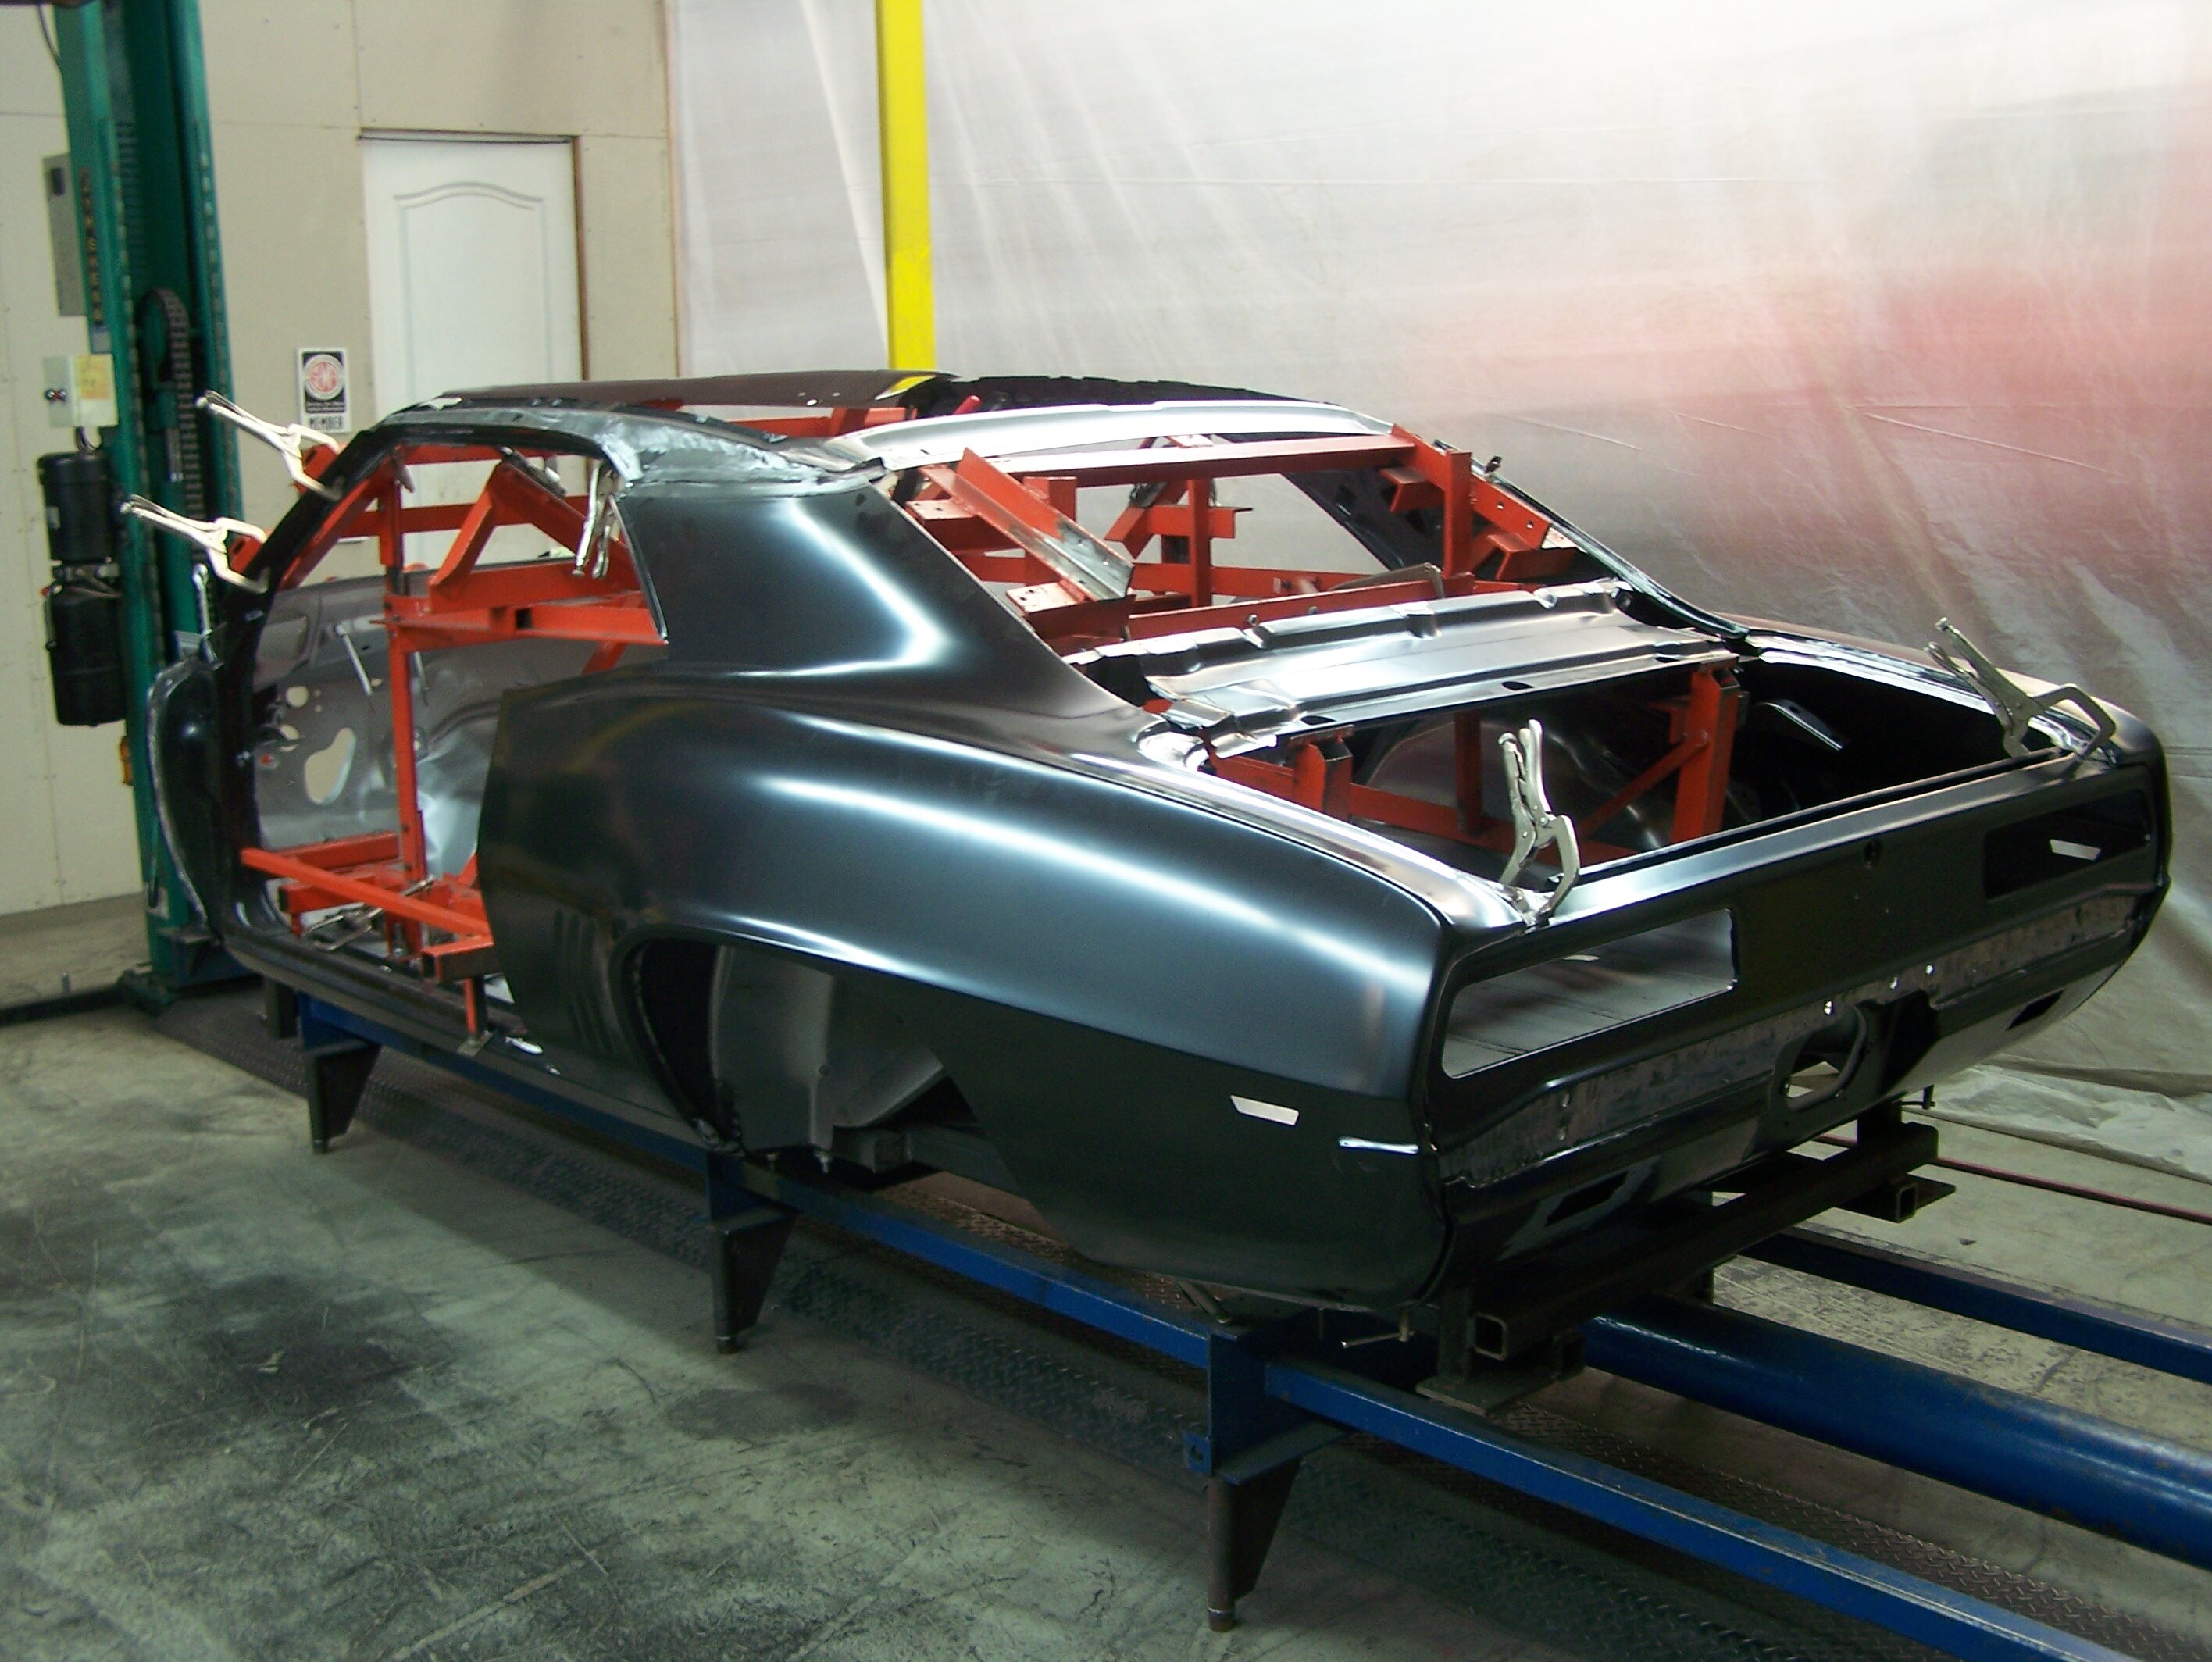
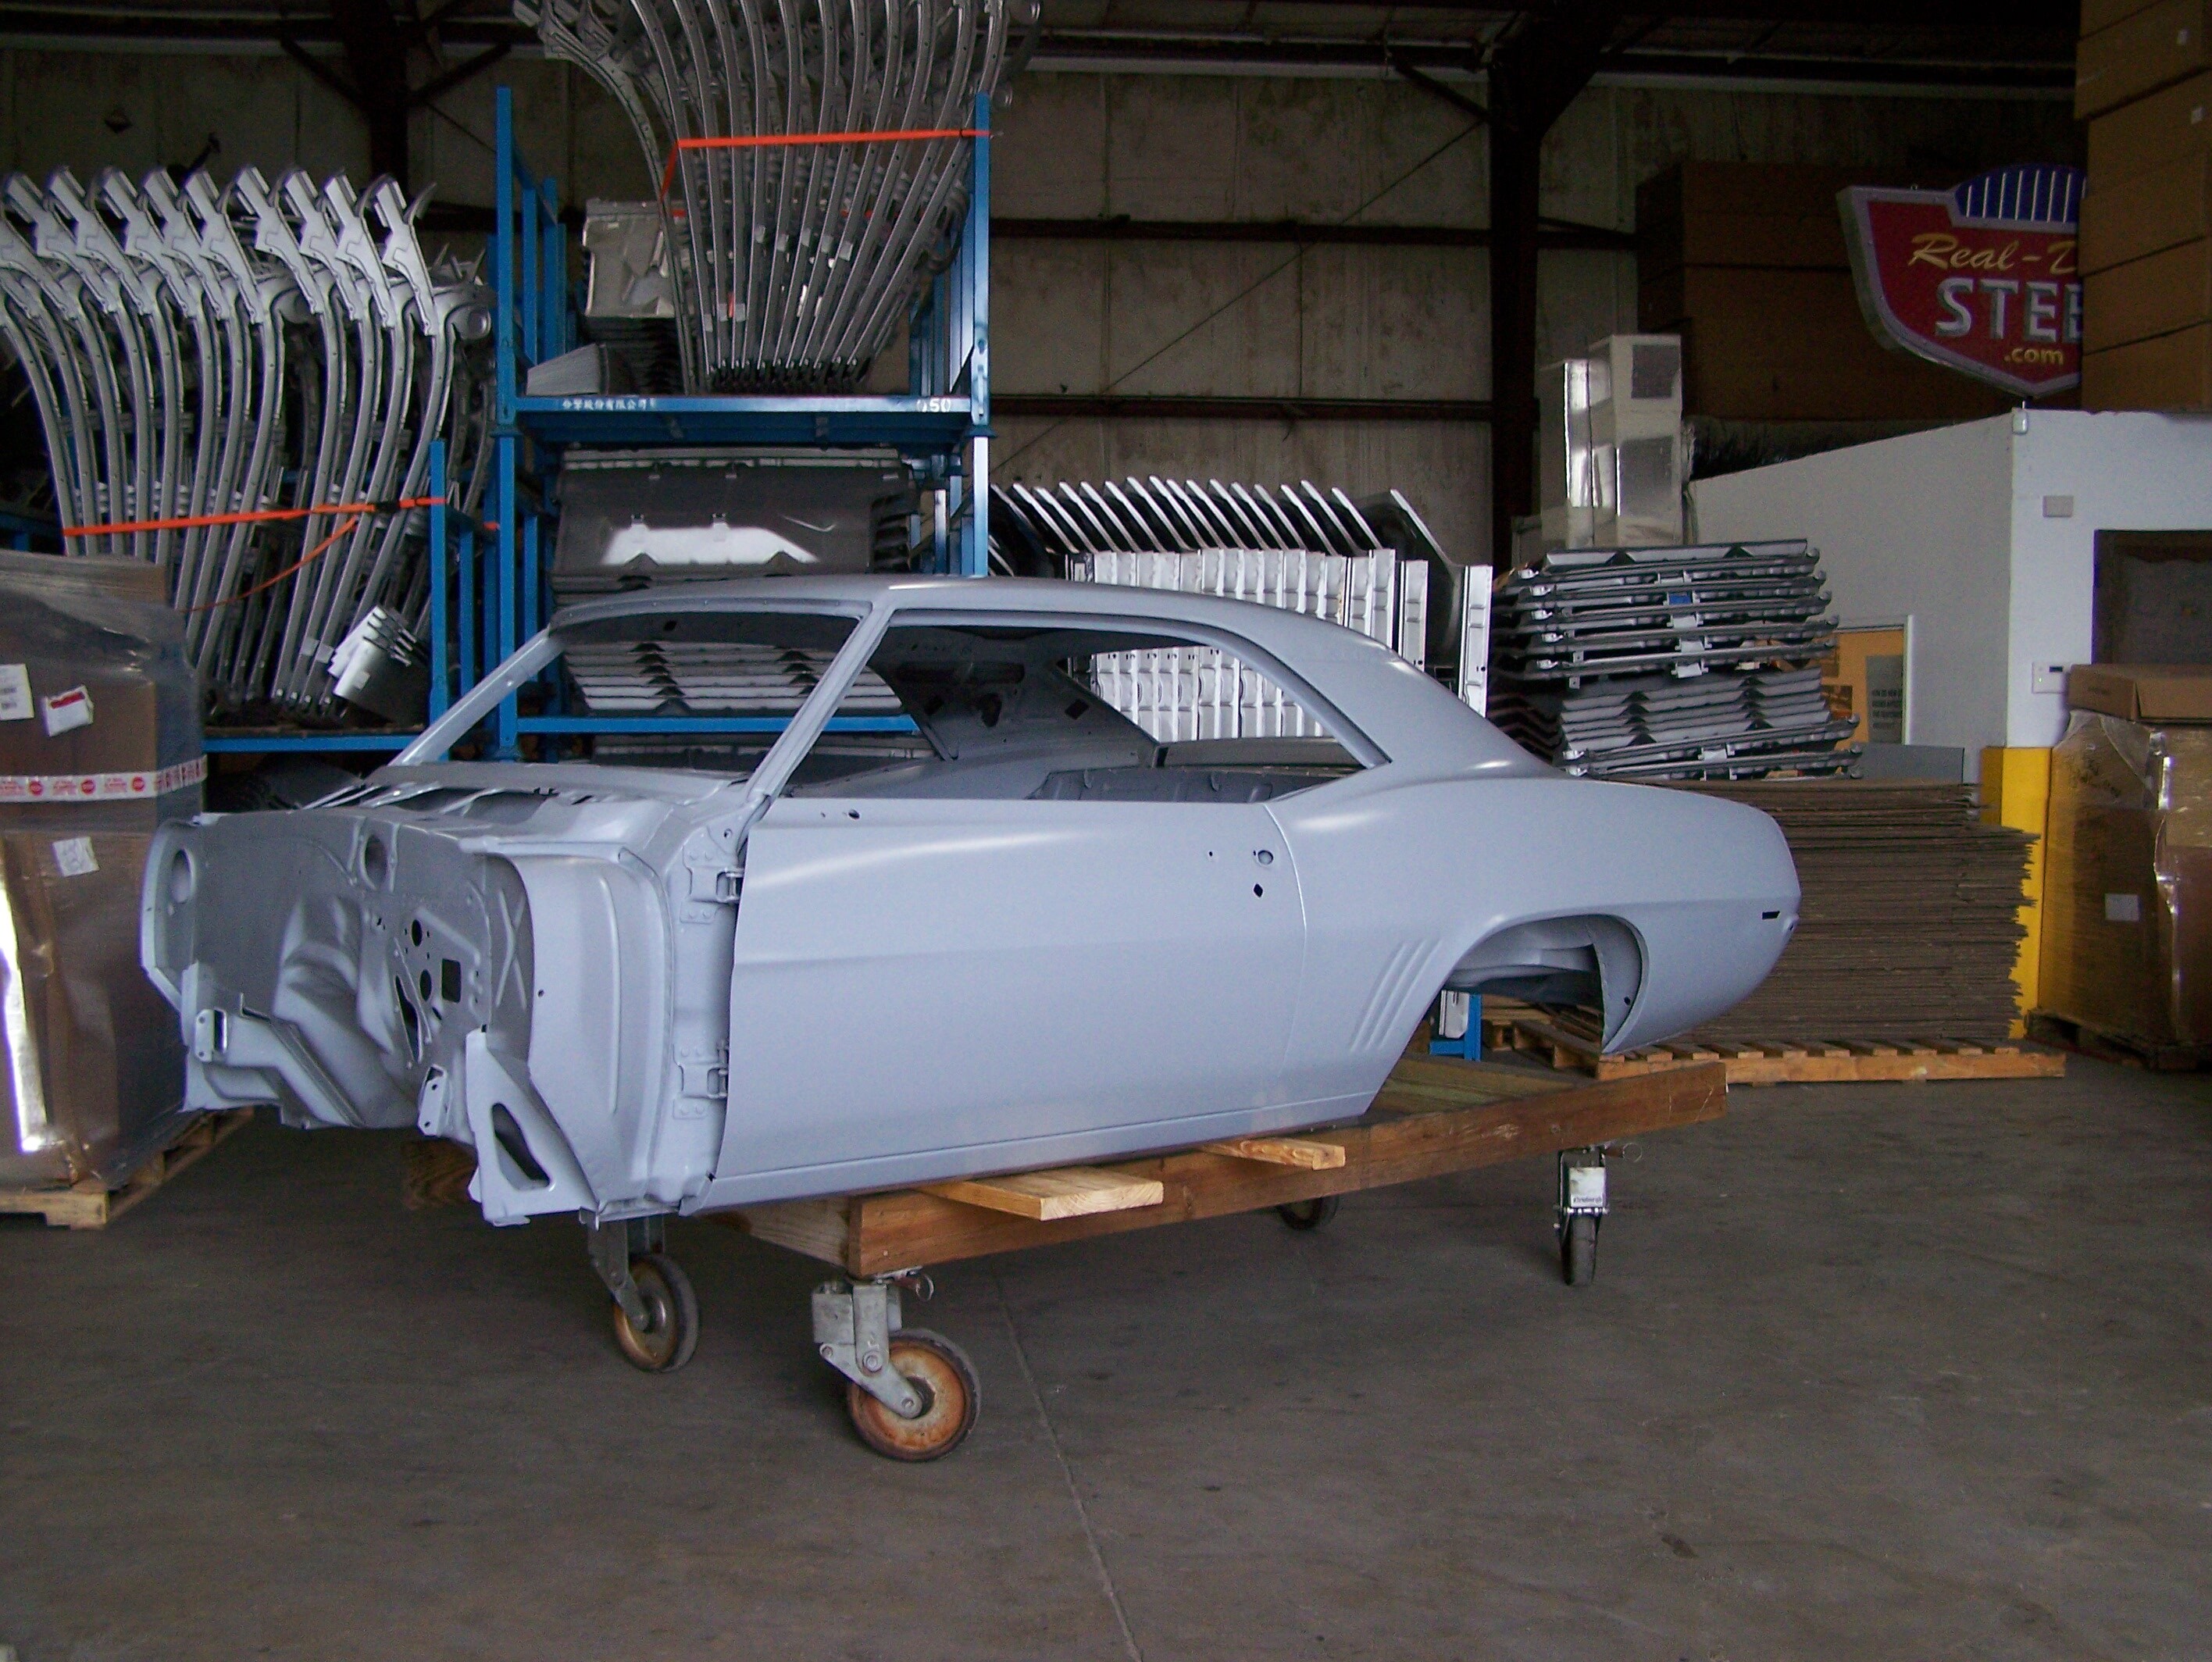
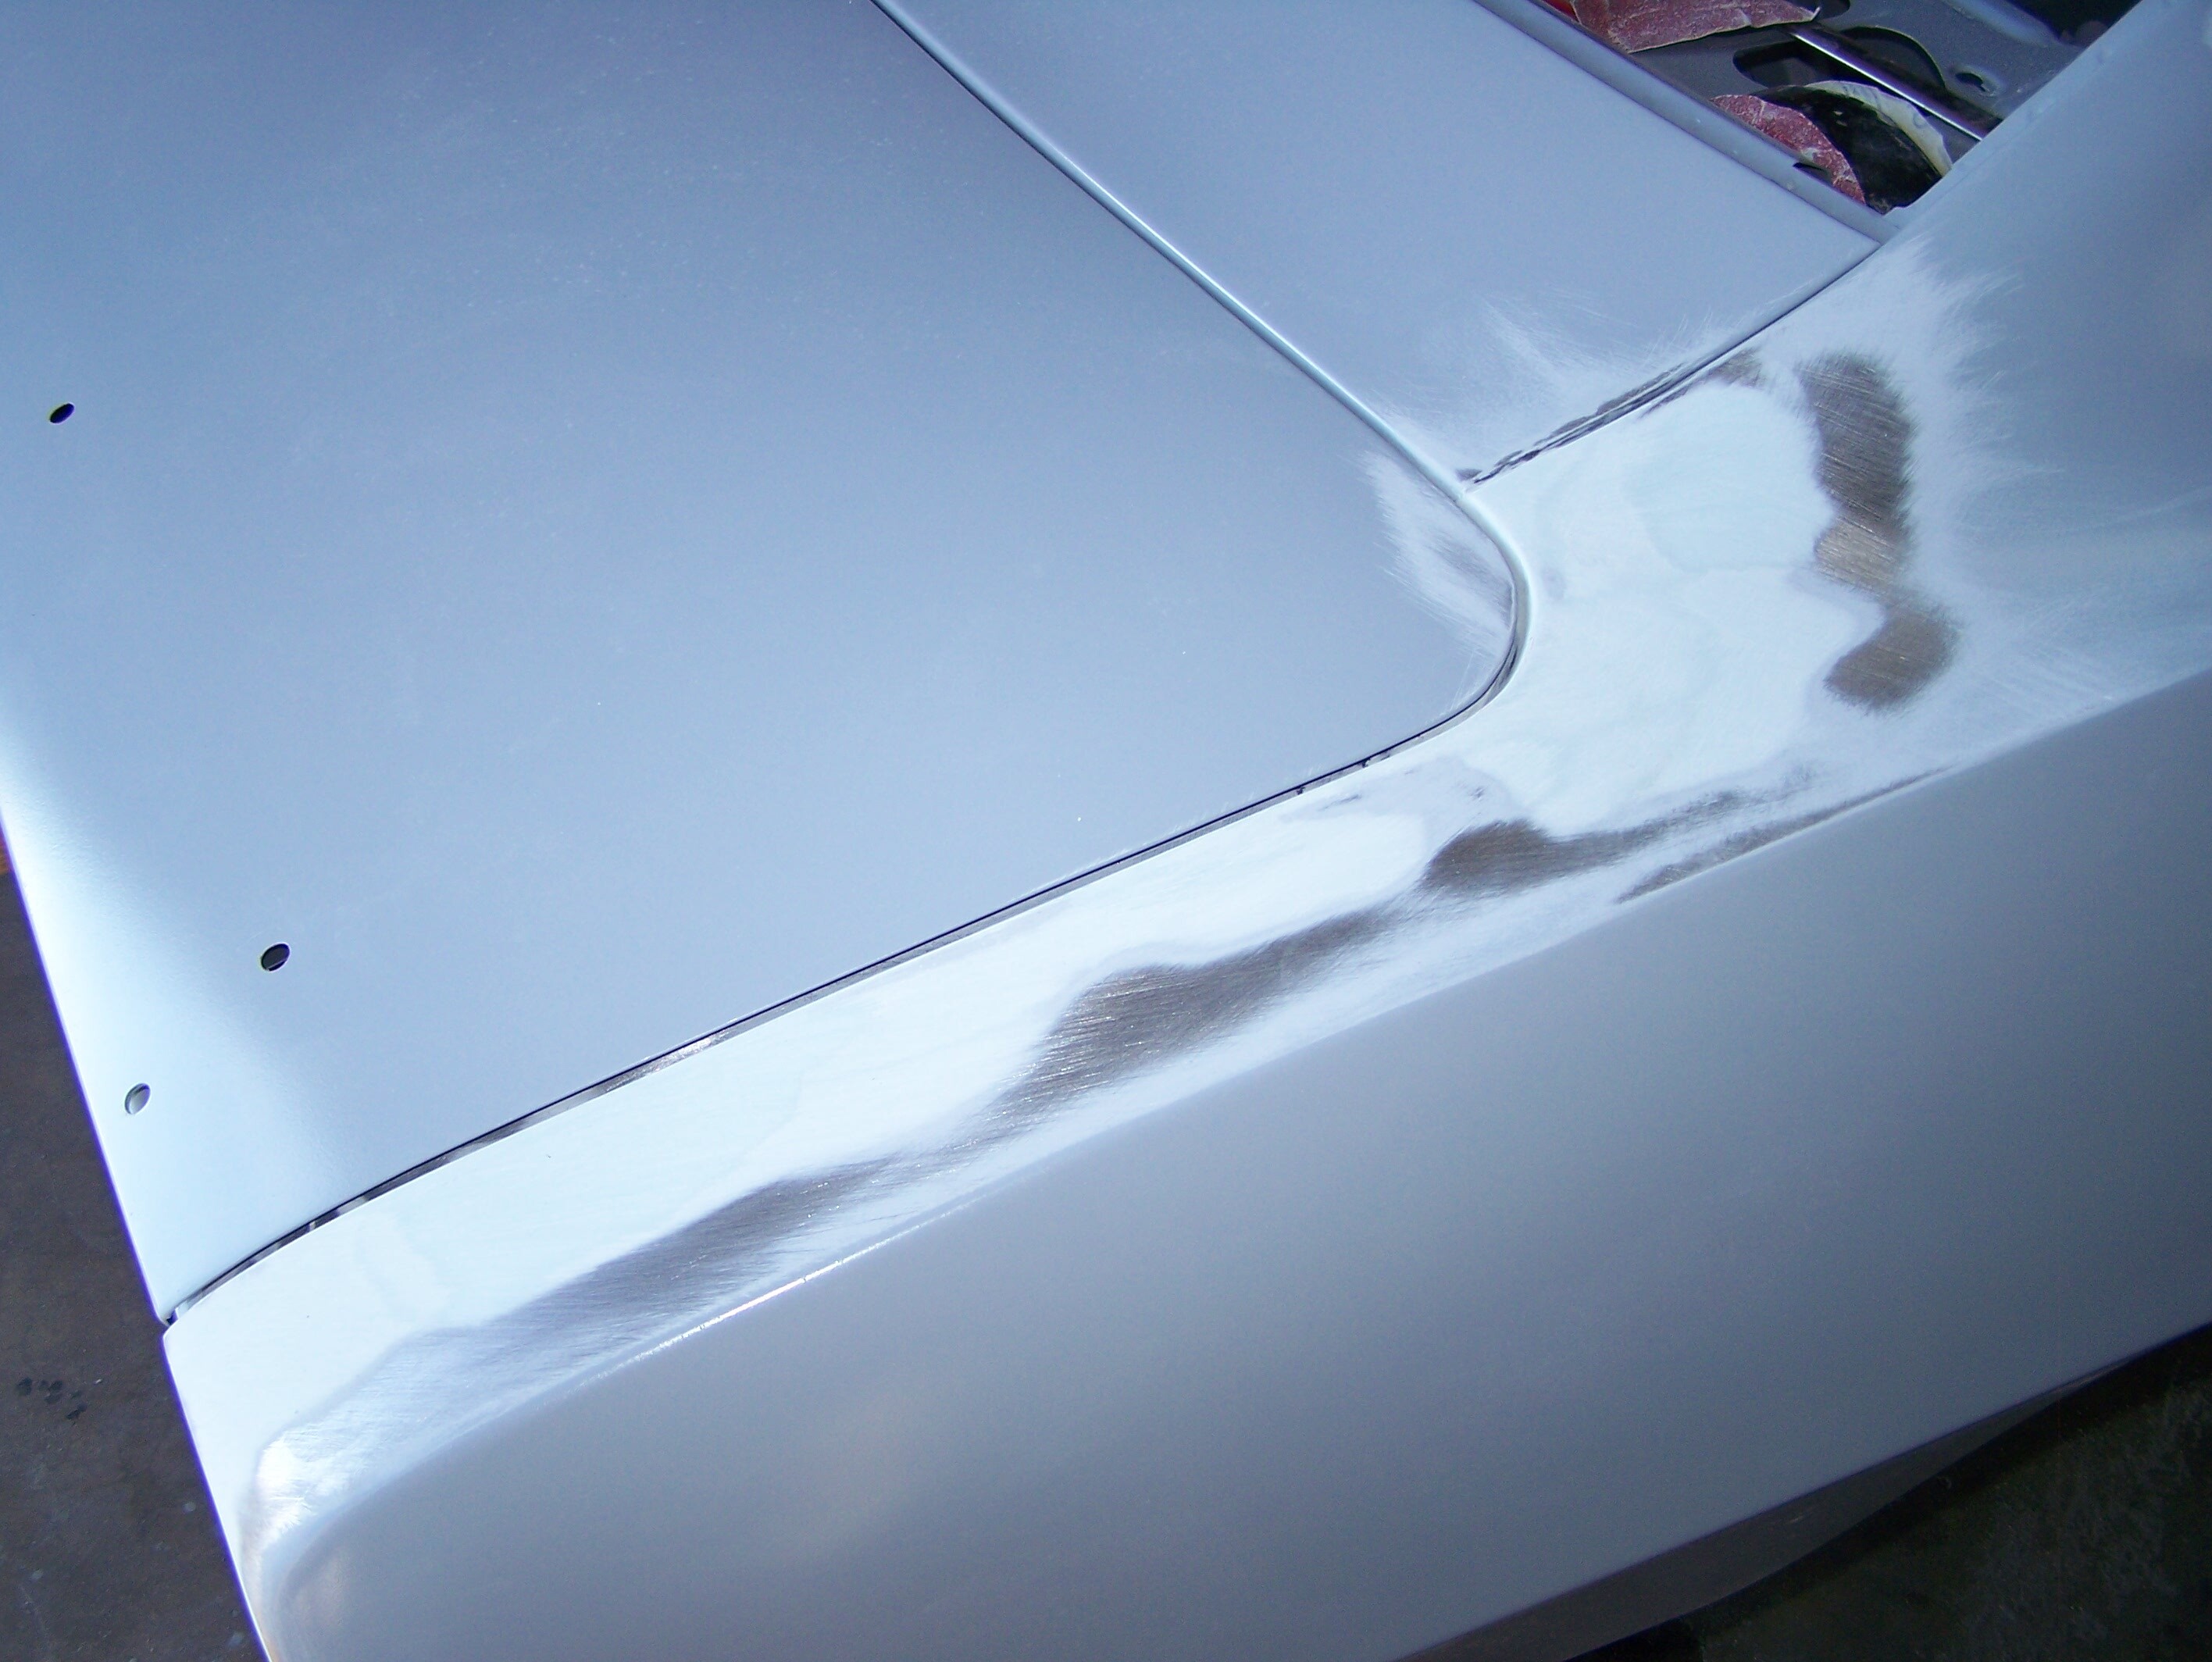
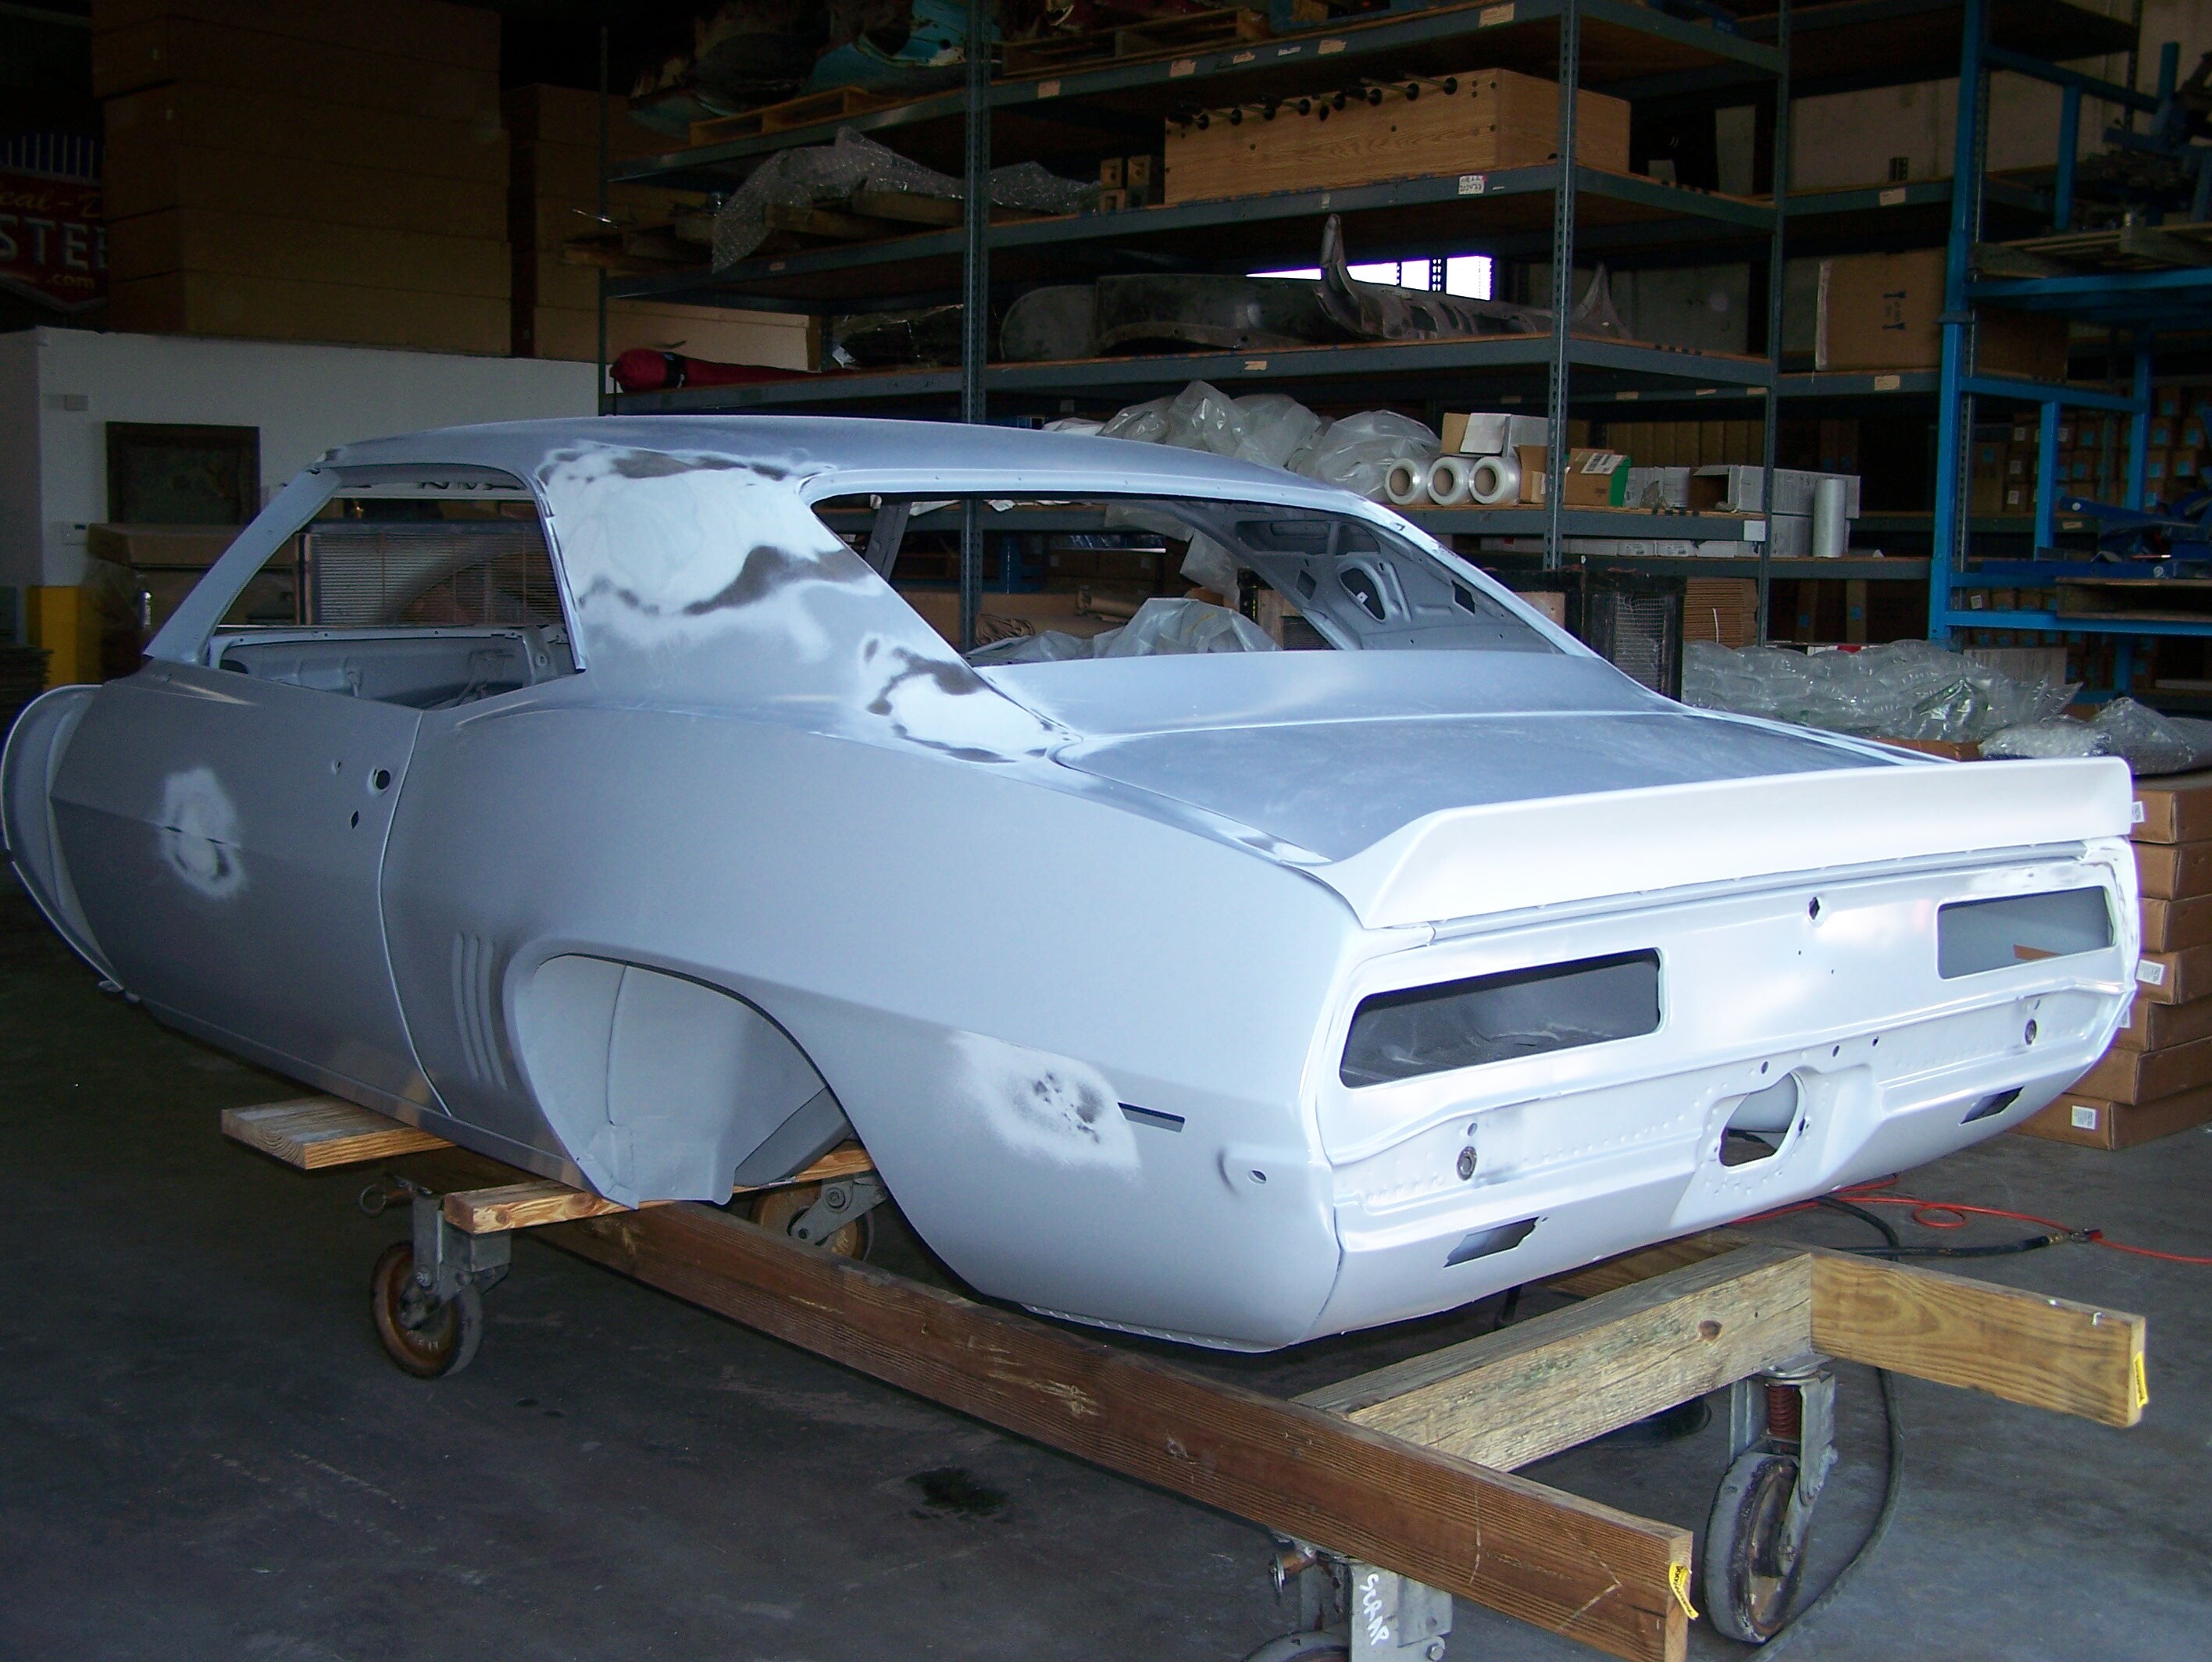
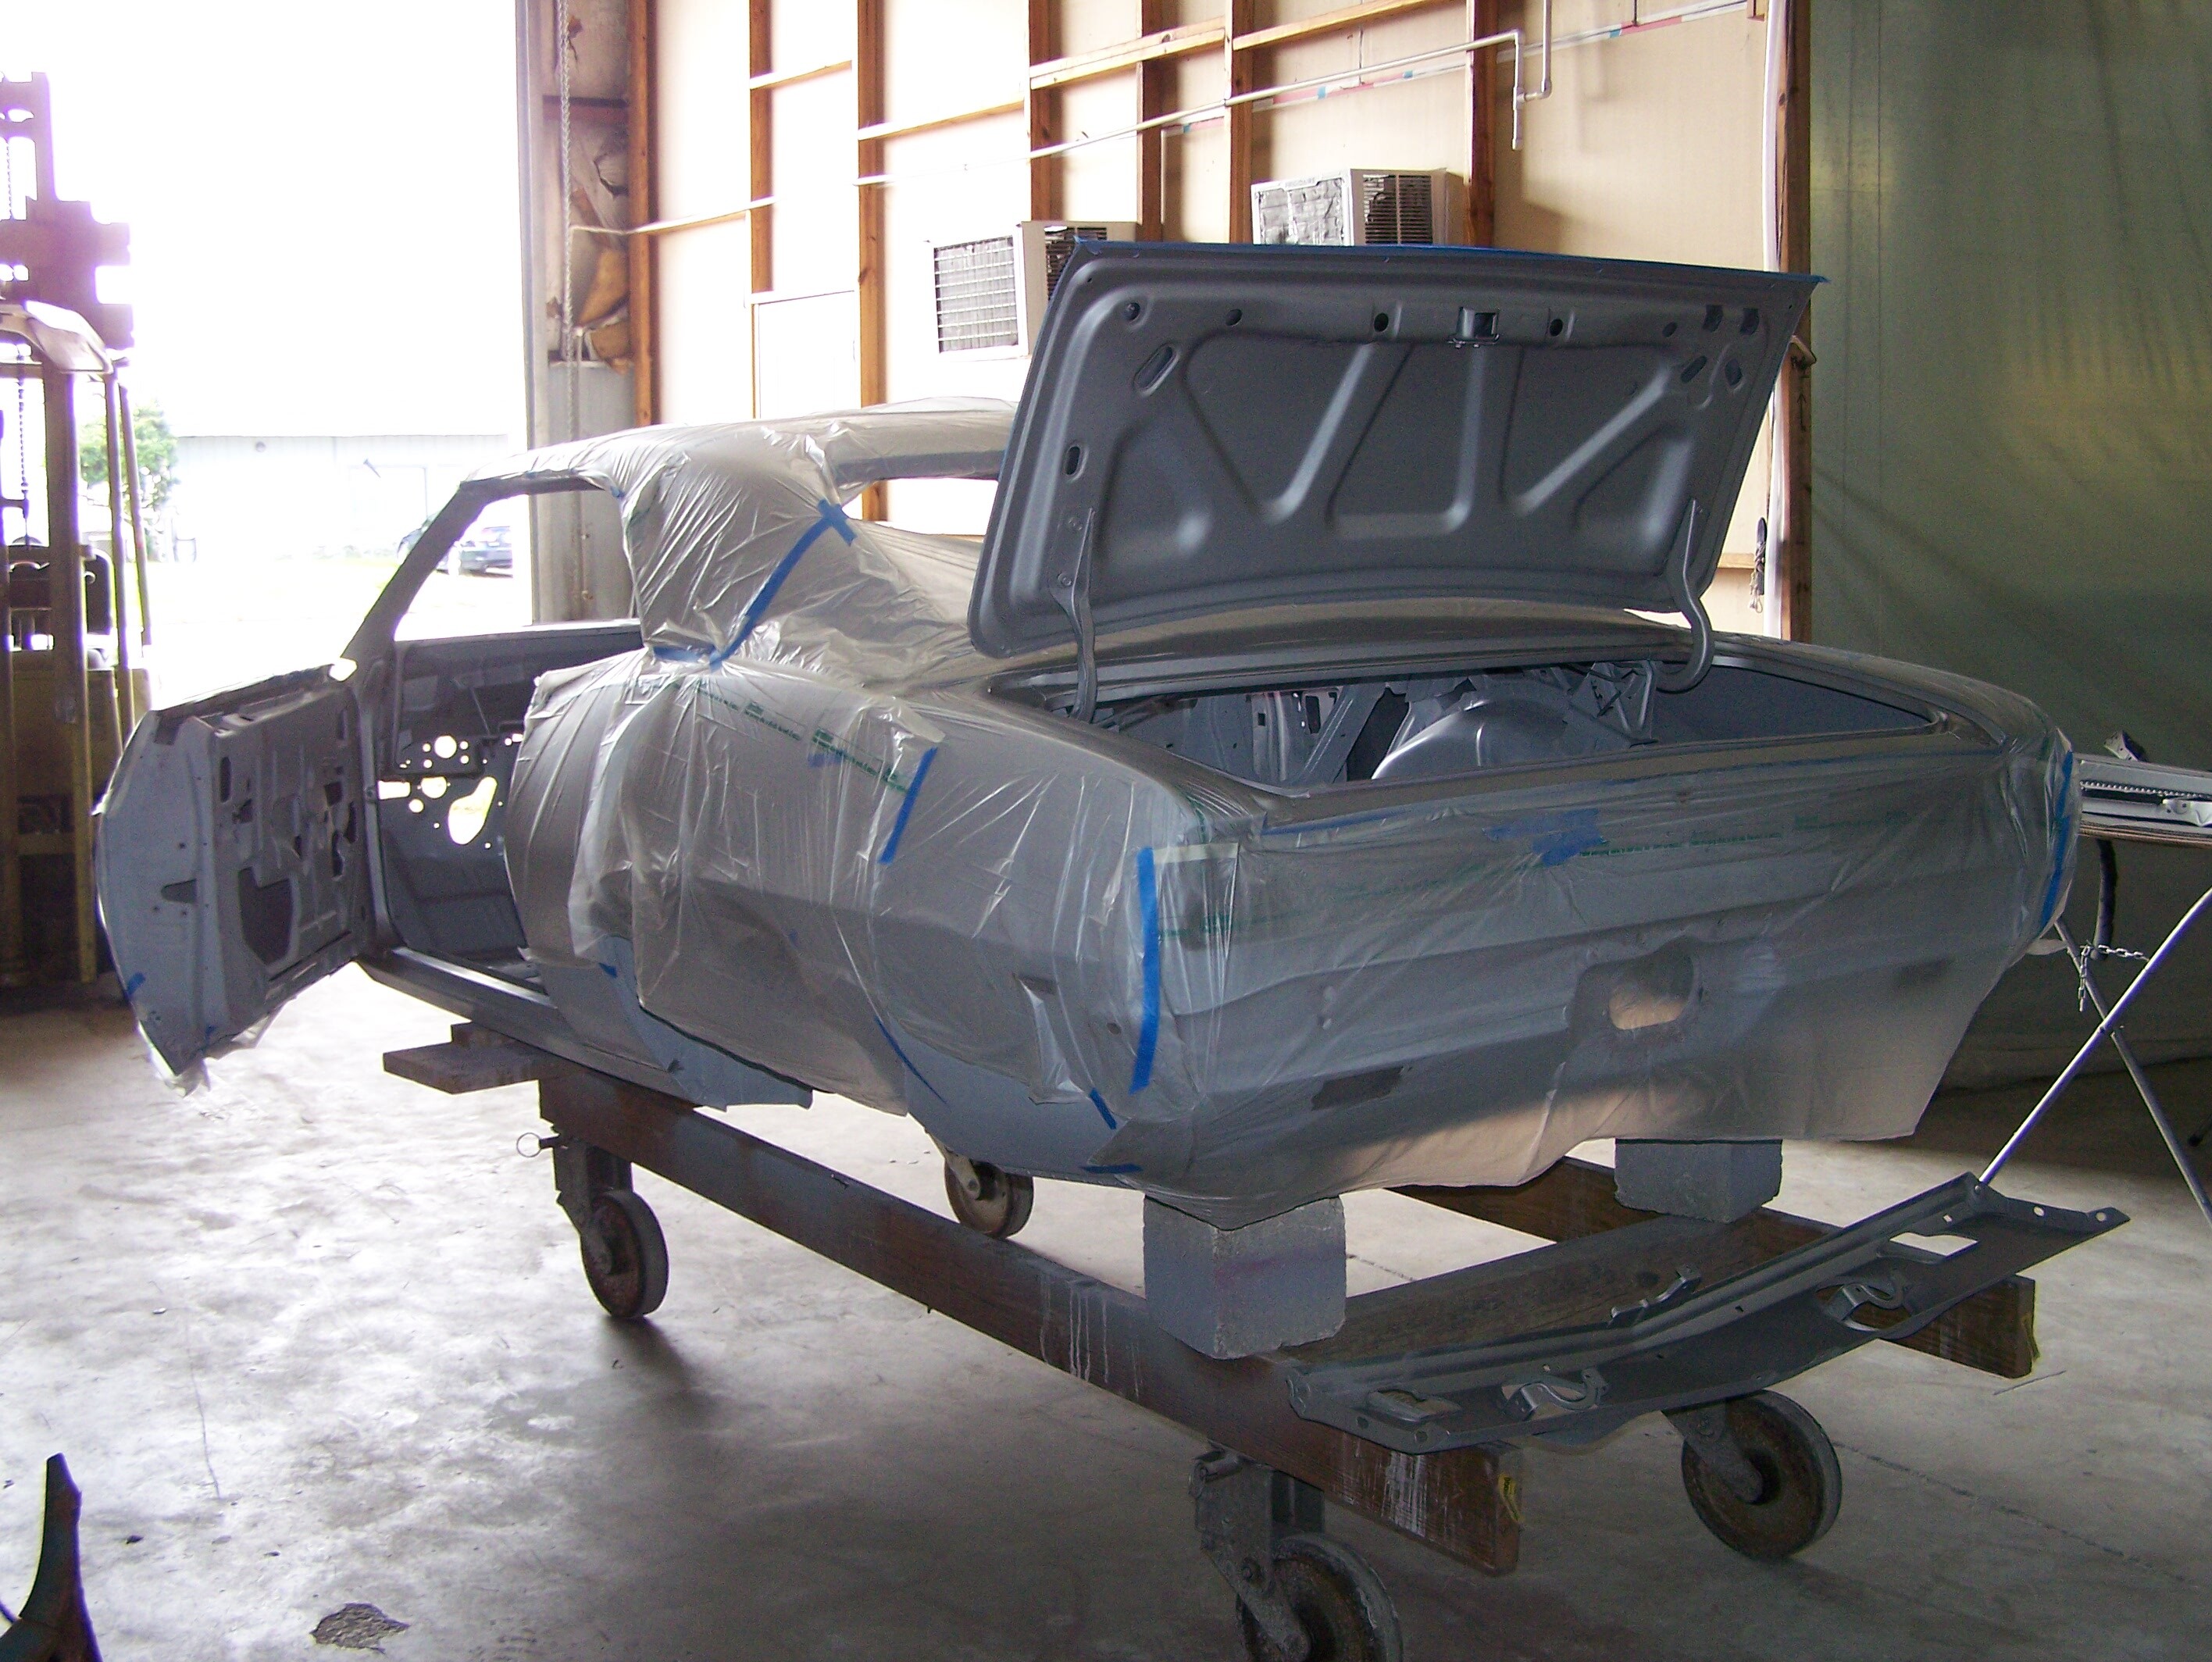
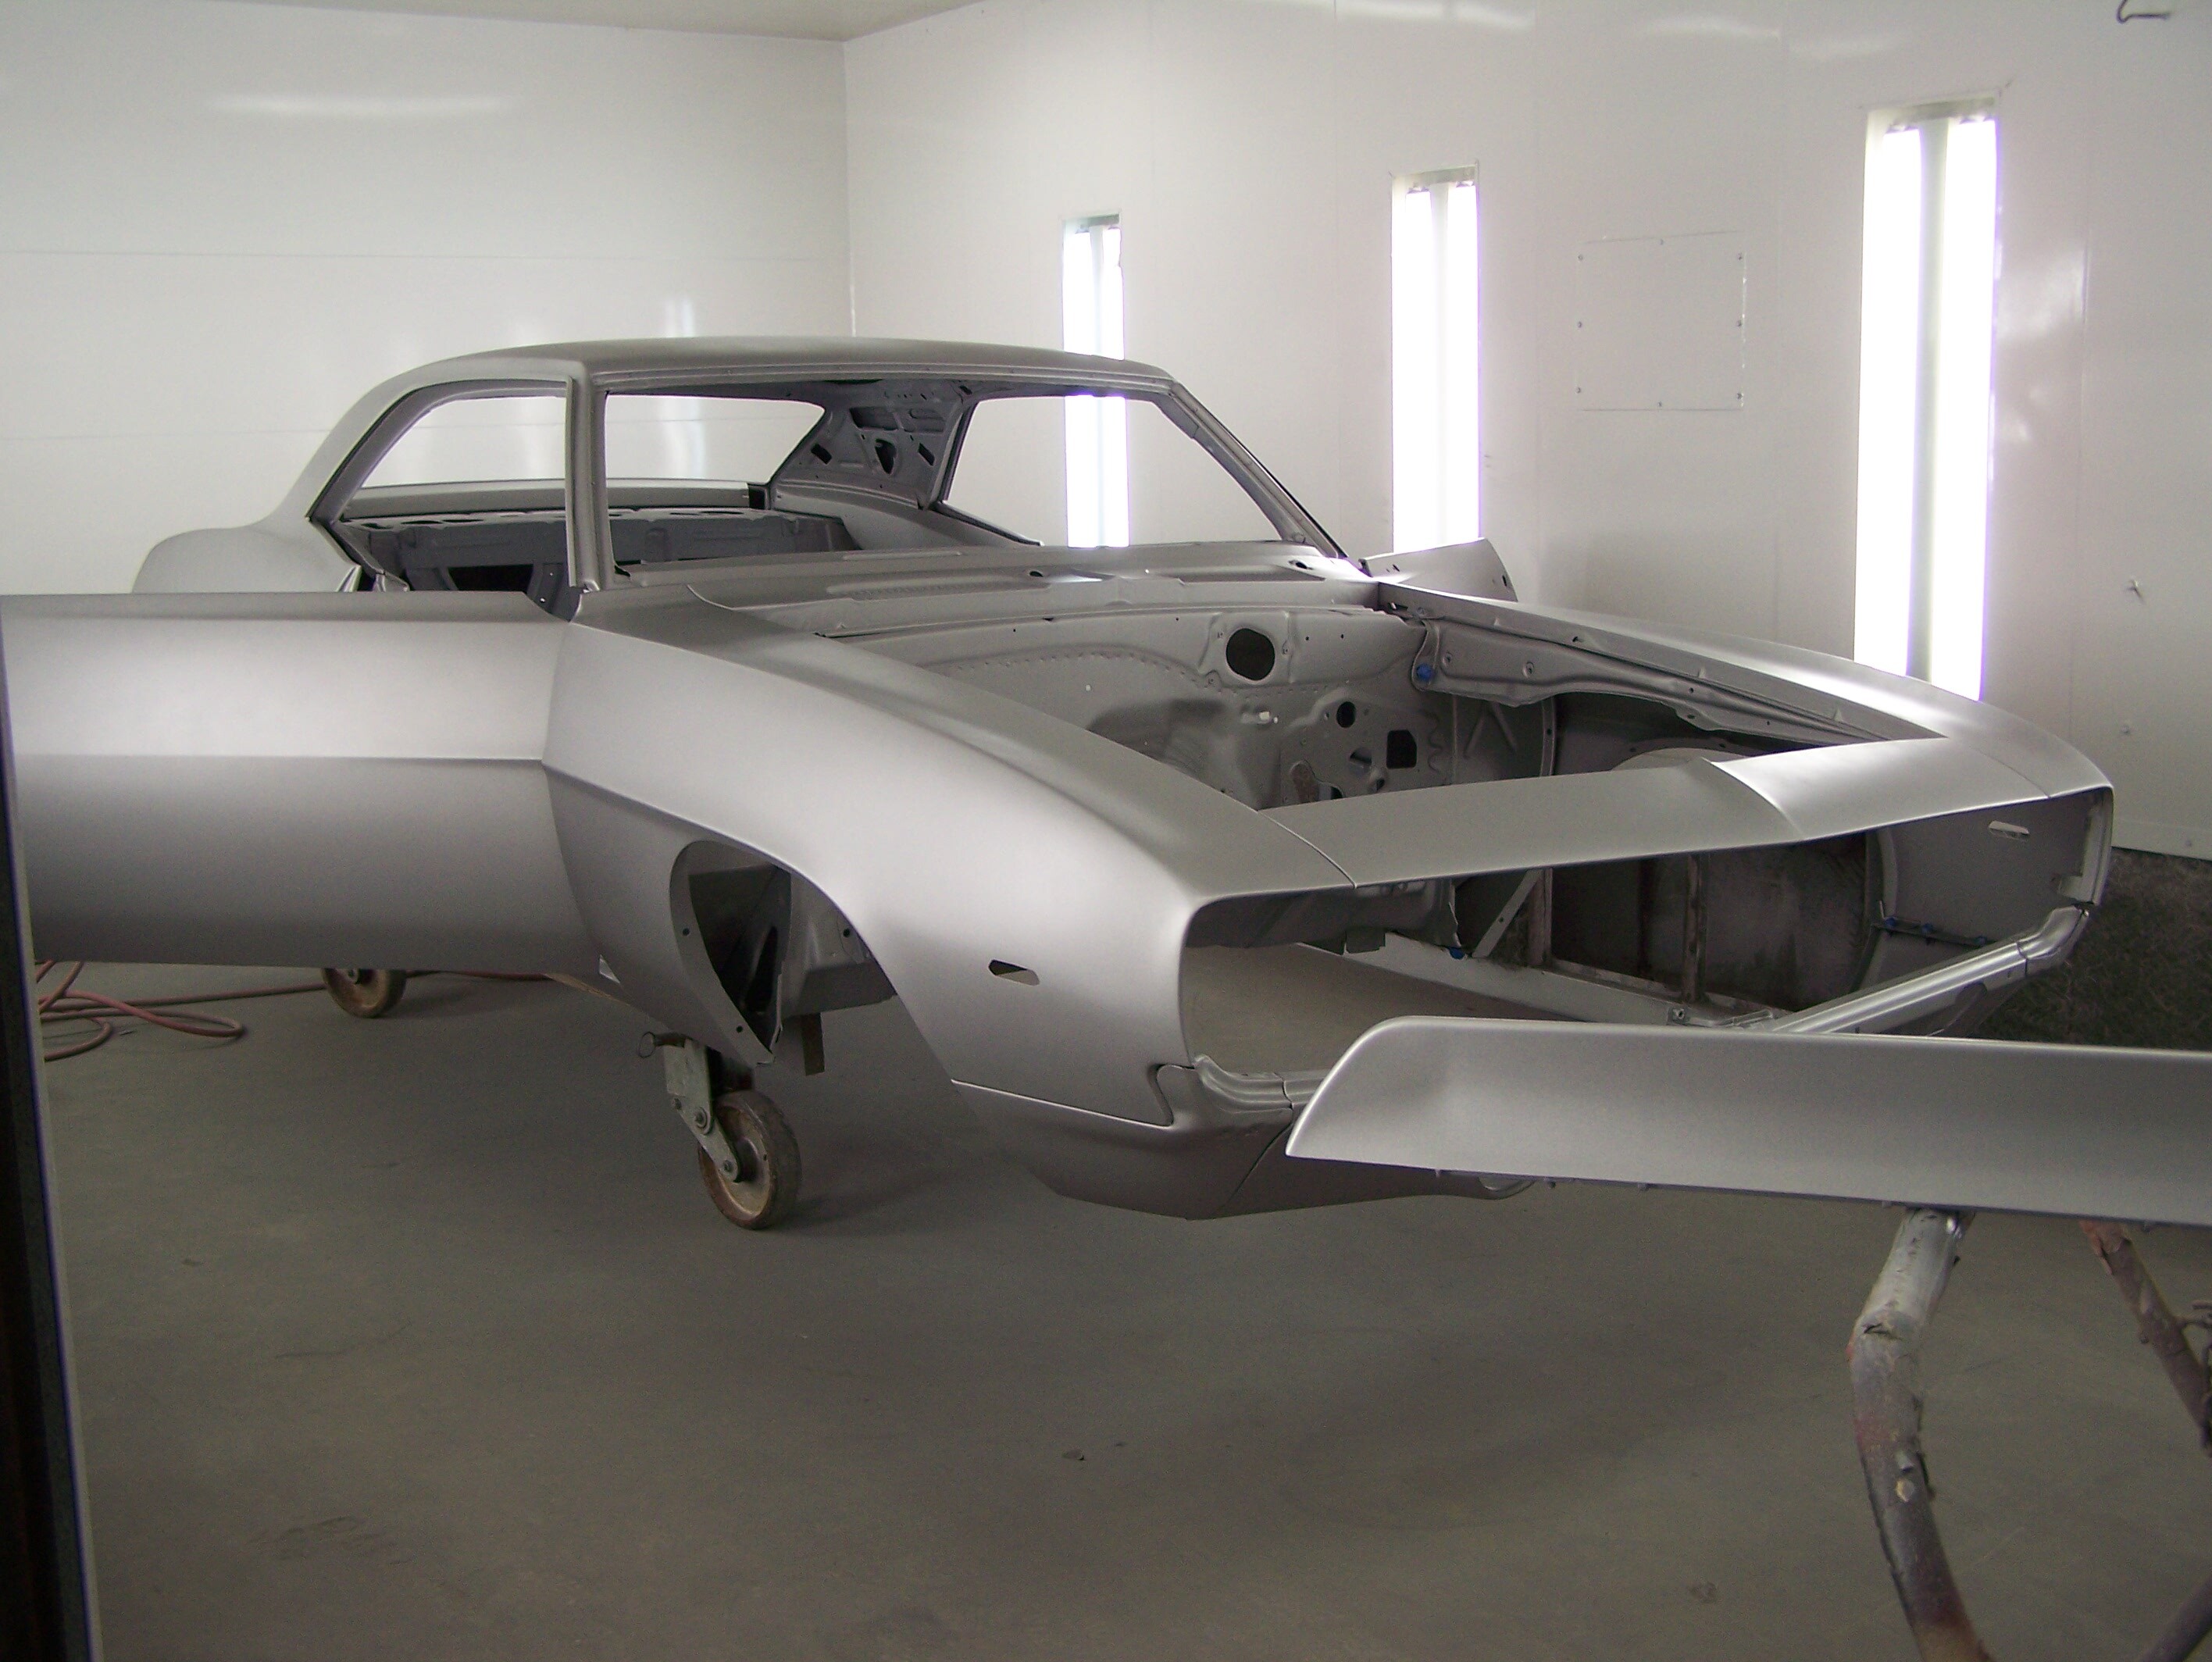
Once all major bodywork was completed, the body and front end sheet metal received several coats of 2K urethane primer-surfacer and a guide-coat. Guide-coat is simply some contrasting-color spray paint dusted onto the primer to "guide" you as you wet sand in preparation for paint.
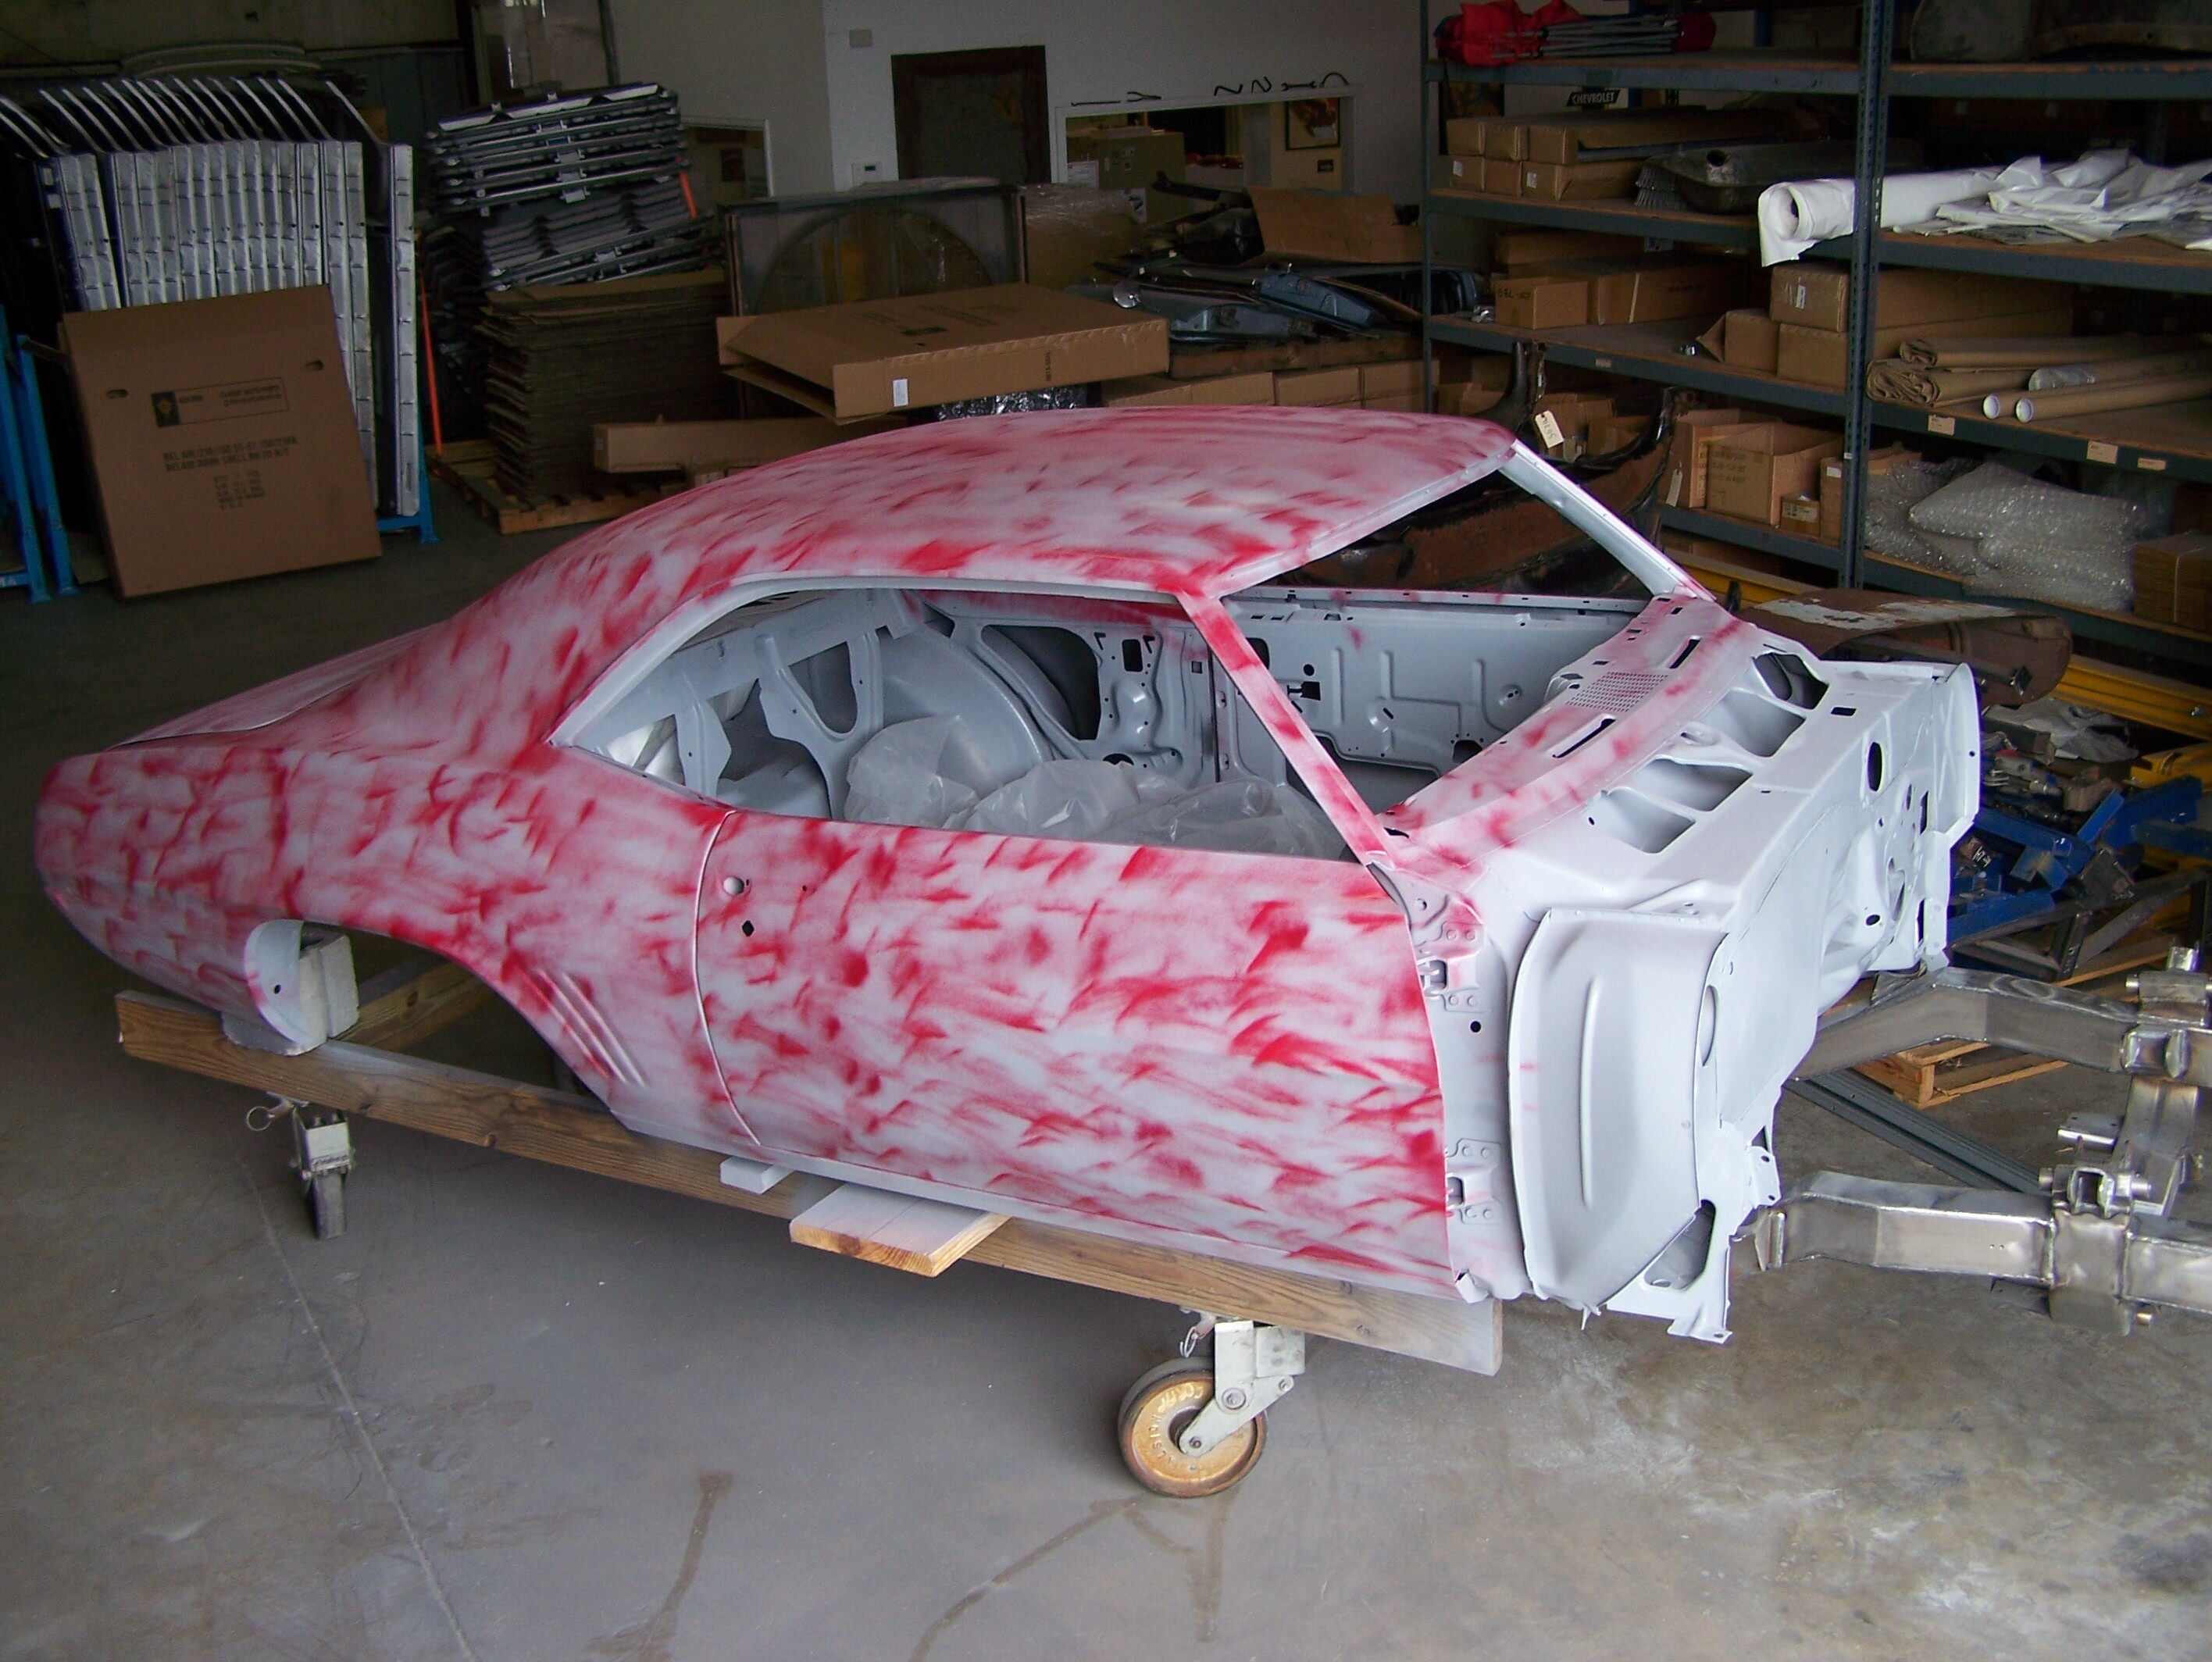
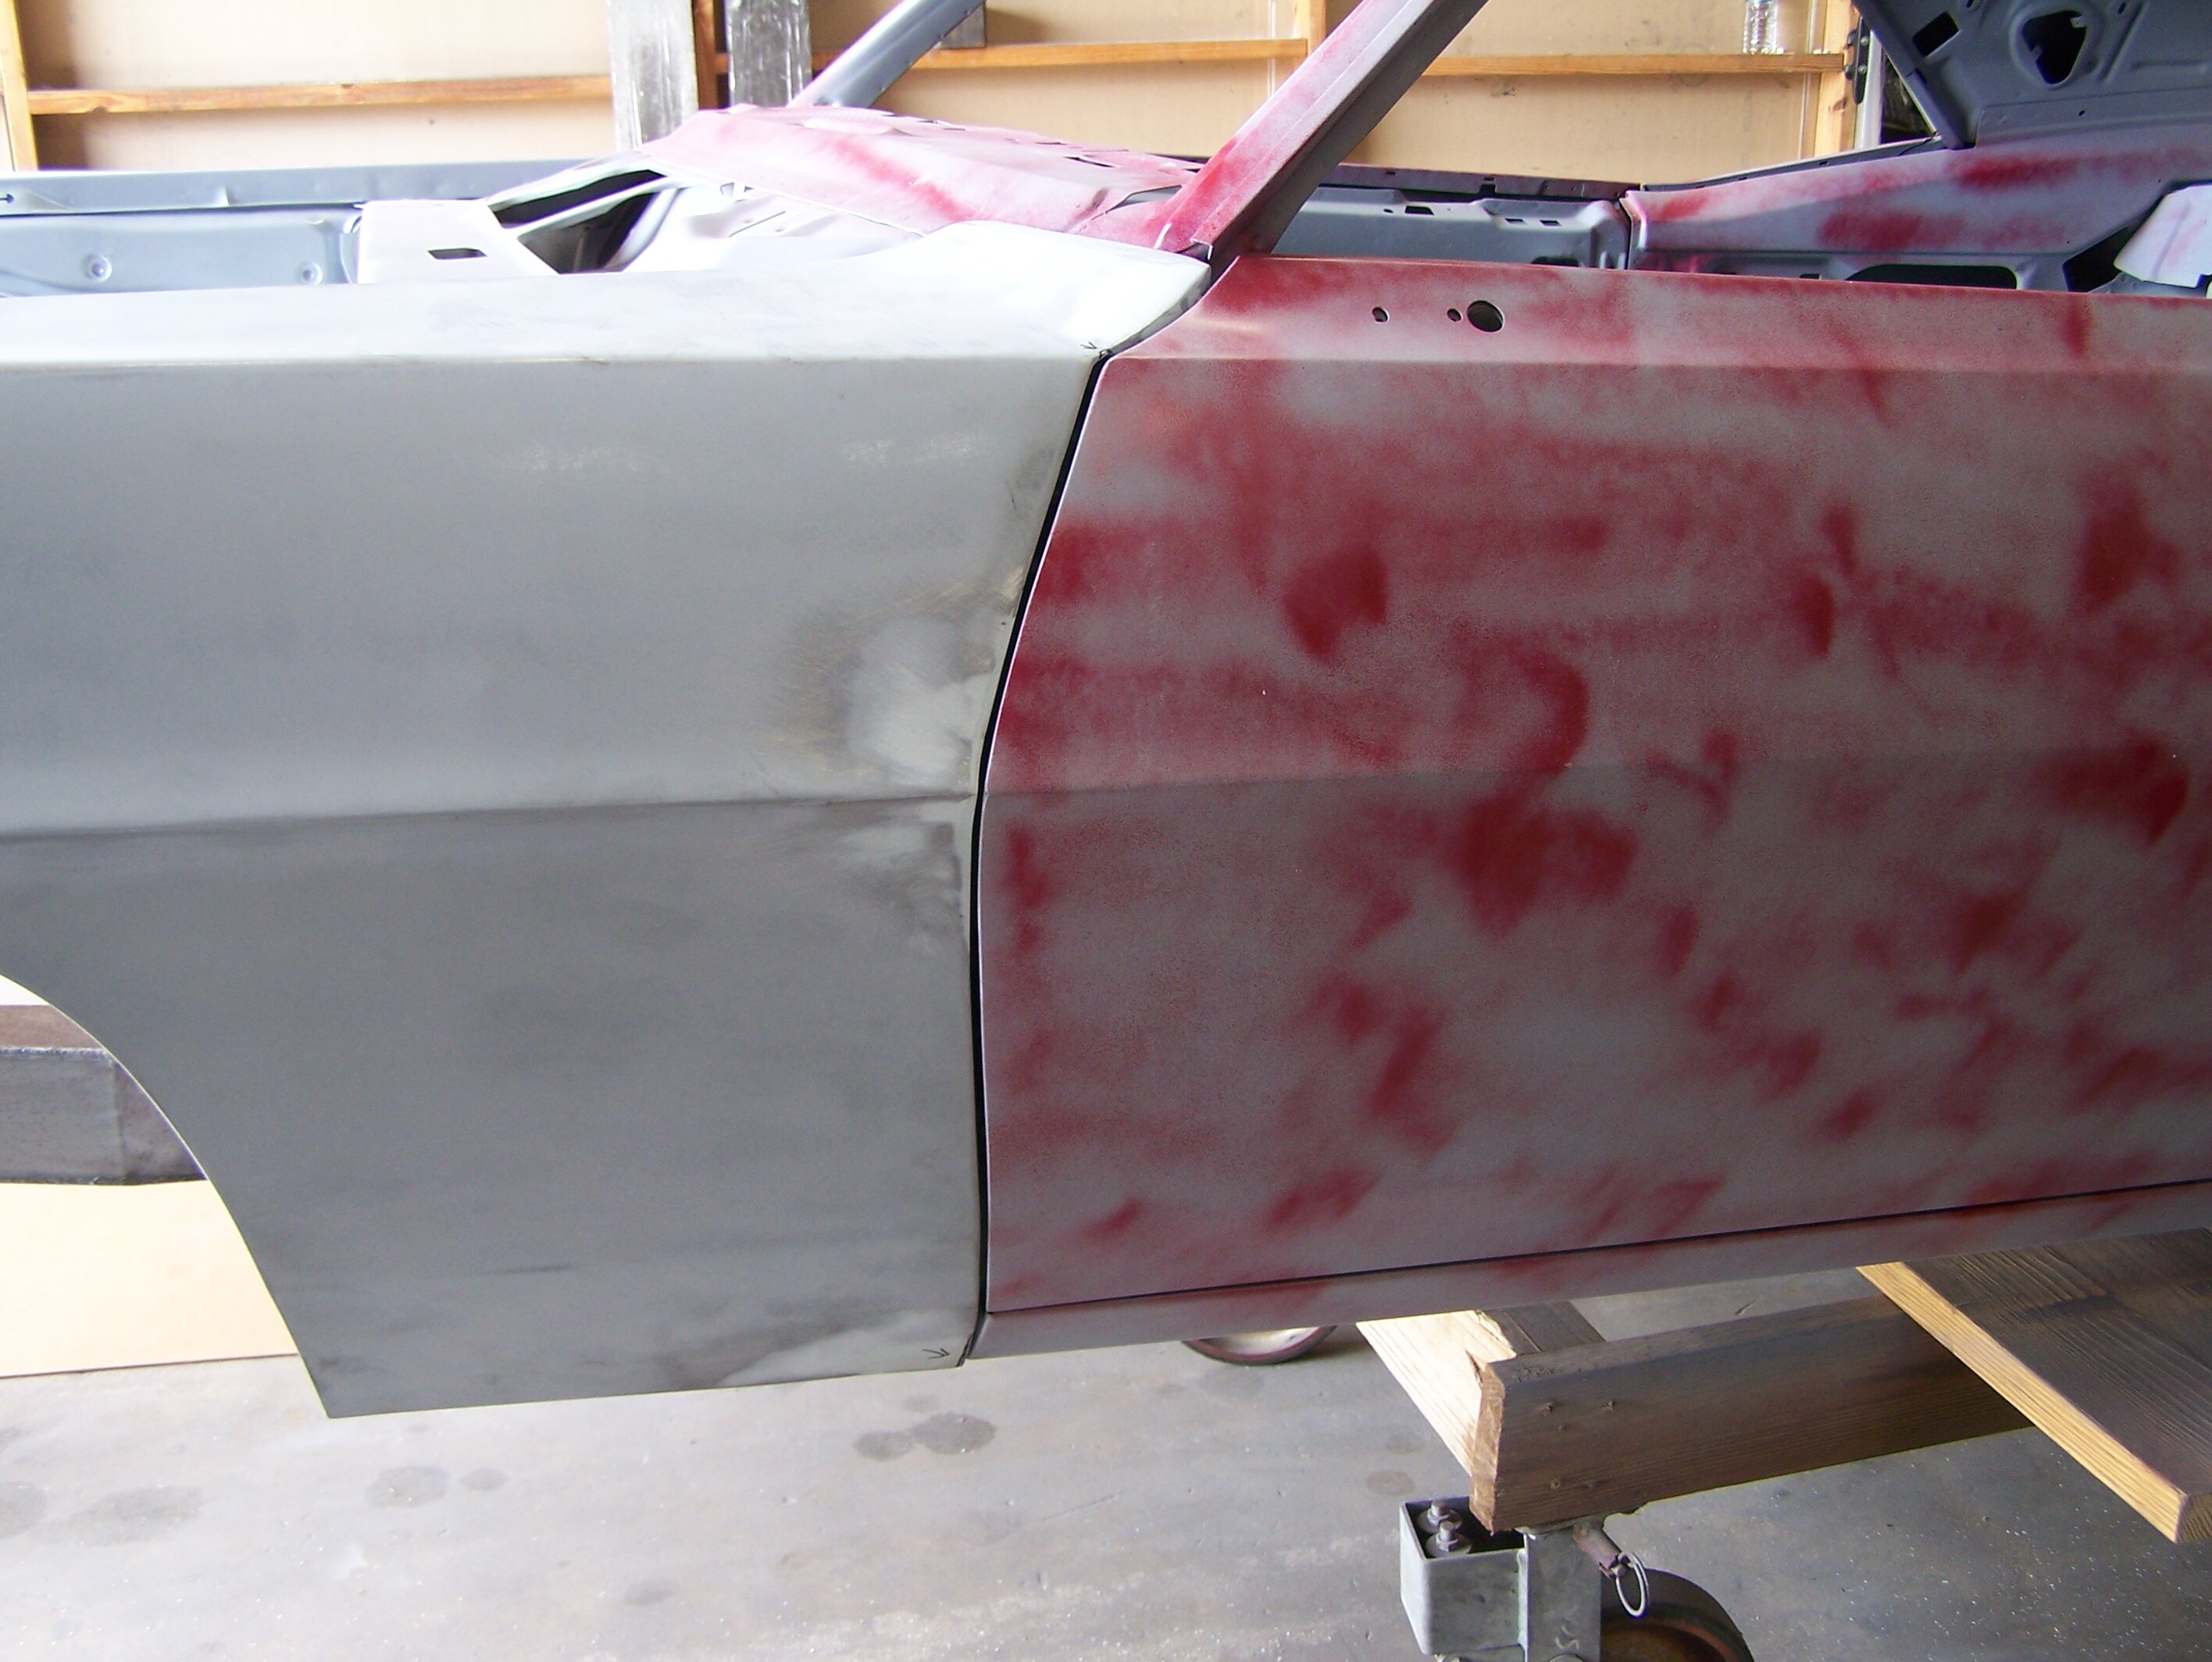
The primer-surfacer was wet block sanded with 320-grit sandpaper until smooth and straight. Any areas that still showed imperfections were re-primed and sanded until perfect. Taking extra time here will always result in a better final finish.
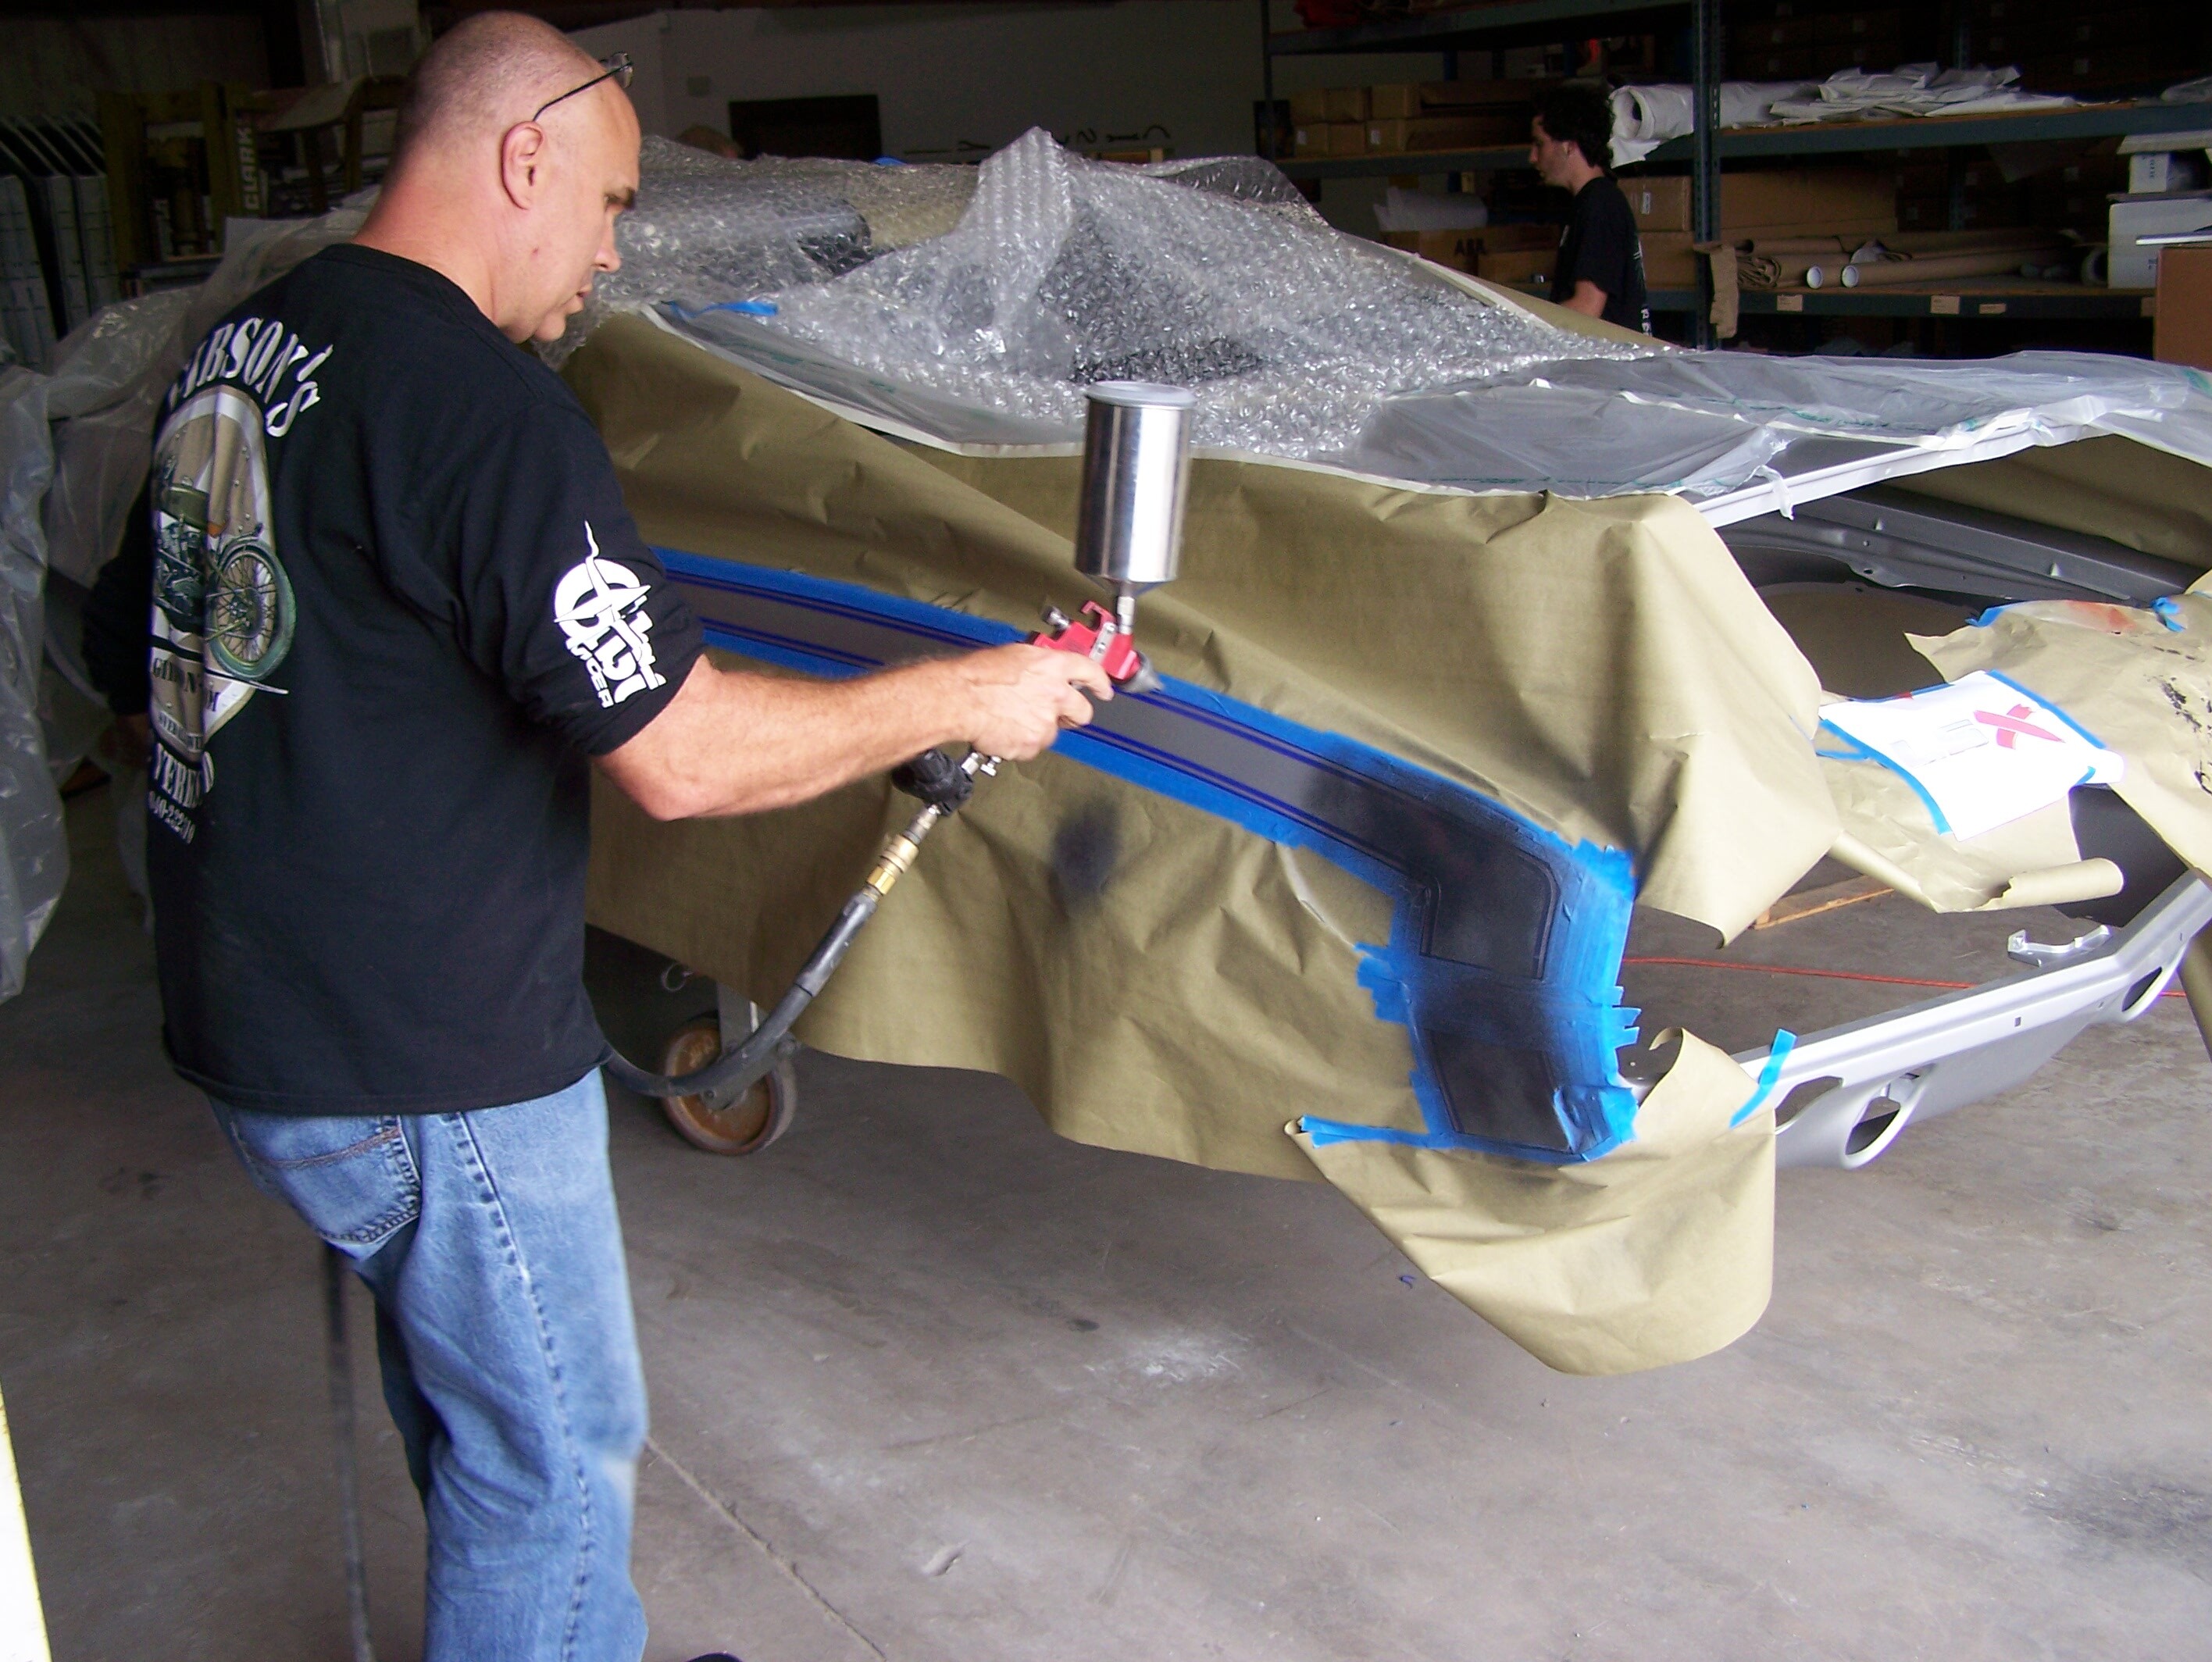
Before going to the spray booth, the door jambs, trunk jambs, fender jambs were all “jambed”, which means these areas were painted now so the fenders could be installed on the body for the final paint process.
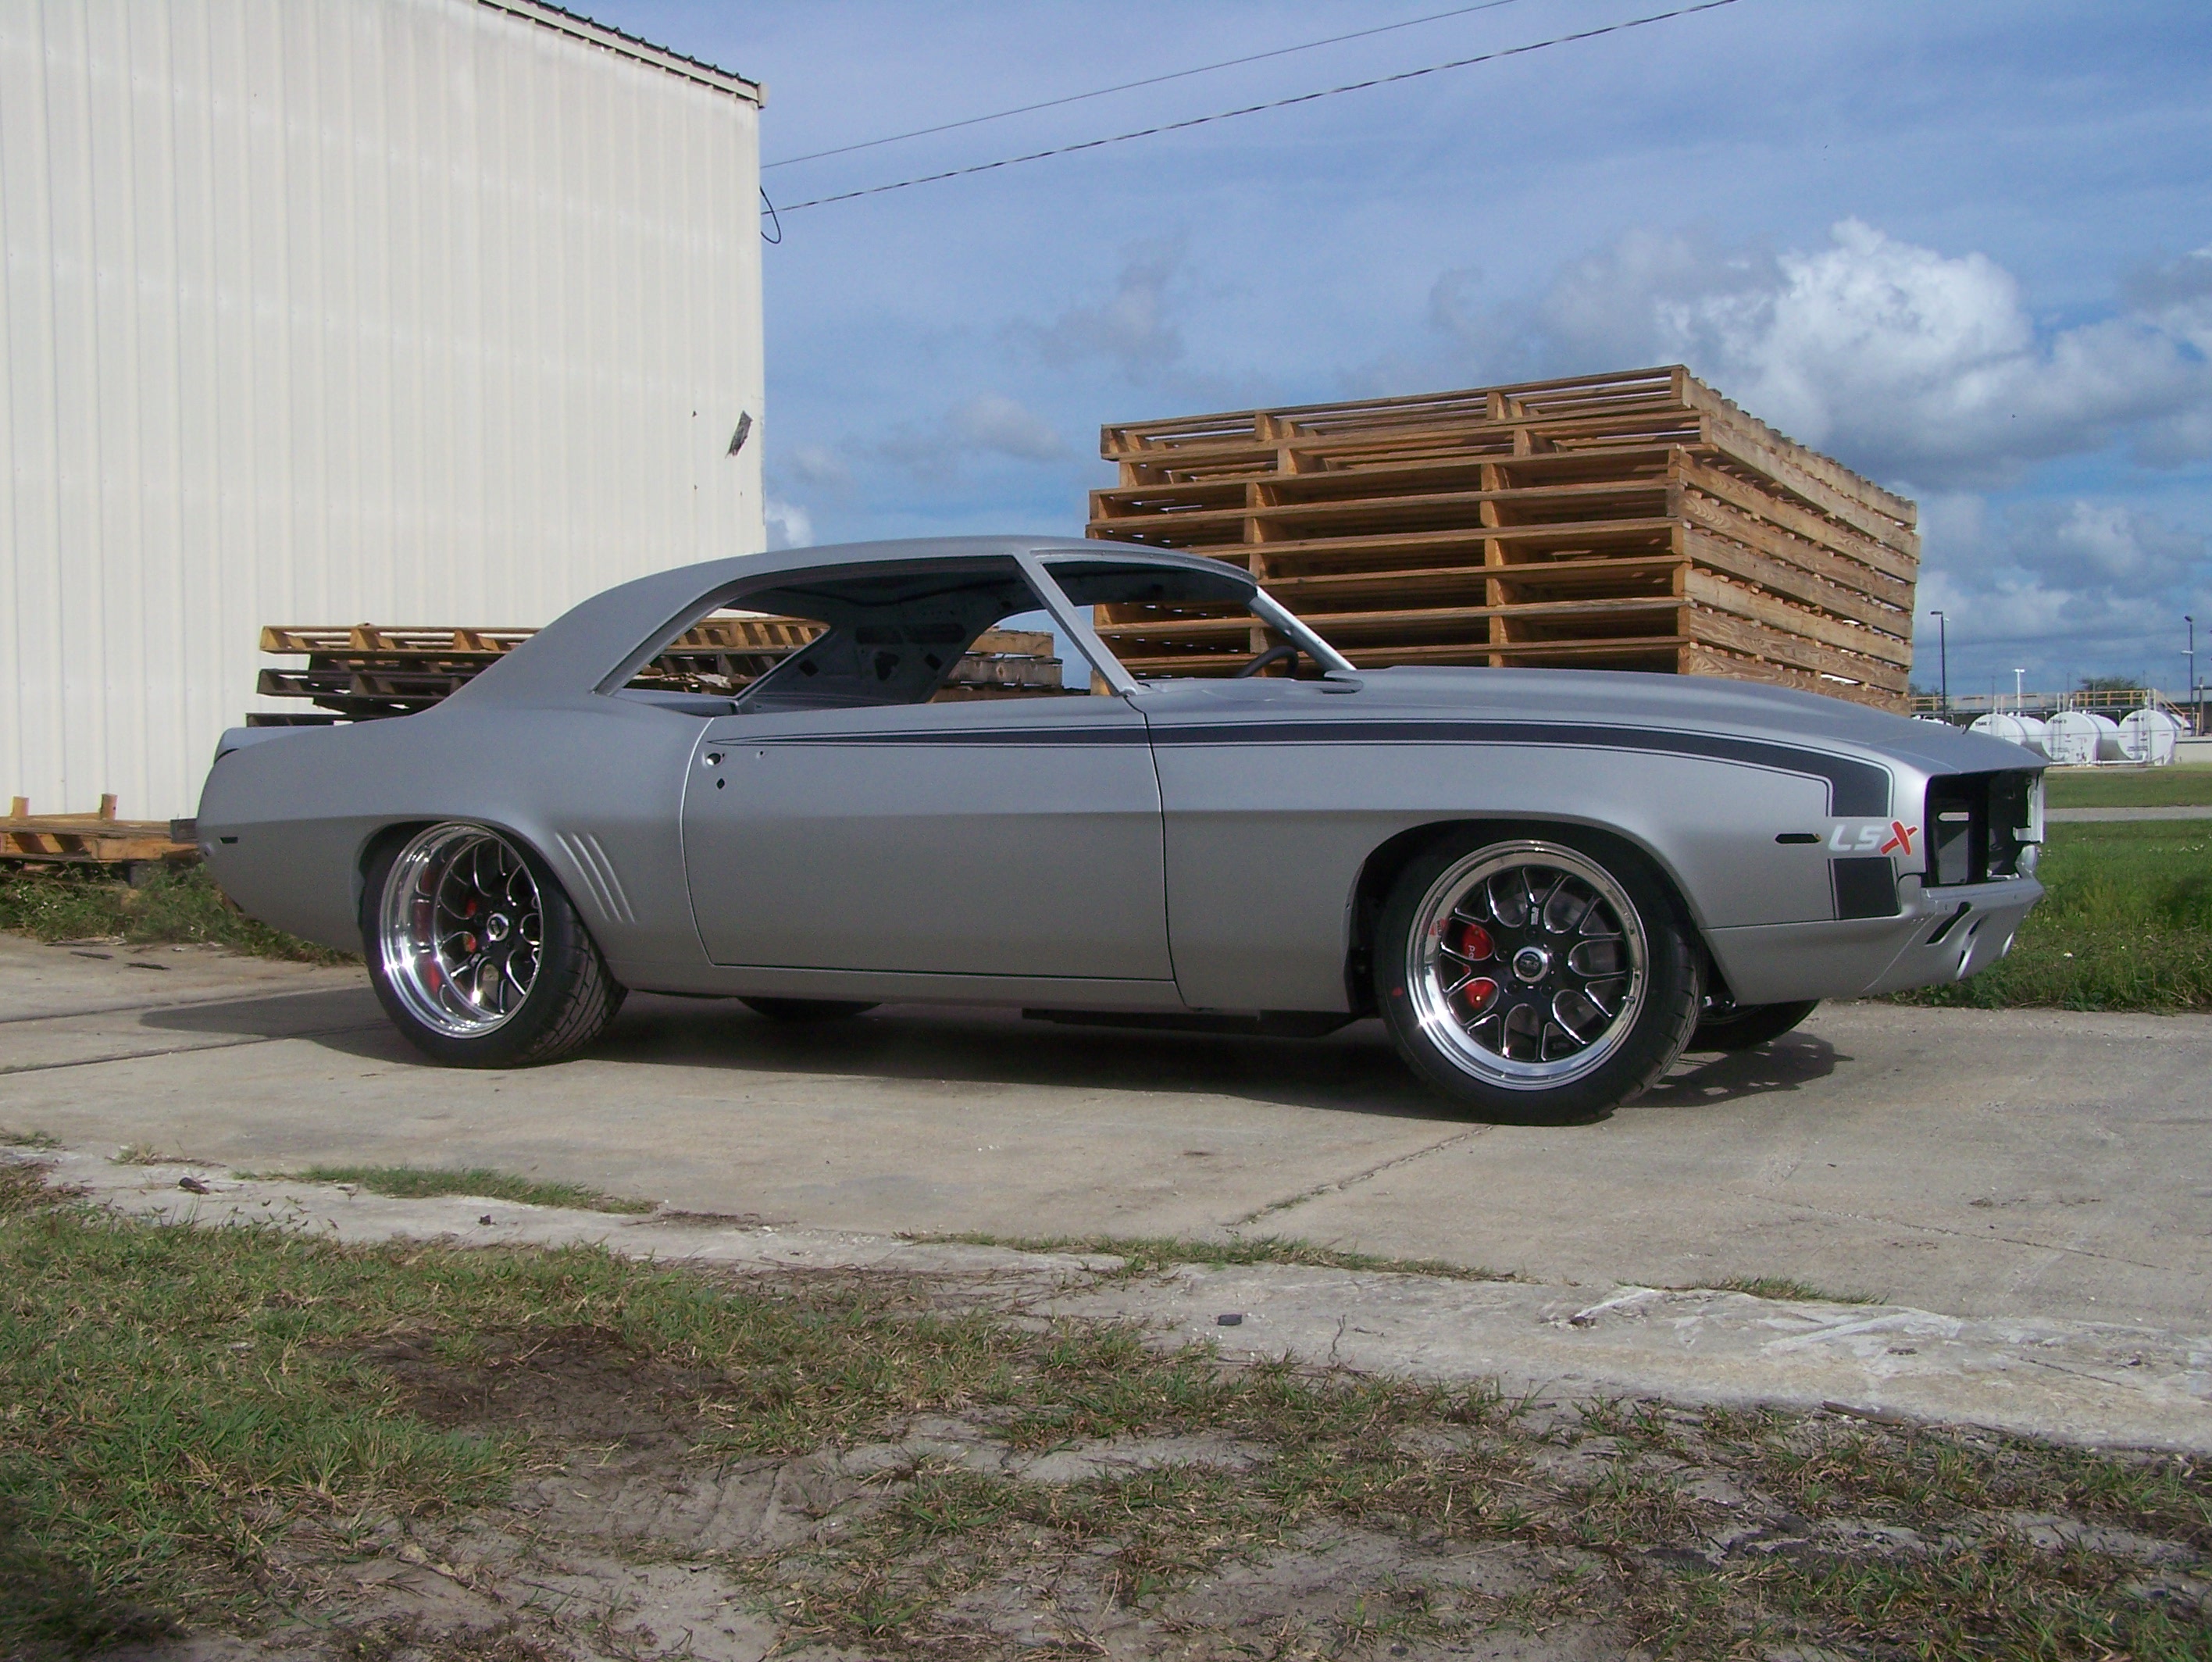
Nothing too fancy here, we applied a flattened bright silver single-stage urethane not intended to be a “finish” coat. This car will be given away as a roller that the winner can finish as he/she likes. Gary Zuyus from Motorhead Design www.motorheadshirts.net applied the graphics and LSX logos after the car returned from the paint booth.
Once the body was in paint, the Chris Alston Chassisworks www.cachassisworks.com front frame clip was removed, painted gloss black and fully assembled.
For the display purposes of this car, the Moser Engineering rear axle was simply leaf-sprung in anticipation of the final build receiving a 4-link coil-over rear chassis.
Once the front frame clip was fully assembled, the 376 ci/480 HP LS3 with Super Magnum T56 6-speed Connect and Cruise package from Chevrolet Performance and Skoggin-Dickey Parts Center www.sdparts.com was installed in the frame. The transmission tail shaft was artificially suspended until proper tail shaft height could be determined and the rear crossmember and brackets installed.
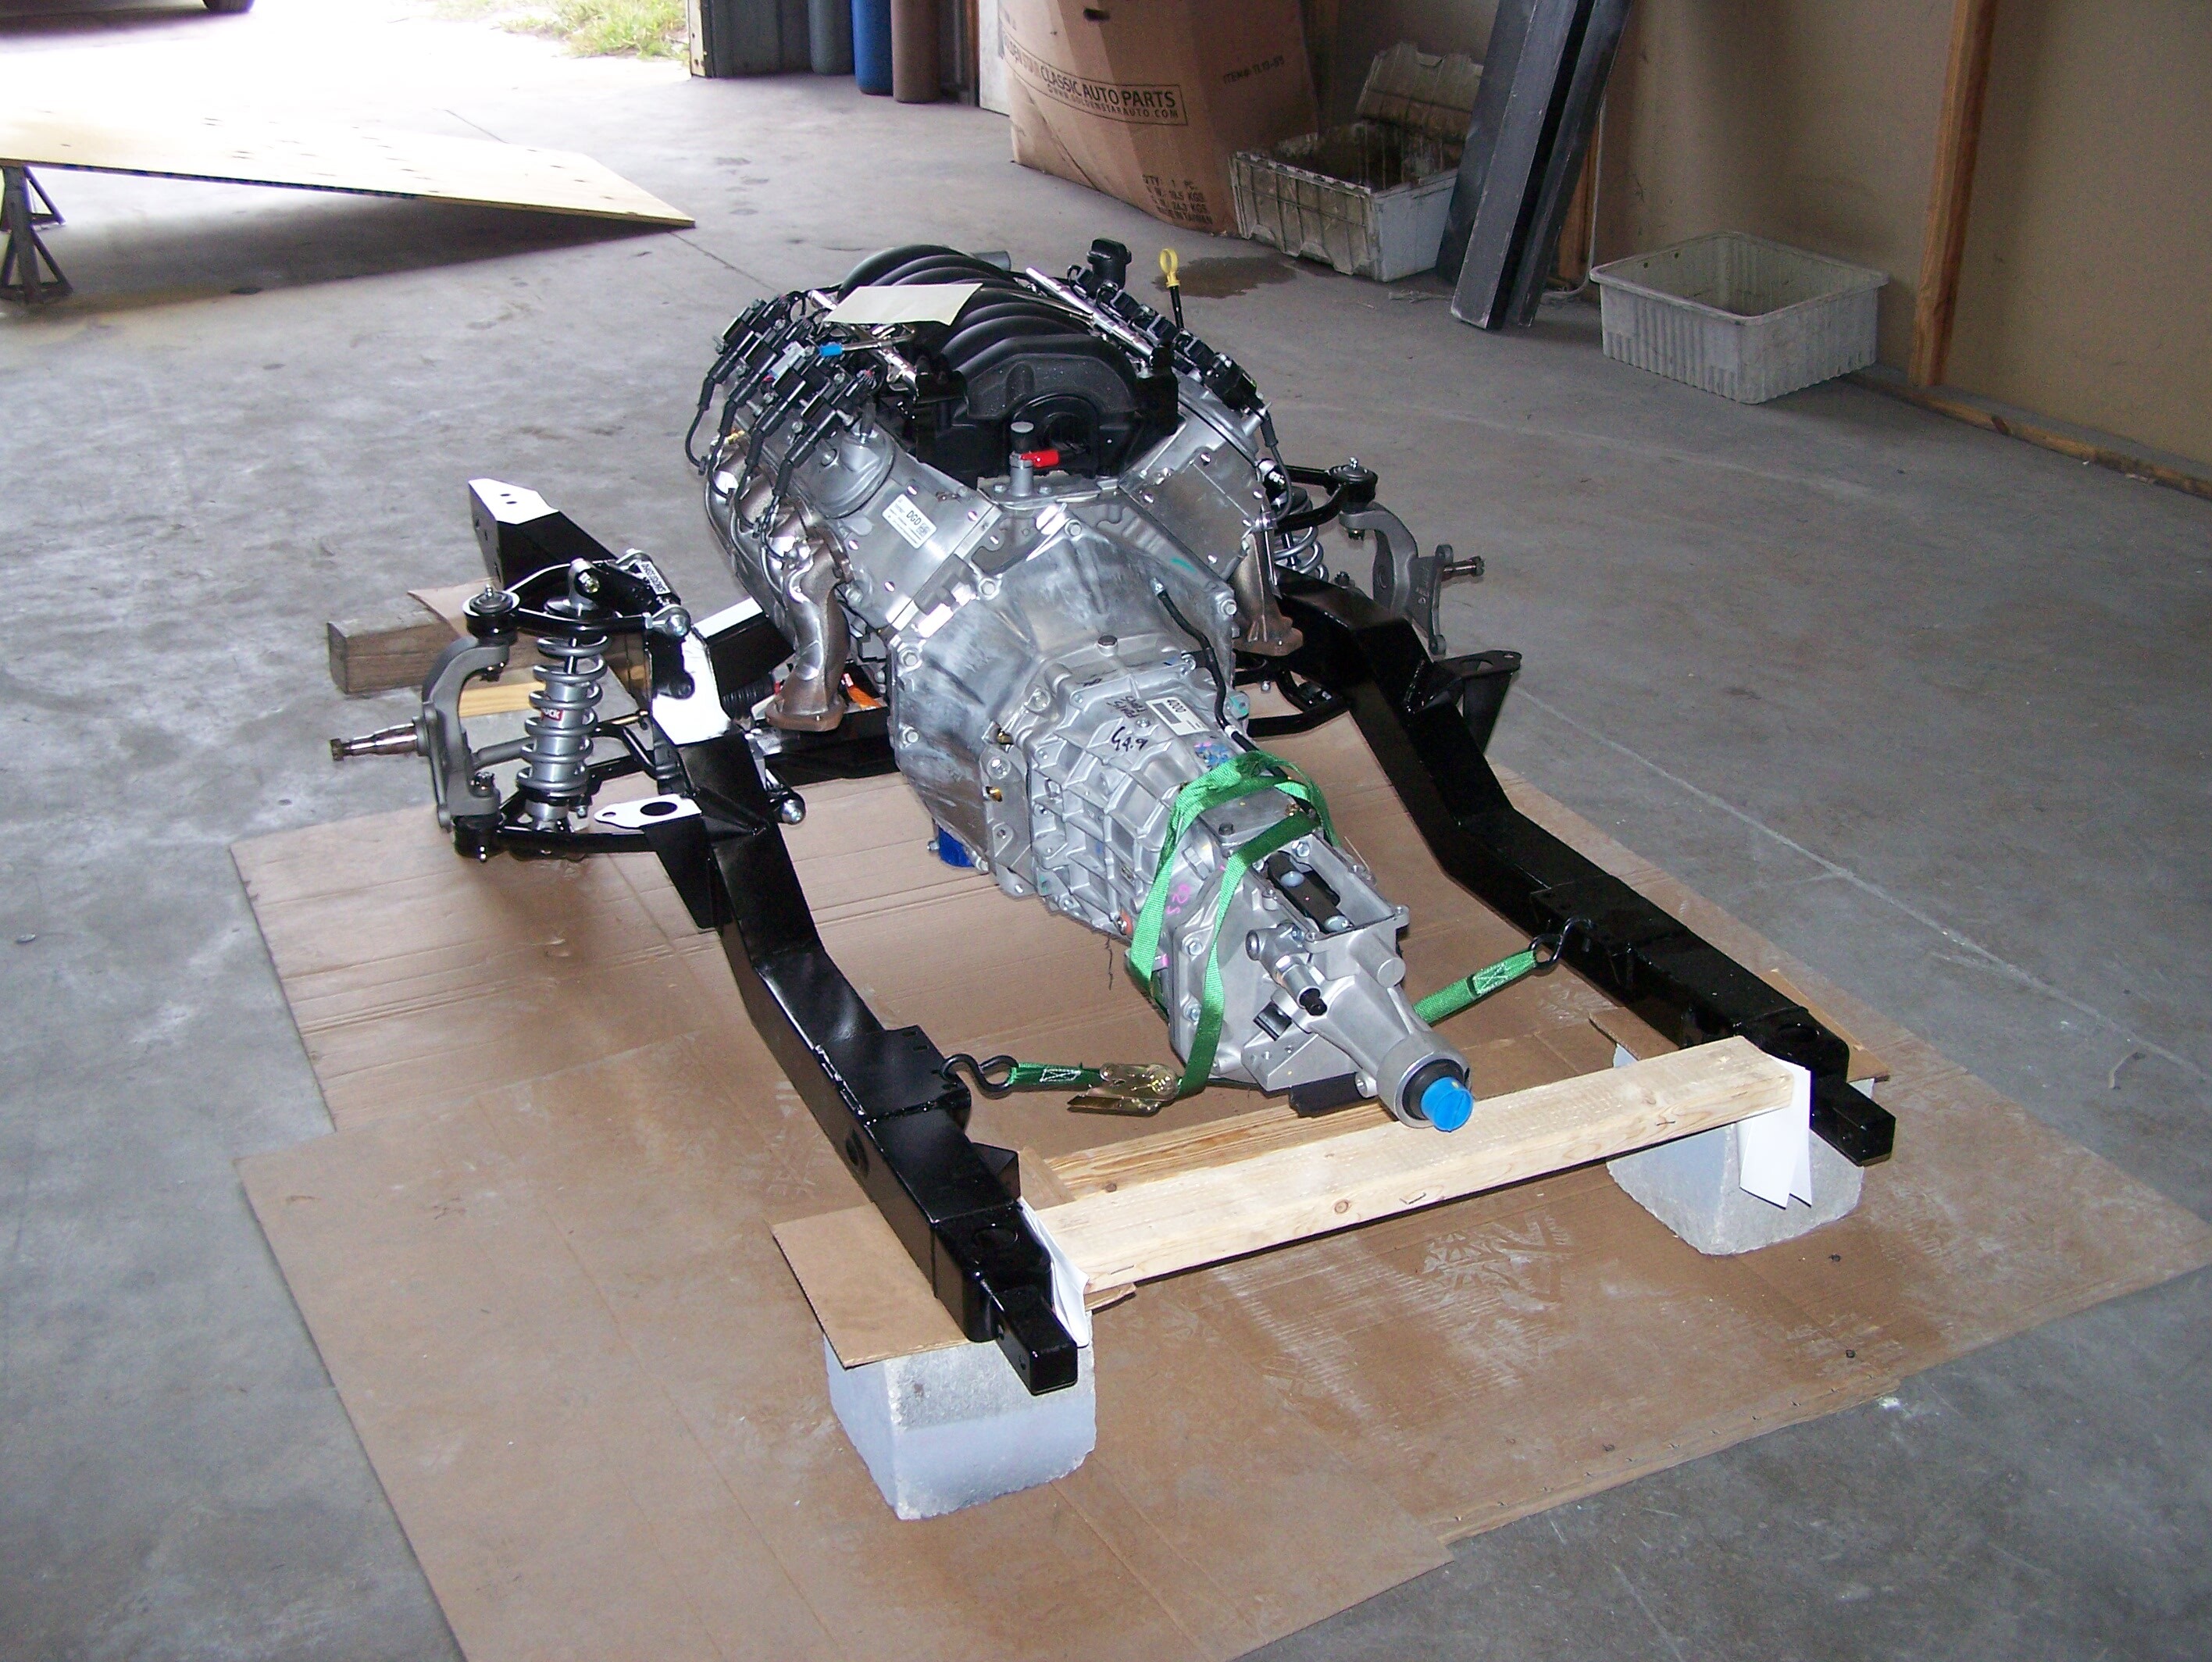
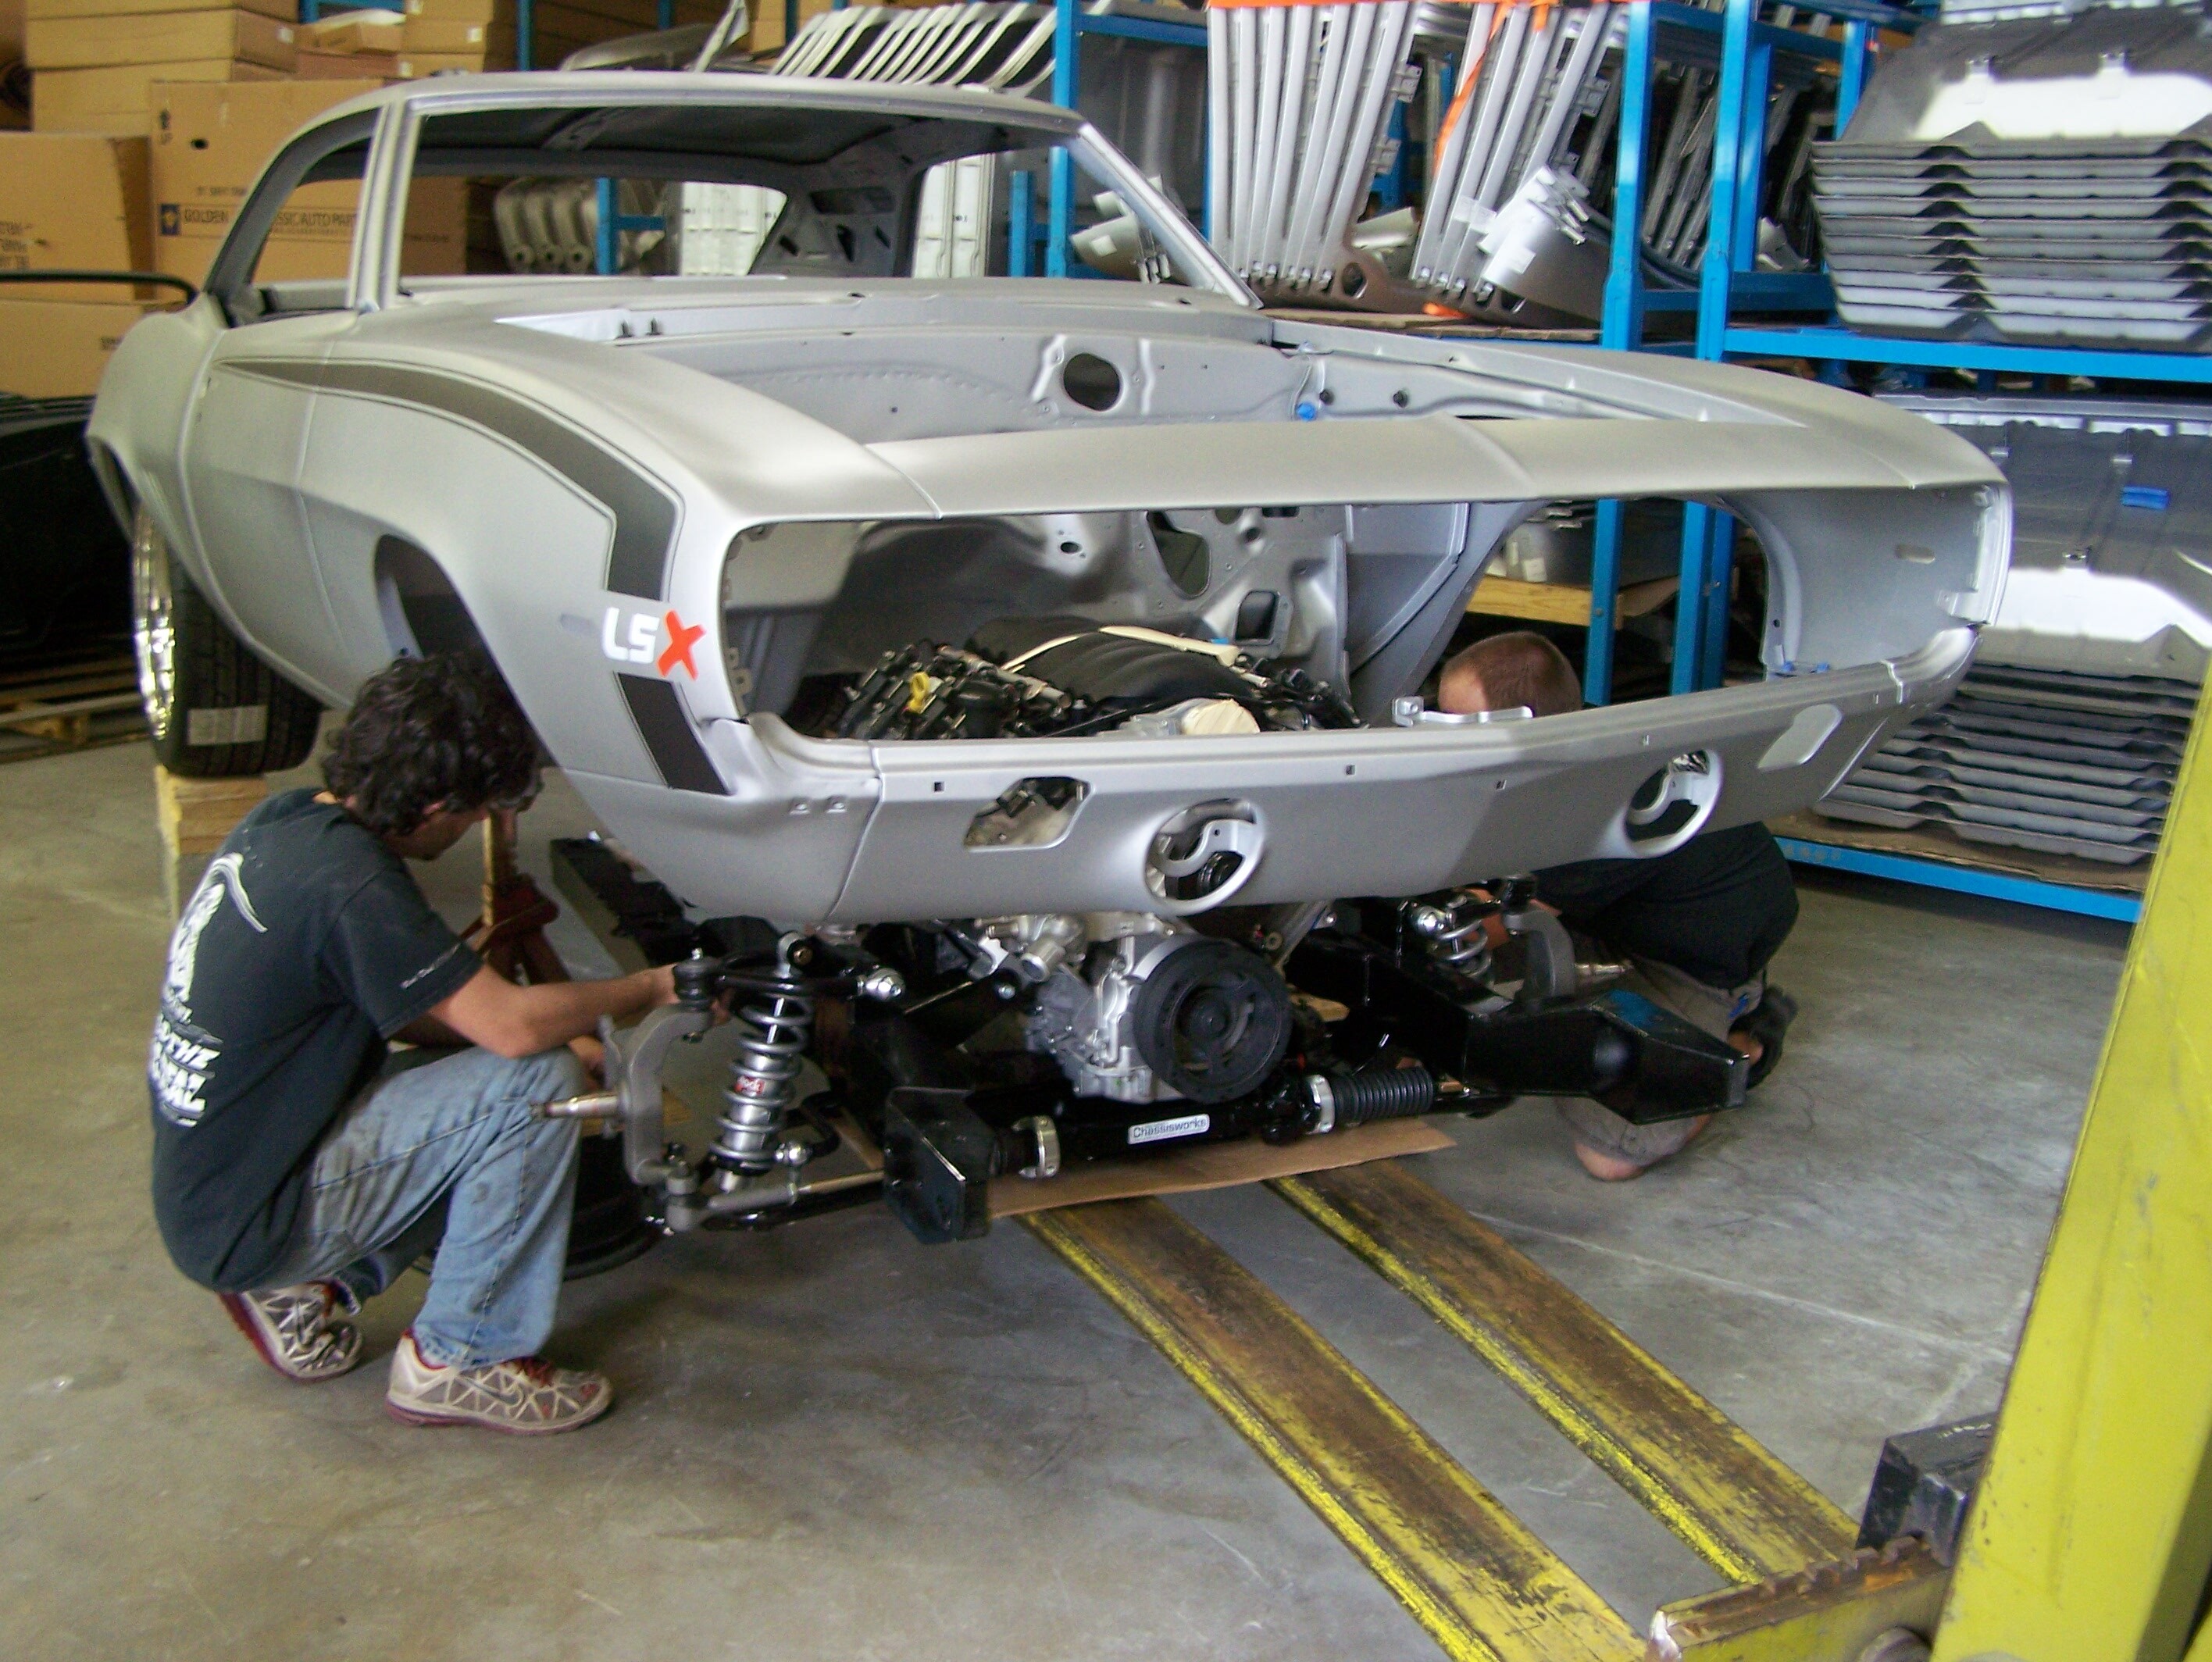
With the frame clip and driveline installed, the ididit tilt column www.ididitinc.com and AutoPro/Volante steering wheel and adapter www.volantesteeringwheels.com were fitted and connected to the Chris Alston rack and pinion steering unit.
The final pieces of the puzzle were the Wilwood Dynalite 4-piston front and rear calipers and two-piece rear rotors www.wilwood.com which were a quick, simple bolt-on to the Alston and Moser components already installed. An operating parking brake and hydraulics will be added later to make the car easier to load/unload and transport via RPM Transmissions www.rpmtransmissions to all the scheduled events and appearances for 2016.

Real Deal Steel NMCA ’69 Camaro RS/SS Specs
Engine and Transmission
Installing a late model EFI engine into your hot rod project has never been easier with the Connect and Cruise Engine Package from Chevrolet Performance and Scoggin Dickey Parts Center. The Real Steel Camaro includes the 480HP LS3, the Super Magnum T56 6-Speed manual transmission, matching bellhousing and clutch kit, engine wiring harness, throttle pedal assembly, O2 sensors, mass-airflow meter and ECM for a complete drop in system. The Chevrolet Performance LS3 engine is backed with a 24-month, 50,000-mile warranty parts and labor limited warranty. Scoggin Dickey Parts Center is the leader in technical assistance and sales for Chevrolet Performance which guarantees you a perfect engine install and tire smoking torque from your new crate engine.
Wheels
Weld Racing RT-S Series Forged S77B 20x11.5 (rear) and 18x7 (front)
Tires
Mickey Thompson Street Comp 305/35R20 (rear) and 225/45R18 (front)
Front Frame Clip (Subframe)
Chris Alston’s Chassisworks 7701-2 Bolt-On Front Option System Frame Clip - Includes: A-arm clip, upper and lower arms with ball joints, spindles, rack and pinion, tie rods, billet coil-over shocks with springs, and 104-page pictorial instruction guide.
Brakes
Wilwood 140-2115-DR Forged Dynalite Pro Series Rear Brake Kit (rear) and Forged Dynalite 120-6806-RD Calipers with 150-8850K High Performance Brake Pads (front)
Rear Axle
Moser Engineering 9” rear axle housing and axle assembly with 31-spline axles and big bearings. Nodular case center section with Trutrac (posi) 3.55:1 ratio
Steering Wheel & Adapter
Volante ST3075 S9 Premium Series Steering Wheel with STH GM series adapter and STE “Camaro” center ca
Steering Column
ididit Inc. 1520790051 Black Powder Coated Tilt 1969 Camaro with ignition switch