1955-57 Chevy Nomad & Station Wagon Hidden Tailgate Hinge Kit
$699.99
- SKU:
- HTGH-567
- Part Type:
- Other
- Part Type:
- Trunks
- Vehicle Generations:
- 1955-57 Chevy
- Custom Hidden Hinge Kit
- Replaces Stock Hinges With A Custom Rotating Assembly That Cannot Be Seen From The Outside Of The Car
- Requires EXTENSIVE Cutting, Welding & Fabrication
- Also Fits Pontiac Station Wagon & Safari Wagon
- Complete Installation Instructions Are Included
55-57 Chevy Nomad Hidden Tailgate Hinges
This kit requires cutting, welding, and fabrication skills to install. This should be installed prior to doing paint and body work. Note that due to the location of the pivot point the tailgate will be lower on the body when open. Therefore, stock bumper guards cannot be used and the license plate will either need to be relocated so that it does not extend up above the bumper. Also note that installation of the hinge assembly with the stock spare tire well in place may be very difficult if not impossible.
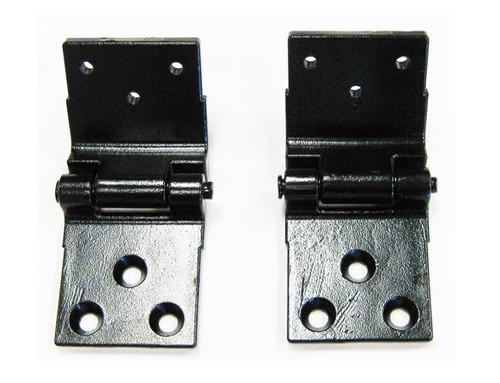
The hinge kit comes loosely assembled so that you can see how the components fit together as seen in figure 1.
Figure 1: Hinge assembly
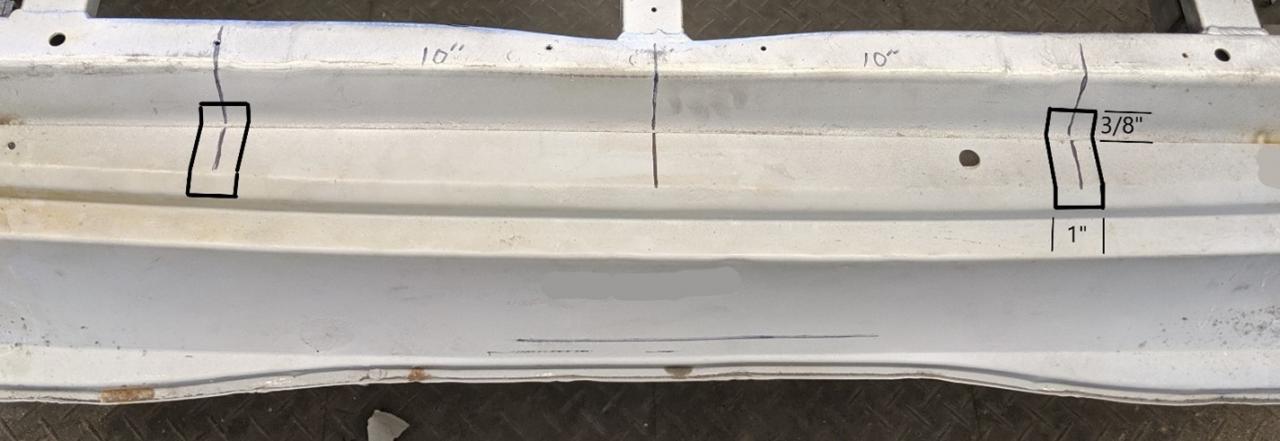
Start out by removing the tailgate and stock hinges from the car. Measure the bottom tailgate jamb on the car to find and mark center. Then measure out 10” to either side of the vehicle center and make a mark. These marks will locate the center of the holes that will be cut for the new hinge arms to pass through the body. Use Figure 2 to mark the rectangular cutouts in the body for the new hinges. The cutouts are 20” apart center to center. They are 1” wide with the lower edge aligning with the body crease as shown. The upper edge of the cutout will be 3/8” above the existing body line where the factory sheet metal overlaps.
Figure 2: Location of cutouts for new hinge arms.
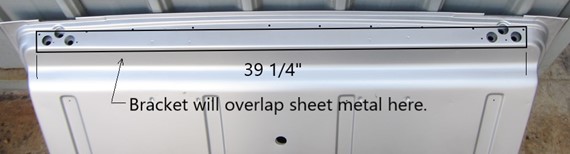
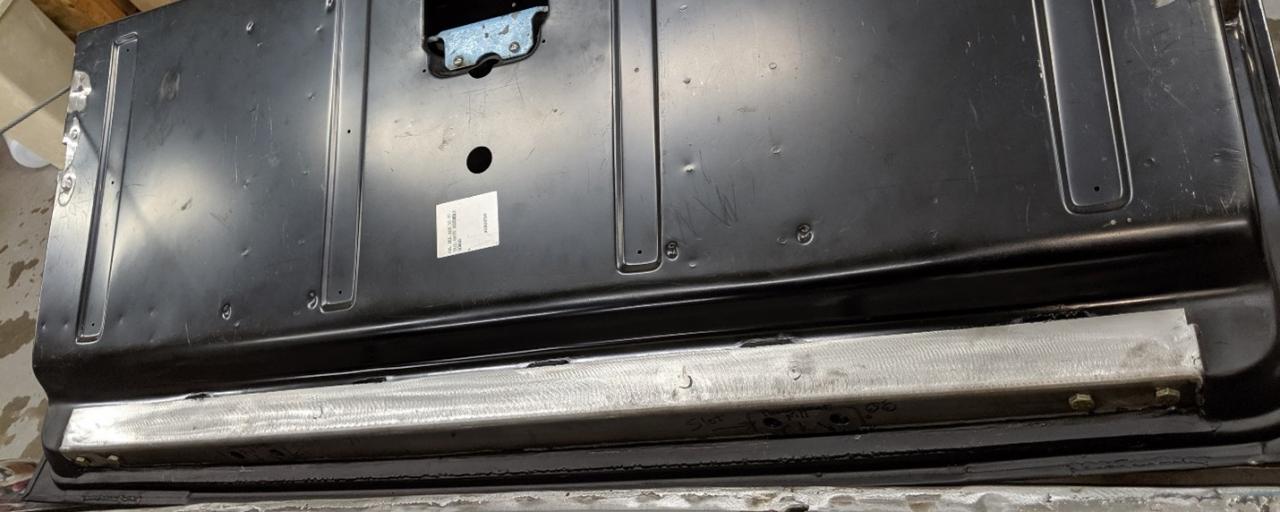
The next step is to modify the tailgate and install the Tailgate bottom bracket. The bracket will be bolted flat against the pads where the stock hinges were located. The sheet metal over top of the mounting pads will need to be removed to allow room for the brace to fit. Cut the sheet metal away in the area shown in Figure 3. Be sure to only cut the skin and not the inner pads where the stock hinges attached. There are a couple of inner braces toward the middle of the tailgate that will need to be trimmed to allow fitment of the bracket.
|
Remove sheet metal here
|
Figure 3: Bracket cutout location.
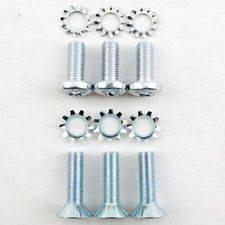
Test fit the bracket making sure it sets flat against the now exposed hinge mounting plates. The vertical flange of the bracket should set flat against the sheet metal of the tailgate. Center the bracket left to right on the tailgate. Slide the nut plates through the stock hinge openings in the tailgate and bolt the bracket in place using (4) 5/16x3/4” hex head bolts. Don’t weld the bracket in yet. See Figure 4.
Figure 4
Remove the two 5/16 pivot bolts holding the arms into the hinge boxes. Be careful not to lose the 4 bushings (2 per arm) and the aluminum spacers. Feed the arms through the openings cut into the lower jamb area in the car. Ensure the 4 tubes are slid onto the ends of the ½” rods as shown in figure 1. Lift the hinge box assembly into position underneath the car. Now reinstall the arms into the hinge boxes as they came apart using the 5/16” pivot bolt, bushings, and spacers. In the following steps it is very beneficial to have a helper. Holding the tailgate in the open position, bolt up the hinge arms to the tailgate bracket using the provided 5/16” flathead bolts. There is adjustment in the bolting position. Try to center the arms to start up/down and left/right in the adjustment range of the bolt holes. Now close the tailgate to the car. We use shims and temporary brackets as shown in figure 5 to hold the tailgate into position on the car.
Figure 5: Tailgate positioning.
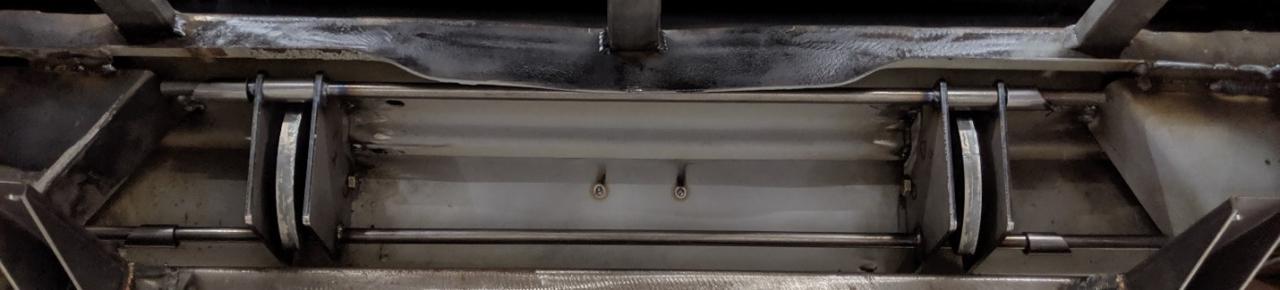
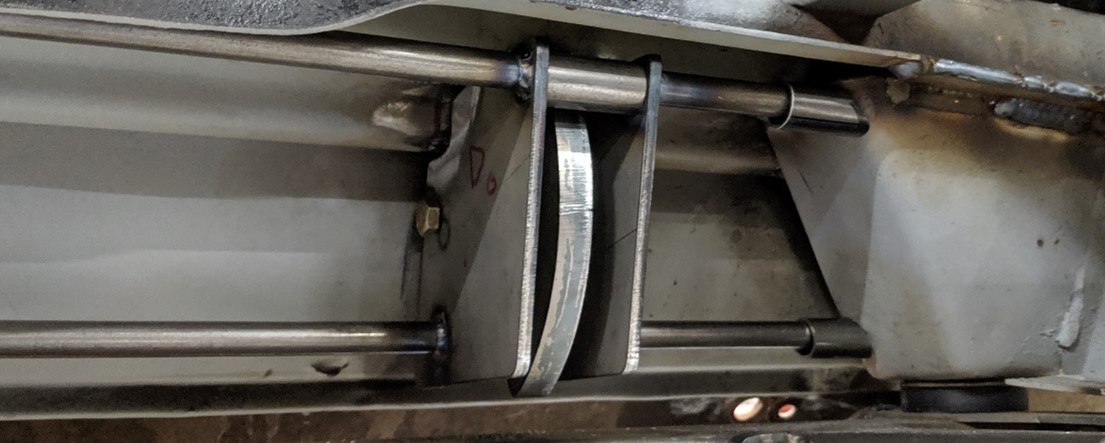
Make sure the tailgate is steadily held into position on the car. From underneath the car ensure the tailgate hinge boxes are fit close to the sheet metal of the car body as shown in figures 6 and 7. If necessary the hinge bolts can be loosened and hinges adjusted on the tailgate bracket to get the boxes to fit up nicely underneath while the tailgate is held in the closed position.
Figure 6: Hinge box assembly in position under the car. Note spare tire well has been removed.
Figure 7: Try to get hinge boxes to fit up closely and square to the body at the points shown.
Once you are satisfied with the fitment of the tailgate and the hinge boxes, tack weld the boxes in place with two tacks on each side of the boxes where the arrows indicate in figure 7. Test the tailgate to ensure it opens and closes freely without hitting or binding. Hook up the cables to see where the tailgate will stop in the down position and make sure that the bottom lip of the tailgate is not contacting the body. The down position will not be flat. See figure 8.
Finally slide the tubes on the ½” rods outward until they touch the body mount towers as seen in figure 7. The 4 tubes can then be welded in place to both the body mount tower and the ½” rod, anchoring the system in place. Finish welding both sides of the hinge boxes to the body at the points indicated by the arrows in figure 7.